Archives for April 2013

Aunt Linda’s Homemade Window Cleaner


Spring is in the air! Ahhhh…..

Spring cleaning can be quite a chore, but doesn’t it feel great after ya do it?

Hand is raised, Ladies!

So, open some windows and whip up Aunt Linda’s {proven} homemade window cleaner. This is an oldie, but goodie that I’ve had in my recipe box for over 10 years. 

Here’s to cleaner windows and cheaper cleaner! 

*Thanks Dee for giving me this recipe on the day of my bridal shower!

Aunt Linda’s Homemade Window Cleaner

Prep time:
Total time:
Ingredients
  • 4 oz ammonia
  • 12 oz rubbing alcohol
  • 16 oz water
Instructions
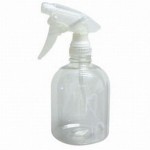
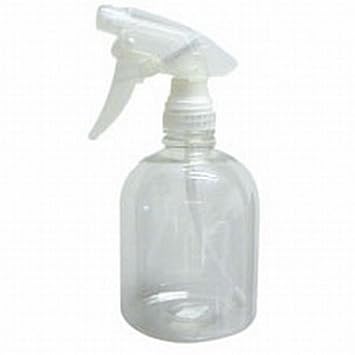
  1. Mix together and store in a large squirt bottle.
Signature

Frosted Peanut Butter Brownies


IMG_2387

My son’s homework assignment for the weekend was to make a recipe to share with his class…he went through Mom’s old recipes and picked a winner! These Peanut Butter Brownies are delicious, easy, and make plenty for a class full of 3rd graders. 

*For a gluten-free alternative use this GF flour blend

IMG_2361

Gear up! 

IMG_2367

Put all your ingredients in a bowl ….

IMG_2369

and away you go! 

IMG_2370

The batter will be thick…

IMG_2371

Press it into a greased 17×11 pan with your hands. Bake at 350 for 15-18 mins. 

IMG_2372

Start whipping up your homemade frosting! 

IMG_2374

This is goooooood…..

IMG_2377

Lol…just ask the baby of the family 😉 

IMG_2383

A little ole fashioned pile up while the goodies are baking..

IMG_2385

Let brownies cool, frost, and divide into 48 squares! 

IMG_2387

We added a little something extra for fun- what child doesn’t like sprinkles? 

IMG_2388Taste testing before he goes to class in the morning! Great job Buddy! 


Frosted Peanut Butter Brownies

 
Prep time:
Cook time:
Total time:
Serves: 48
Ingredients
  • 1 1/4 cup oats
  • 1 cup sugar
  • 1 cup brown sugar
  • 1 cup softened butter
  • 2 eggs
  • 2 cups flour
  • 1 cup peanut butter
  • 1 tsp baking soda
  • 1/2 tsp salt
  • ~Frosting~
  • 4 cups powdered sugar
  • 1 tsp vanilla
  • 3 Tbsp peanut butter
  • 1 Tbsp oil
  • Hot water to desired consistency
Instructions
  1. Preheat oven to 350.
  2. Mix all brownie ingredients in a large bowl. Batter will be thick.
  3. Spread evenly onto a greased 17×11 cookie sheet with your hands.
  4. Bake for 15-20 mins until lightly golden brown.
  5. Cool then frost.
  6. Frosting:
  7. mix sugar, vanilla, PB and oil together.
  8. Add hot water until desired consistency.
  9. Pour over brownies and frost evenly.
  10. Cut into 48 squares.


Signature

Roasted Brussel Sprouts

The other day I posted on Facebook about my love for brussel sprouts. When I say love…I mean like the same kind of love I have for chocolate-yeah, I know. To my surprise, I was not alone! So many ladies commented about how-they too-shared this love! Wohoo!!! Here’s my favorite method of preparations…very simple, so delicious. Enjoy.

Cut stems and rinse about 16 brussel sprouts.


Pat dry with paper towels. Drizzle with olive oil and balsamic dressing. Add chopped garlic, sea salt and cracked black pepper.


Place on a foil lined pan in your pre-heated oven {400 degrees}. Roast 15 mins, shake the pan and roast another 15 more mins.

The leaves will have a caramel color like so…the balsamic gives this dish a sweet/nutty flavor. Salt and pepper more if desired. Delicious!

Looking for a gluten-free meal plan? This side would be the perfect accompaniment to a Grilled Pork Tenderloin and Mashed Redskins.

Roasted Brussel Sprouts

Prep time:
Cook time:
Total time:
Serves: 4
Ingredients
  • 16 Brussel Sprouts
  • 3 garlic cloves {chopped}
  • 2 Tbsp Olive Oil
  • 2 Tbsp Balsamic Vinegar
  • Sea Salt and Cracked Black Pepper to taste.
Instructions
  1. Preheat oven to 400 degrees.
  2. Cut stems off of brussel sprouts, rinse, and pat dry. You can leave sprouts whole or slice in half-whatever you prefer.
  3. Place in a bowl and coat with oil and balsamic vinegar, add garlic, salt and pepper.
  4. Place on foil lined pan and roast for 15 mins, shake pan to turn, roast another 15 mins.
  5. Add additional salt and pepper if needed.


Signature

Homemade Salted Caramel {In under 10 mins!}

I’m laughing at myself as I post this amazing recipe right after an hour of “Cross Fit”. Ohhh Ladies, forgive me….your “Comfy” hostess is so contradictory. But, at least I’m burning off the crazy calories pictured above…right? Help me. Someone. 😉

In all seriousness….one square of this caramel is worth about 100 burpeesnot kidding.  You all know I’m a softy when it comes to sweet and savory -this salted caramel is no exception!!!! I loooooove this recipe. Oh, is this stuff good.

Place your squares in wrappers {cut parchment paper and tie ends} for gifts, in paper cups for display, or just eat them out of the pan {hand raised, ha!}. Enjoy Ladies! 

Conviction {ekk!}.

In a medium saucepan on medium-high heat melt your butter, sugar, brown sugar, sweetened condensed milk, corn syrup and vanilla.

Stir with a whisk constantly for about 5 mins -it will bubble like so and turn into medium golden color.

Butter an 11×7 {you can also use an 8×8 or 9×9, no biggie}. Pour caramel into pan.

And here comes the savory part.…sprinkle a little coarse sea salt on top {don’t over do it!}. I buy my sea salt at Marcs.

Refrigerate for 1 hour, then slice into squares! This is so good….so so so so so so good.


Homemade Salted Caramel {In under 10 mins!}

Prep time:
Cook time:
Total time:
Serves: 24 pieces
Ingredients
  • 6 Tbsp butter
  • 1/2 cup white sugar
  • 1/2 cup brown sugar
  • 1/2 cup light corn syrup
  • 1/2 cup sweetened condensed milk
  • 1 teaspoon vanilla
  • coarse sea salt
Instructions
  1. Add all ingredients except salt into a medium sauce pan.
  2. Let boil on medium/high for about 5 mins stirring with a wire whisk until caramel thickens and deepens in color {a medium golden color}.
  3. Butter an 11×7 {or 8×8/9×9} pan and pour in caramel.
  4. Lightly salt the top of caramel.
  5. Refrigerate for 1 hour and cut into pieces.
Signature

Nifty Thrifty Week at Karen Ehman’s!

Hi Ladies!

If you haven’t already heard…Karen Ehman from Proverbs 31 Ministries is hostessing a “Thrifty Nifty” week! She invited Five frugal and fun guests….{what an honor} to give ideas on to help you spend less and live more; to fret less and GIVE more! 

Come visit me over there where I’m sharing Ebay’s FREE recipe book “90 meals under $1.25” featuring Comfy in the Kitchen.

See you there!

Signature

Bacon-Wrapped Asparagus

The maple bacon paired up with cracked black pepper and sea salt makes this sweet and savory dish a winner in my book! A side that looks fancy, but is soooo easy. Enjoy roasted in the oven {as shown} or grilled! 

Trim the bottoms of your asparagus so they are even with one another {about 1-2 inches} and rinse. Bundle 5-6 together, wrap tightly with one piece of uncooked maple bacon -seal with a toothpick.

Line up bundles in a foiled lined 9×13 baking pan {I would steer away from a cookie sheet because the bacon juices will run off}. 

Drizzle with olive oil and sprinkle with black pepper and sea salt. Roast in a 400 oven for 15 mins {turning in between} until browned. If you would prefer, you can grill 5 mins on each side until bacon is cooked and crispy. 

Bacon-Wrapped Asparagus

Prep time:
Cook time:
Total time:
Serves: 6
Ingredients
  • 2 lbs Asparagus
  • 1 package of Maple Bacon
  • 2 Tbsp Olive Oil
  • Salt/Pepper
Instructions
  1. Trim Asparagus ends so that they are all even with one another {about 1-2 inches off}. Rinse
  2. Bundle 5-6 asparagus, wrap tightly with maple bacon, seal with a toothpick.
  3. Place all bundles in a foil lined 9×13.
  4. Drizzle with olive oil and season with salt and pepper.
  5. Roast for 7 mins, turn and roast an additional 7 mins until bacon is cooked through.


Signature

“We’re missing the best part of each other”.

Last week, I posted the above photo on FaceBook from the book “What Women Fear”, by Angie Smith.  Sitting here on the couch on a Saturday night I thought-I bet a lot of other Ladies have felt this way-I know I sure have. Even amidst the company of other women, we can still feel very alone if we dont’ get hard core about it-I’m talking being real.

“Carry each other’s burdens, and in this way you will fulfill the law of Christ”. ~ Galatians 6:2

The truth is every one of us has struggles. It’s promised.

Financial Stress…Health Issues… Marital Problems…Depression…Loneliness…Anger…Grief…Loss…

If I asked you what your top 3 challenges or hurts are currently, I bet you could name them almost immediately. Throughout our day we can fixate on these issues until they literally consume us…then we go to a bible study and act hunky dory. Why do we do this?

Here’s my personal internal dialogue:

“I’m sure this will pass and no one will ever need to know that I struggled today.” Pride

“These ladies may loose respect for me if they catch on I don’t have it all together.” Worry

“What if they think less of me?” Fear

“I’m the person people come to, I can’t burden them with my issues.” Nonsense

“What if they talk about me when I’m not around?” What-if thinking

“What if they judge me?” Idolizing

And the list goes on….and there is always a kibosh on our silly worries when the wisdom of God steps in.

Sometimes all we need from one another is to hear these precious words : I’ve been there too. 

Seriously?

Yep.

Ahhhhh……

Everyone of us is a living, breathing, walking…. book. What good is a book if you can’t open it up and read it? What can it teach anyone by just sitting there? The stories, humor, good times and bad times…the meat. That’s what we are missing in one another!!!! I could care less about that shiny cover that we all end up tossing aside anyways.

Ladies, I encourage you to share a page in your book the next time you’re with trusted and like-minded friends. Your testimony will most likely be a huge blessing to someone else in the room wondering if they are all alone in their struggles. Some of the kindest people I’ve ever met are the ones who have been through the hardest of times. 

“Been there”. 

 No temptation has overtaken you that is not common to man.  God is faithful, and he will not let you be tempted beyond your ability, but with the temptation he will also provide the way of escape, that you may be able to endure it.

~1 Corinthians 10:13
.

Signature

Sweet Garlic Glazed Chicken

My mom forwarded me this recipe and my, oh, my is it a keeper! As you know, I’m a huge fan of sweet and savory dishes- this one is no exception! Enjoy!

Chop fresh garlic – it’s gotta be fresh for this recipe {I know, I know- I don’t like the smell of it on my hands for days either….but it’s worth it for this one}.

In a small/medium pan add olive oil and sauté garlic on medium heat until tender. Be very careful with your stovetop setting-garlic can burn quickly! 

Add brown sugar to the olive oil and garlic- stir until it makes a paste.

Place thawed chicken breasts in a 9×13 pan, cover with paste and sprinkle with salt and pepper. Bake uncovered at 400 for approximately 20 mins. I placed mine on a cookie sheet, but when I make this again, I’ll use a 9×13- there was a little spillage, don’t ya hate that?.

*I am a huge fan of smaller, organic chicken breasts. If your chicken is larger than shown below, make sure to pound it. This will help it cook evenly!

Mmmmmm…..You’re going to love this one! Thanks Mom! 

Sweet Garlic Glazed Chicken

Prep time:
Cook time:
Total time:
Serves: 4-6
Ingredients
  • 6 boneless chicken breasts
  • 4 garlic cloves chopped
  • 4 Tbsp of brown sugar
  • 2 Tbsp olive oil
  • Salt/Pepper
Instructions
  1. Preheat oven to 450.
  2. Place foil in a 9×13 pan and put your chicken in it.
  3. In a small or medium pan pour olive oil and sauté your garlic on medium heat until tender.
  4. Remove from heat and add brown sugar to your olive oil/garlic. Stir until it’s a paste.
  5. Evenly divide mixture over each chicken breast.
  6. Season with salt and pepper.
  7. Bake uncovered for 20-30 mins depending on the size of your chicken.
Signature

Quick and Simple Berry Trifle

This elegant dessert is so light, so simple, and so delicious…perfect for a warm Spring or Summer day. The juice from the berries naturally soak into the angle food cake. The homemade whipping cream adds a special touch to this “semi-homemade” Berry Trifle. Your guests will be delighted!


Strawberries, blueberries, blackberries, raspberries, whipping cream, {sugar}, 1 store purchased Angel Food Cake, a trifle bowl.

Cut strawberries and rinse all berries in a colander.


Mix berries {beautiful, aren’t they?}

Pour whipping cream into a large mixing bowl and beat on high until soft peaks form. Please know that you can over mix whipping cream and it will loose it’s creamy smooth texture.

Add 1/2 cup of sugar to whipping cream and beat for 30 seconds until combined. {Yes, you may substitute Cool Whip if you need to…but the extra 5 mins to make your own whipped cream is SO worth it in this particular dessert}.

You are ready to layer! Start by simply tearing large pieces of angel food cake apart and layering them at the bottom of your trifle bowl. Add berries, then whipping cream. Repeat 3 times.


Quick and Simple Berry Trifle

Prep time:
Total time:
Serves: 12
Ingredients
  • 2 cups strawberries
  • 1 cup black berries
  • 1 cup raspberries
  • 1 cup blue berries
  • 1 pint whipping cream
  • 1/4 cup sugar
  • 1/2 tsp vanilla
  • 1 store purchased angel food cake
Instructions
  1. Beat whipping cream with sugar and vanilla until soft peaks form- set aside.
  2. Cube angel food cake.
  3. Rinse all berries and begin layering: Cake, whipping cream, berries.
  4. End with whipping cream and berries for a garnish
Signature

Take Them a Meal Blog- Raising a Family and Meal Ministry….

Raising a family and a Meal Ministry

Hi Ladies!

Have you ever wondered how I manage a family and a meal ministry? I know what you’re thinking:” I can’t even keep up with my own family’s meals let alone another’s, Janelle!”

Trust me, I am NO Super Woman {In fact, I’m extremely human}. 

Join me over at Take Them a Meal where I’m sharing some tips and tricks that I’ve picked up throughout the years…like any ministry, it’s a live and learn situation. 

Keep serving!

Take Them A Meal Blog

Signature

Healthy “Copy Kat” Peanut Butter Chocolate Chip Balls

Last week I posted a delicious recipe: “No Bake” Peanut Butter Chocolate Chip Balls. Words can’t describe how tasty those little treats are! Then, I had a sweet reader, Amanda, comment and share a similar recipe… but on the lighter side. Would you know, I tried her version today and loved them too?! Wohoo!!!! I’m so proud of my “Comfy” readers! 

So, in Amanda’s words: ” No stove top or oven required!! I made these all last summer and everyone loved them. They make everyone happy even the health nuts in your life because it uses honey instead of sugar:) I also have a child with constipation issues and these have a lot of flax seed in them to help him work things out:) Enjoy!!!!!!!”

Thank you SO much Amanda! This recipe is an excellent Copy Kat! My husband had 2 after lunch! I’m sure I’ll be making this version this Summer too! 

In a large bowl combine oats, coconut, peanut butter, chocolate chips, milled flax seed, honey, and vanilla. 

Stir it up and place in the refrigerator for 1 hour- then shape into balls. Keep refrigerated! YUMMMM!!!!

I love the addition of the milled flax seed…Many of you might be thinking “Oh that’s probably expensive- sounds organic, lol”. Honestly it’s not and it’s known to be one of the healthiest things we can add to our food! I purchased 3/4 lb for $1.25 at my local indoor farmer’s market {make sure to purchase it already milled or “ground”}.  It’s a sneaky, yet effective way to add some pretty powerful health benefits into your recipes! Awesome.

 Thanks Again Amanda! 


Healthy “Copy Kat” Peanut Butter Chocolate Chip Calls

Prep time:
Total time:
Serves: 15-20
Ingredients
  • 1 cup oats
  • 1 cup coconut
  • 3/4 cup peanut butter
  • 1/2 cup chocolate chips (I use dark so I can eat more cookies and feel good about it:)
  • 1/2 cup ground flax seed (Costco has the best at an awesome price!)
  • 1/3 cup honey
  • 1 tsp. vanilla
Instructions
  1. Mix and refrigerate for 1 hour.
  2. Roll into balls.
  3. Refrigerate until ready to eat! No oven required!
Signature

Grandma’s Coleslaw

Are you looking for a coleslaw recipe just like grandma used to make? Well, look no further…this slaw has ” just the right” amount of mayo, vinegar, and sugar to please the harshest connoisseur . It’s also the perfect addition to a backyard barbecue!

In a food processor, throw in your carrot, onion and celery.

Give it a whirl, like so…Then, scoop out the mixture and place it in a large bowl.

 Add 1/2 a head of cabbage cut into chunks. Process and place in the bowl with the carrot mixture. Then, add the other 1/2 a head cut into chunks, process and place into bowl. 

Mix it all together.

In a medium bowl whisk together mayo, milk, white vinegar, sugar and salt and pepper.

Pour over cabbage mixture and stir well.

Garnish with a little paprika and there you have it! YUM! Just like grandma used to make!

Grandma’s Coleslaw

Prep time:
Total time:
Serves: 8
Ingredients
  • 1 carrot peeled and cut into chunks
  • 1/4 of an onion
  • 1 stalk of celery cut in half
  • 1 head of cabbage cut in half {then into chunks for easier processing}
  • 3/4 cup mayonaise
  • 1/4 cup milk
  • 3 Tbsp white vinegar
  • 1/2 cup sugar
  • salt/pepper to taste
  • paprika for garnish
Instructions
  1. Process carrot, celery and onion together in a food processor and place in a large bowl.
  2. Process chunks of cabbage in 2 batches and add that to your carrot mixture.
  3. In a medium bowl whisk together mayo, milk vinegar, sugar, salt and pepper. Pour over cabbage mixture and stir well.
  4. Garnish with paprika.
Signature

“No-Bake” Peanut Butter Chocolate Chip Balls

Oh wow, wow, wow, wow. I am so excited to share this recipe with you!!!!

Recently, I was the recipient of a delicious {and very heart warming} meal ministry….the sender gave me a dessert labeled “Monster Cookies”{It was a secret recipe- bummer!}.

Well, I knew I couldn’t live a day without trying to figure out how to recreate these amazing little masterpieces of awesomeness. So, here is my best effort- boy, are these gooooooooood.

A sweet friend of mine came over {who will remain nameless -she made me promise}after I made these and had 3..or 4? Oh, who counted? I could have eaten the entire plate! haha!

Anyways- make these, they’re good…really, really good. I love them. Make them for me. 

* Naturally gluten-free. 

In a medium sized mixing bowl add your oats, 5 Tbsp of peanut butter {save 2 Tbsp}, vanilla and salt. Set aside. 

In a medium sauce pan bring brown sugar, milk, and butter to a simmer for about 3-4 mins- whisking so it doesn’t burn. 

Pour hot mixture over dry mixture and stir well. Then, add in the remaining 2 Tbsp of peanut butter. Stir well again. 

Place in the refrigerator for 1 hour until cooled and firm. 

Add 1 cup of chocolate chips, mix with hands and shape into balls. 

I can’t explain how good these are, you’re just going to have to try them yourself 😉


“No-Bake” Peanut Butter Chocolate Chip Balls

Prep time:
Cook time:
Total time:
Serves: 15-20
Ingredients
  • 4 1/2 cups old fashioned oats
  • 7 Tbsp of Peanut butter {divided 5 and 2}
  • 2 tsp vanilla
  • 1/2 tsp salt
  • 3 cups brown sugar
  • 3/4 cup milk
  • 1/2 cup butter
Instructions
  1. In a medium sized bowl add oats, 5 Tbsp peanut butter, salt and vanilla. Set aside.
  2. In a medium sauce pan bring to a simmer your brown sugar, milk and butter. Let simmer for 3-4 mins-whisk every 30 seconds so the bottom doesn’t burn.
  3. Add hot mixture to your oat mixture. Stir well. Add the remaining 2 Tbsp of peanut butter and stir well again.
  4. Place bowl in refrigerator for 1 hour to let cool and firm up.
  5. Add 1 cup of chocolate chips, mix with hands and roll into balls.
Signature

Featured Recipe @ WLW…Easy Guacamole


I’d have to say it’s up there with chocolate in my book…..I love guacamole THAT much 😉 Come join me over at my friend Courtney’s blog- Women Living Well, where she’s sharing this delicious recipe .

This is a great little lunch treat I make for myself often…

Signature