Archives for September 2014

Easy Chicken Quesadillas

IMG_5466
These easy chicken quesadillas are a hit for lunch, dinner or as an appetizer. Best yet, they please the grown-ups and the children alike. Once you realize how easy they are…I’m sure they will become a staple in your home as they have become in mine.

IMG_5454
Marinate your chicken breasts in Italian dressing overnight.

IMG_5457
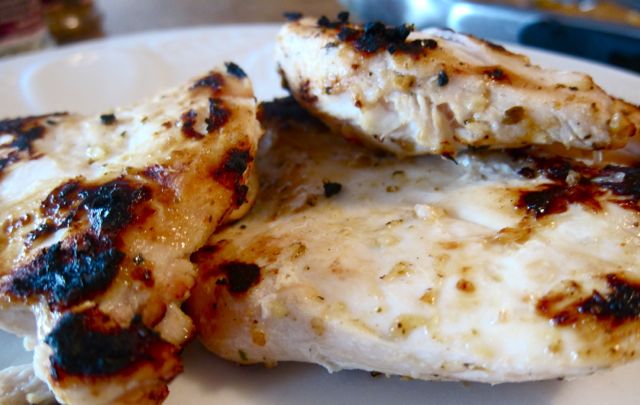
Season with salt, pepper and garlic powder. Broil or grill until done. Don’t overcook or the chicken will be too dry.

IMG_5456
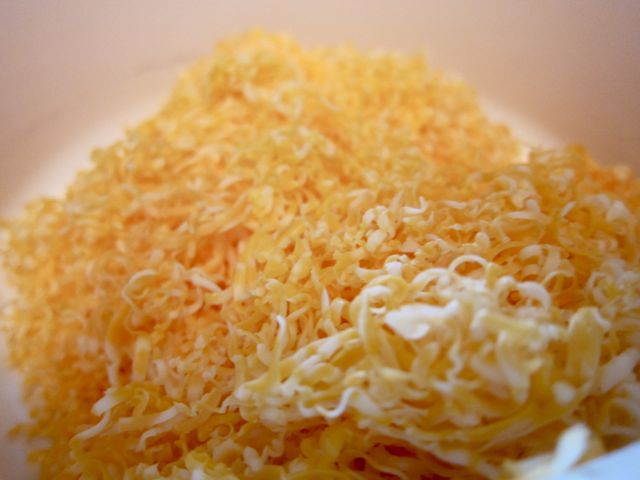
Shred Colby-Jack cheese. You can use pre-shredded cheese, but hands down, shredding your own is so much better.

IMG_5458
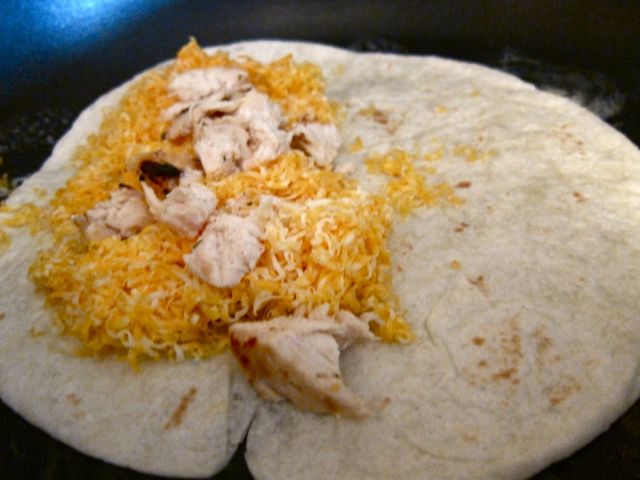
Lightly butter a pan and add a flour tortilla, place cheese and chicken on one side.
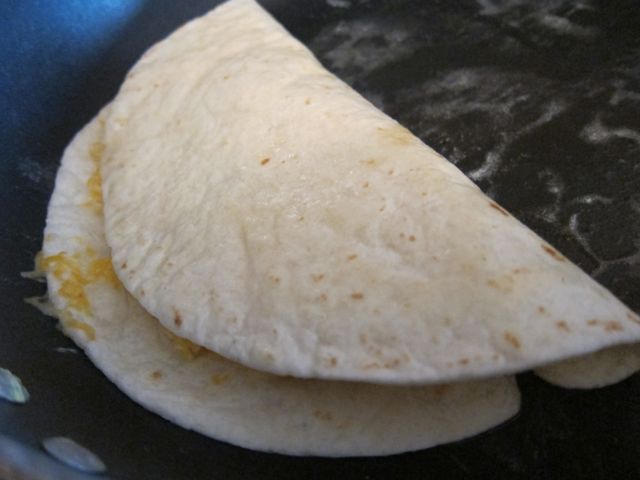
IMG_5460
Flip one side over.

IMG_5461
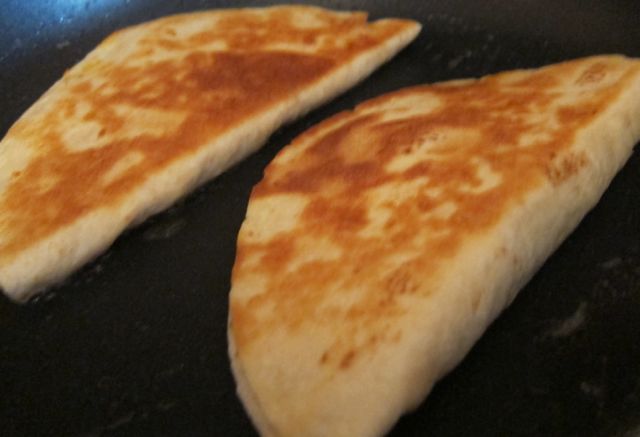
Cook until lightly browned.

IMG_5462
For a larger quesadilla use two flour tortillas filled with chicken and cheese.

IMG_5464

Slice with a pizza cutter and serve with your choice of dipping sauces.
You may also like to try steak, fajita veggies, shrimp, etc…a very easy recipe to alter to your taste.

Easy Chicken Quesadillas
Author: Janelle Nehrenz
Prep time:
Cook time:
Total time:
Serves: 6-8
Ingredients
  • 6 chicken breasts
  • 1 bottle of Italian dressing
  • 2 cups shredded Colby Jack cheese
  • flour tortillas
  • salt, pepper, garlic powder
  • butter for pan
  • salsa and sour cream for dipping
Instructions
  1. Marinate chicken in Italian dressing overnight.
  2. Season chicken with salt, pepper and garlic powder- grill or broil until just done. Cut into chunks.
  3. Shred cheese
  4. Lightly butter a pan
  5. Lay one flour tortilla onto pan and add cheese and chicken to one side. Flip the other side over. Lightly brown on both sides.
  6. Slice with pizza cutter and serve with salsa and sour cream. Enjoy!


Signature

How I Got My Highlights to Look More Natural


Image 2
Hi Ladies!

I know, this is somewhat of a random post…but us girls like to talk about hair sometimes. I’m totally good with that.

Here’s my story. So, last year I kind of let my hair go…a “natural ombre”, so to speak. On my birthday, my sweet grandma offered to get my hair highlighted.

*Please note, as tempting as it was to enhance these pictures- I did not. I wanted you to see the real color! 

Image

What happened was, because my hair was so dark at the root area, my highlights looked like stripes. Not only that, my hair still had an ombre appearance and the bottom of my hair was lighter than I would have liked.

Image 2
Because I have an olive skin tone, I look better with an “overall brunette” appearance… even though I tend to like some golden highlights throughout. So, I went to Sally’s Beauty Supply to see if they had something that could help me get the look I wanted.

I was hesitant because I’ve only colored my hair at home once and it was a MAJOR mishap. The lady recommended I use a color conditioning treatment called Roux Color Refresh Mask in Brown.

Image 1

All I did was wash my hair, then towel dried it. I put on plastic gloves and rubbed the entire packet throughout my hair, combed it and let it sit for 6 mins. It said 3 mins, but I checked my e-mail and you know how that goes….

Then, I rinsed it out and conditioned it. Here’s what it looked like! I was VERY pleased. It made my hair look like one color overall with natural highlights.

I thought I would mention that they also had colors for different kinds of blonde, brunette, and red. This would be a great option for those of you who want to add a reddish tint for the Fall, but you don’t want to spend a lot of money.

Enjoy! 


*Disclaimer, I was not asked to advertise this product, nor am I getting paid by Roux. I am however an affiliate of Amazon. 

Signature

Easy Chicken and Stuffing Bake


photo 2-2
After I had our third munchkin, my sweet neighbor Faith brought this delicious meal over and boy, was it such a blessing for a tired, nursing mother.

I enjoyed it so much, I had to have the recipe and share it with you. It’s a great “make, take and bake” meals for meal ministry as well an a delicious comfort meal for your own family. Enjoy! 

photo 1-1
Make stuffing however you wish. You may choose to use Stovetop or a semi-homemade stuffing such as Pepperidge Farms (follow package directions). Butter a 9×13 and place prepared stuffing at the bottom. 

photo 2-1
Boil chicken breasts until just done (no pink, but still juicy). Slice fat off and cut into chunks, season with salt and pepper. Place on top of stuffing. 

photo 4
Combine cream of chicken soup, sour cream and 2 cups of water in a bowl and pour over chicken. Bake in a 325 oven for 40 mins until bubbly. 

photo 2-2

Mmmmm…..delicious. A family favorite that pleases even the little ones! 

Easy Chicken and Stuffing Bake
Author: Janelle Nehrenz
Prep time:
Cook time:
Total time:
Serves: 6-8
Ingredients
  • 6 chicken breasts
  • 14 oz Pepperidge Farms Stuffing (prepared) or 2 boxes of Stove Top (prepared)
  • 2 small cans of cream of chicken soup
  • 1 cup sour cream
  • 2 cups water
  • salt and pepper
Instructions
  1. Pre-heat oven to 325.
  2. Boil chicken until just done, slice off fat, cut into chunks, season with salt and pepper.
  3. Prepare stuffing according to package directions. Place at the bottom of buttered 9×13.
  4. Place chicken on top of stuffing.
  5. In a separate bowl, combine cream of chicken soup, sour cream, and water. This will make a gravy. Pour overtop.
  6. Bake uncovered for 40 mins until the edges start to bubble.
  7. Enjoy!!! Mmm….
Signature

Banana Brownies with Browned Butter Icing

Image 8My dear mother-in-law recently e-mailed me this delish recipe. Ohhhhh, my- WOW. These brownies are so moist and the browned butter in the icing gives it a “Bananas Foster” taste. You simply must make this recipe…it’s a keeper.

Image 2
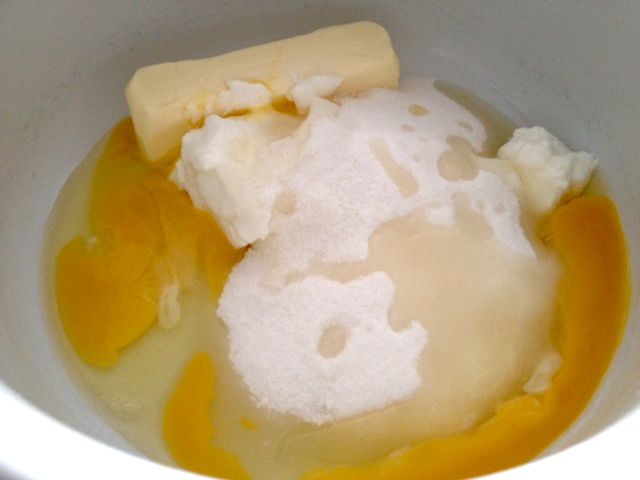
Start off with your butter, sour cream, sugar and eggs. Beat well.

Image 4
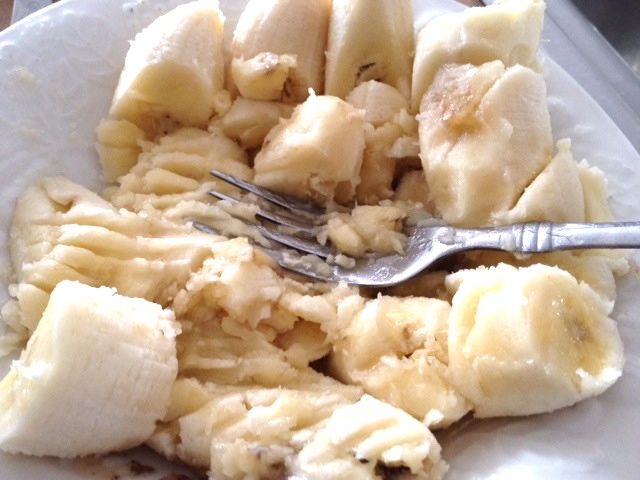
Mash 4 very ripe bananas.

Image 3
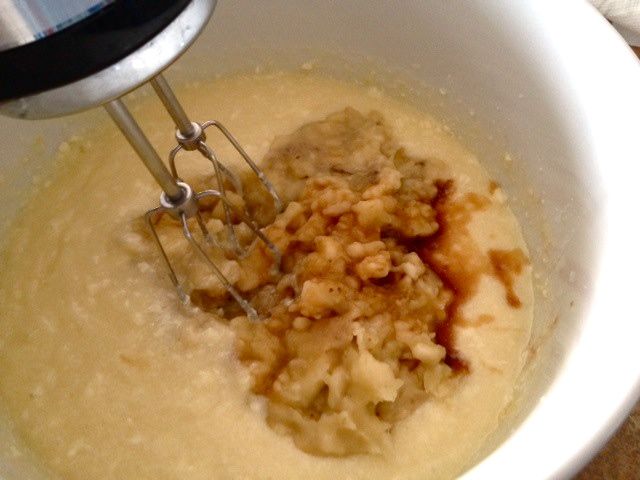
Add them to the mix with vanilla.
Image 5
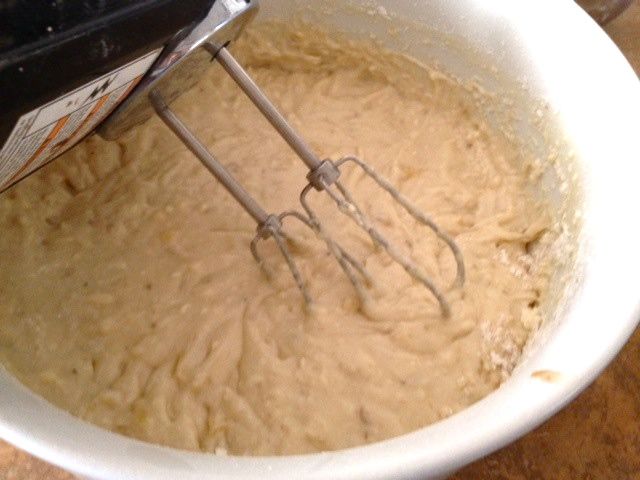
Add your flour, baking soda and salt. Mix well. Bake in a greased 9×13 pan in a 375 oven for 25 mins or until lightly browned.

Image 6
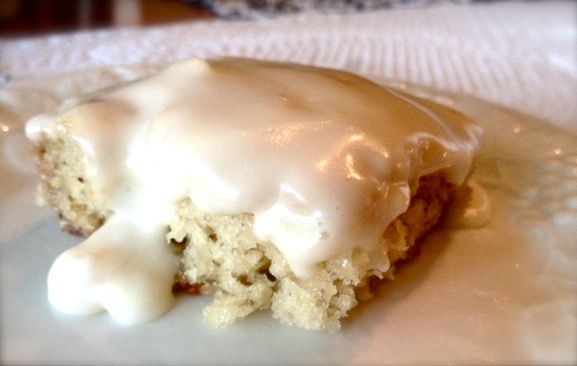
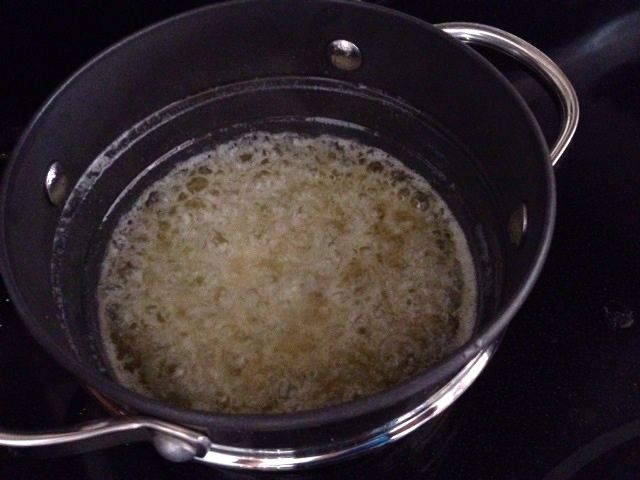
While brownies are baking, make your icing by browning your butter in a pan like so…make sure you use medium heat and let it simmer until it’s lightly browned.

Image 7Pour butter in with 4 cups of powdered sugar, vanilla and milk. Mix well. Pour over top of warm brownies. 

Image 8This is serious. 

Banana Brownies with Browned Butter Icing
Author: Janelle Nehrenz
Prep time:
Cook time:
Total time:
Serves: 12
Ingredients
  • 1 1/2 cup sugar
  • 1 cup sour cream
  • 1/2 cup butter, softened
  • 2 eggs
  • 4 mashed bananas
  • 2 tsp vanilla
  • 2 cups flour
  • 1 tsp baking soda
  • 3/4 tsp salt
  • Browned Butter Icing
  • 1/2 cup butter
  • 4 cups powdered sugar
  • 1 tsp vanilla
  • 3 Tbsp milk
Instructions
  1. Heat oven to 375
  2. Butter 9×13 pan
  3. Beat together sugar, sour cream, butter and eggs
  4. Mash bananas and add them into mixture with vanilla
  5. Add flour, baking soda and salt. Mix well
  6. Spread in prepared pan and bake for 25 mins or until lightly browned and done in the center
  7. To make the icing:
  8. Simmer butter in a sauce pan on medium heat until lightly browned
  9. Add butter to powdered sugar, vanilla and milk
  10. Mix well
  11. Pour over warm brownies
  12. Serve warm


Signature