Archives for October 2012

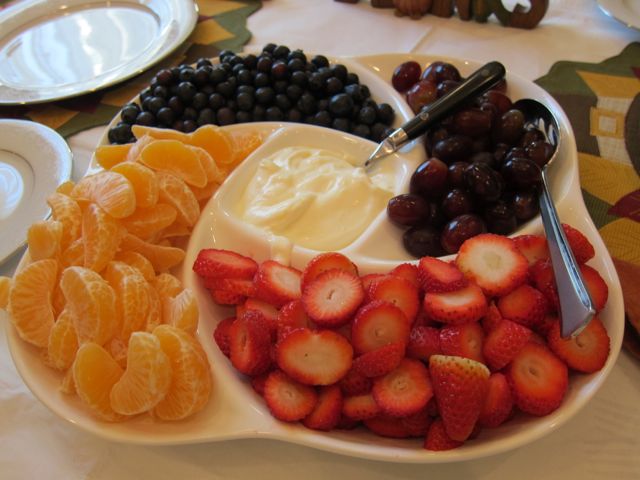
Homemade Fruit Dip

{My Dad’s wife made this for me last Thanksgiving! Thanks Bonnie!}

Ohhh Boy, the holidays are creeping up on us…Ladies, can you believe Thursday is NOVEMBER 1st?!!!

I wanted to share this simple recipe because 1. It’s yummy 2. It’s easy 3. It’s healthier than other appetizers/desserts and 4. It’s allergy friendly!

You may have seen this delicious concoction on Women Living Well…my sweet friend Courtney makes the same Fruit Dip! High Five Girlie!!!! There’s no doubt that great minds think alike…bahaaa!

This is a delicious recipe for all to enjoy. Especially if you, a family member, or a friend have allergies to wheat. When others are enjoying pies and cakes it will mean SO much to have something to enjoy that’s allergy friendly. Enjoy!

Homemade Fruit Dip
Prep time: 5 mins
Total time: 5 mins
Serves: 10
Ingredients
  • 8 ounce package cream cheese, softened
  • 7 ounce jar marshmallow creme
  • 1/2 teaspoon vanilla
  • Sliced and rinsed fruit {strawberries, grapes, oranges, melon, blueberries, etc}
Instructions
  1. Beat cream cheese with mixer until fluffy.
  2. Add marshmallow creme and vanilla-mix until well incorporated.
Notes

You may wish to add food coloring {my mother in law adds strawberries to hers with a little red food coloring-pretty!}

Signature

Spiced Pumpkin Dip with Roasted Marshmallow Topping

I posted last night that I had some Pumpkin Dip baking in the oven. Well, like a true blogger- I took photos 😉 Here is the recipe! I cut up apples for dipping. You can also use graham cracker dippers or buy pre-made pie crust {or make your own} to cut into dippers.

*This is a natural food allergy friendly treat. 

Beat cream cheese until fluffy- This is an important step to getting a smooth texture. 

Grab a child and put him to work. Did I just write that? Bahaa! Eh hem…Add pumpkin puree, brown sugar, pumpkin pie spice and marshmallows. {This son of mine is going to make one fine husband one day btw} 

Sprinkle with chopped nuts {I used chopped peanuts- can you believe the price of pecans these days?!} 
The best part…

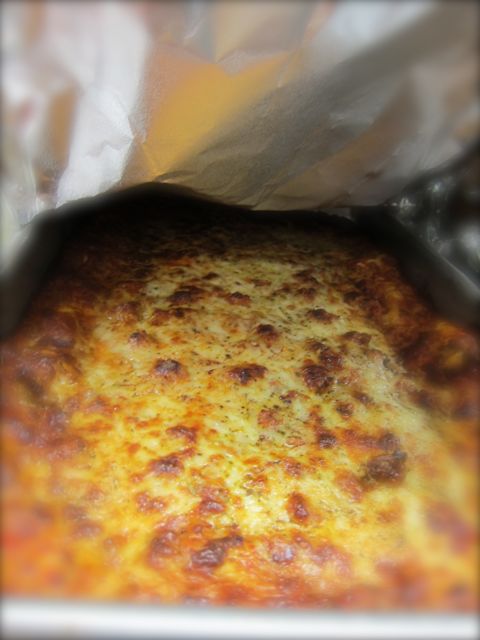
Bake in a 350 oven covered for 20 mins, then take off foil and broil on low for 2 mins to roast the marshmallows. 

Tasty!!!! Mmmmmm…. 


Spiced Pumpkin Dip with Roasted Marshmallow Topping
Prep time: 5 mins
Cook time: 22 mins
Total time: 27 mins
Serves: 6
Recipe adapted from “Festive Family Gatherings” Daymaker
Ingredients
  • 4 oz cream cheese
  • 15 oz plain pumpkin puree
  • 1/4 cup brown sugar
  • 2 tsp pumpkin pie spice
  • 1 cup marshmallows divided in half
  • 1/2 cup chopped nuts
Instructions
  1. Beat cream cheese until fluffy.
  2. Add puree, brown sugar, pumpkin pie spice, 1/2 cup marshmallows and beat on low speed.
  3. Top with nuts and a layer of marshmallows
  4. Cover and bake in a 350 oven for 20 mins. Lift off cover and broil on low for 2 mins.
  5. Serve with sliced apples graham crackers or crust dippers.


Signature

Slow Cooker Baked Beans {a Family recipe!}

Would you believe out of all the recipes on my side bar…THIS recipe is one of my absolute favorites?

You know how when you go to a family pot luck each family member generally brings their “staple dish”? In our family, this is Aunt Shirley’s “dish”. I LOVE these beans! {stop laughing at me and singing that silly bean song in your head, I know you’re thinking it! LOL!}

In all seriousness…these beans are simple to make, sweet, savory, filling, naturally allergy friendly and ohhhh so good. I literally make them my meal, I love them that much! 

For a delicious Autumn side dish, make sure to pin these to your favorites! Thanks for the recipe Aunt Shirley! 

Brown 6 slices of bacon in a skillet on medium heat.

Drain on paper towel. Reserve renderings {bacon fat} in your skillet. 

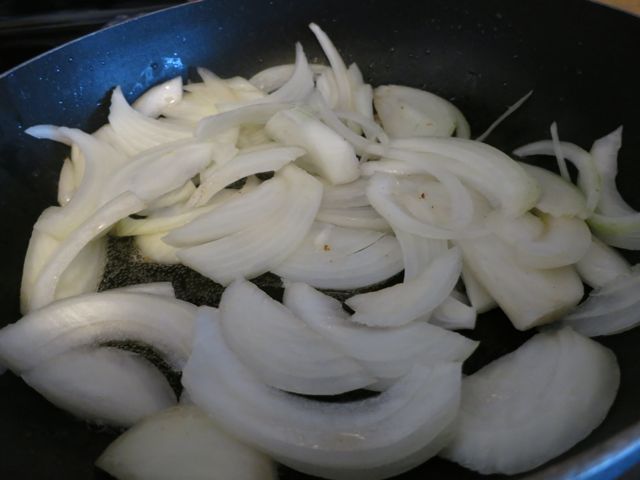
Slice one large onion and sautee in bacon renderings on medium-high heat.

In the meantime, turn your crockpot onto the high 4 hours setting and add brown sugar, mustard, garlic powder, salt and cider vinegar.

Drain Great Northern beans, Red Kidney beans, and Butter beans. 

Add everything to crockpot. Onions with drippings, pork and beans, drained beans, and bacon {crumbled a bit}. Stir well, cover and cook for 4 hours. 

These are goooooood. Mmm, Mmm, Mmmm!!!


Slow Cooker Baked Beans {a Family recipe!}
Prep time: 20 mins
Cook time: 4 hours
Total time: 4 hours 20 mins
Serves: 20
Ingredients
  • 6 slices bacon
  • 1 large onion cut into rings
  • 1 cup packed brown sugar
  • 1 tsp mustard
  • 1/2 tsp garlic powder
  • 1 tsp salt
  • 1/2 cup cider vinegar
  • 2-15 oz cans Great Northern Beans, drained
  • 1-16oz can Butter Beans, drained
  • 1-16oz can dark red kidney beans, drained
  • 1-28 oz can Pork and Beans
Instructions
  1. Brown bacon until crisp and place on a towel lined plate. Crumble.
  2. Slice onion and sautee in the bacon renderings.
  3. Turn crockpot onto high 4 hours and add brown sugar, mustard, garlic powder, salt, and cider vinegar. Stir well.
  4. Drain Great Northern, Butter and Kidney beans, add them to the pot.
  5. Add pork and beans to the pot.
  6. Add the onions with renderings to the pot.
  7. Stir, cover and bake 4 hours.
Signature

My Gluten-Free Story on Roomag

Is it all in my head? This persistent shortness of breath, migraines, forgetfulness….everything my doctor has tested me for has been fine….what is wrong with me?!!! 

Come join me at Candace Cameron Bure’s Roomag today where I share the journey that led me to a gluten-free life-style. I pray that my story might help some of my readers who could be suffering from the same symptoms I was.


*Please note: For those individuals who are not gluten intolerant {a simple blood test can rule this out}, moderation is typically just fine. For this very reason, I do still incorporate gluten into my recipes. I personally cannot eat gluten in moderation because the side effects are so uncomfortable for me. 

Roo Mag

Signature

Guest Post on WLW

Happy Friday Everyone!

Many of you have been so sweet to e-mail me and ask about my hubby. He is healing up just fine! He’s going to Physical Therapy throughout the week and doing his exercises at home. In just a few weeks, he will be driving again {PTL!!!!!}. Right now, he’s still in a walking boot… But, it definitely beats the cast and crutches 🙂 A small price to pay for all the fun he had being a baseball catcher for HS and KSU, right honey???? Bahaa!


Moving along..

My very dear friend Courtney from Women Living Well is featuring my Lasagna for a Crowd! Ohhhh what a blessing this day was for me, cooking for the new members at the church! You won’t  want to miss “me in a hairnet” lol!

{Courtney’s sister is one of the beautiful girls serving punch at this event!} 


Signature

Contributor Day- What a Blessing!

Ohhh Ladies, what a special day. I have 3 posts I want to share on 3 different websites…all that are very, very, {did I say very?} dear to me. I hope you’ll visit me on these posts….

I’m visiting Sally Clarkson on I Take Joy and bringing her some homemade cinnamon chip scones! I can’t begin to describe what a blessing this is to me…

One of the first bible studies I attended was in my mentor Julie’s home. We were reading Dancing With My Father by Sally …at the end of one of our evenings together, Julie told us to write down www.itakejoy.com and visit it for “mothering” encouragement. I jotted it down and visited it weekly. I got so much encouragement from Sally through her gentle spirit and genuine love for mothers. Through her written words…she reminded me how important motherhood is and what a blessing the Matriarch of the family is. 

At that time I would have never imagined guest posting on I Take Joy…I wasn’t even a blogger at that time!  But, Ladies….this is how God works. He speaks to us individually and in such meaningful ways. What a very small world with such a BIG God.

{Courtney, Sally, and Me at The Relevant Conference last year- now Allume}

Sally has a NEW book written with Sara Mae! Desperate “Hope for the Mom who needs to breathe” I can’t wait to read it!  

You can also visit Sally on her other blog Mom Heart. I think you’ll see some sweet familiar faces under the author button.

Speaking of familiar faces!!!! I am also visiting my sweet friend Ruth at The Better Mom!

Come get the recipe for these delicious, easy, and allergy friendly Cornflake Bars! Just 4 ingredients! My children {and I} LOVE these!!!!  

An excellent snack for on the go!

Speaking of on the go…..

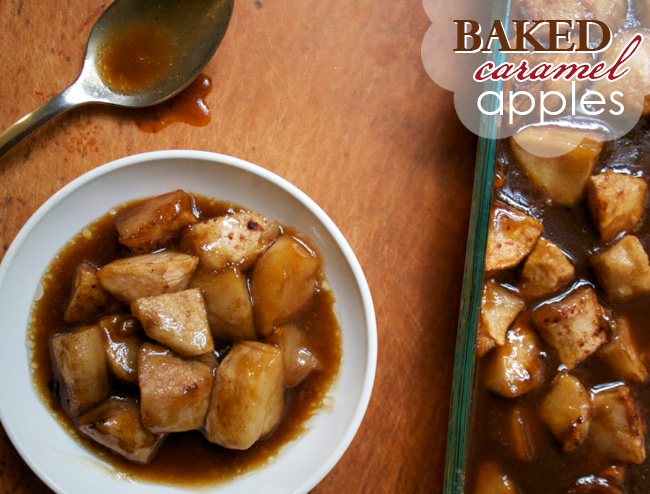
Baked Caramel Apples

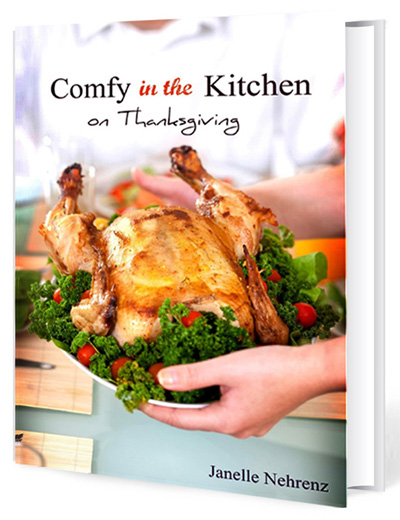
I am so blessed to be a small part of “Take them a Meal” this week. It is my ABSOLUTE FAVORITE website/blog for Meal Ministry. I can’t tell you how many meals I have signed up to take through this amazing website. Adina did such a great job making these Baked Caramel Apples that are in my FREE {no strings attached} Thanksgiving E-book! 

Free Thanksgiving eCookbook 

A sister site of Take them a Meal is Perfect Potluck– this is the Perfect time to get acquainted with this site….it will make Holiday planning SOOOO easy! What a nifty idea!

I encourage you to add “Take them a Meal” to your Pinterest– they have some GREAT meal ideas on there!!! I’m always so impressed with them…

Signature

Rainbow Birthday Cake

My “Baby” had her 4th birthday party with some of her little friends over the weekend. When I asked what she would like her theme to be…she yelled “RAINBOW!” Ok girlie…rainbow it is 🙂 I’m not the most “creative” genius there is {remember, I am “comfy” NOT “creative”)…but I have a willing heart, so I scoured Pinterest for some inspiration.

I truly enjoyed making this special cake for her and thought to share with you. It was a “piece of cake” hehe! For those of you intimidated of making double layer cakes– please don’t be. Again…I am not a baker- just a normal gal. If I can do it, so can you!

There IS something special about a homemade birthday cake, isn’t there? This was one very special cake indeed. The kids LOVED the outside of the cake- then I told them there was a surprise on the inside too…you should have seen their faces. Adorable.

This is where I got my inspiration: The Idea Room and Omnomicon. 

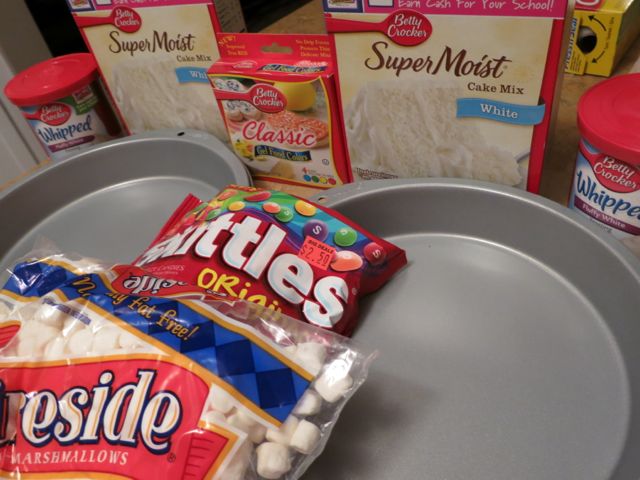
The ingredients: 2 WHITE cake mixes, 2 fluffy white tubs of frosting, 2 cake pans {with liners}, gel food coloring {this stuff is vibrant!}, skittles and marshmallows.  

Make cakes separately in two bowls. This will insure them being even with one another. Follow package instructions. 

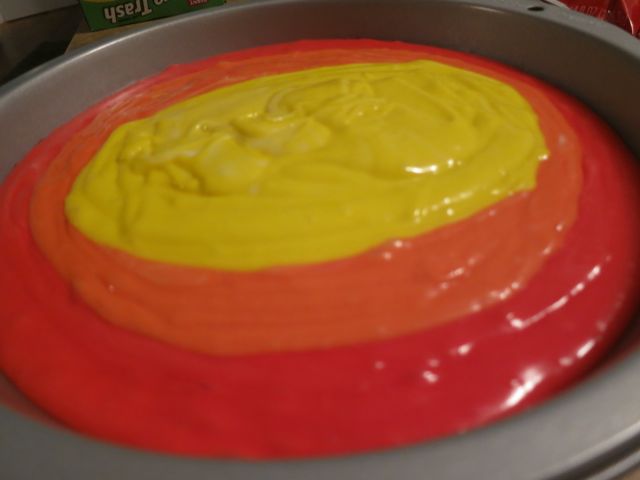
Gather up 3 bowls. For the first cake I went in rainbow order. There will be 3 cups of batter per cake. Put 1 cup of batter in each bowl- red, orange and yellow. You will have to mix the red and yellow to make orange. There is no special amount I used- I just squirted in there like so. 

Stir well. Do this again with blue, green and purple {mixing the red and blue together}. 

Line your cake pans with wax paper liner, spray with Pam {or butter}, then pour the red in, on top of that pour the orange then the yellow. It will flatten out like so. 

Pretty neat! 

Bake 30 mins in a 350 oven.

Cool on wire rack until completely cool- if your cakes are still warm, they may crack during this next step!

Frost in the middle then place the other cake on top and frost all over. 

Use Skittles to make a rainbow and to decorate the sides. Use marshmallows for clouds. This was SO easy- and {I thought} it was super adorable. 

I found some cute candles at the grocery store- yea! I didn’t have to draw anything on the cake, lol! 

Happy Birthday Munchkin!!!!! 

Surprise inside! Wohoo! Oh and yes….that is “superman” ice cream. I just could not resist.

One FUN cake!!! I would make this again in a heartbeat…just adorable!!!! 

I had a lot of fun decorating the house for her party.

But again, you aren’t going to see anything fancy with me…. that isn’t my strength. I think us ladies can sometimes get overwhelmed with all of the talent out there on Pinterest {esp with party planning}. For those ladies who are super talented- that is awesome! But for those of us who have different talents, we shouldn’t be intimidated 🙂 If we have a heart for opening up our homes -that is the most important thing. No one comes to see your home anyways {unless its up for sale!}, they come to see the people. 

Another thing I don’t get all excited about? Messes. I popped up a table in the garage and we had some good old fashioned kid fun. That garage was covered in glue and fruit loops by the end of the night ….Oh well?! The kids had fun! It can all be cleaned up. Let em be kids. 🙂


Rainbow Birthday Cake
Prep time: 60 mins
Cook time: 30 mins
Total time: 1 hour 30 mins
Serves: 20
Ingredients
  • 2 white boxed cakes {with ingredients on package directions}
  • Food coloring gel
  • 2 jars fluffy white frosting
  • 1 large bag skittles
  • 2 handfuls of marshmallows
  • 2 cake pans
  • waxed paper liner and Pam spray
Instructions
  1. Make cakes in 2 separate bowls according to package instructions.
  2. you will need 6 bowls with 1 cup of cake batter per bowl. Make your desired colors. I made cake #1 with red, orange and yellow. Cake #2 with blue, green and purple.
  3. Trace the outside of your cake pan onto waxed paper liner and cut to fit your cake pan. Place liner in cake pan and spray with Pam or butter. These cakes will not stick!!!
  4. Pour each color of batter on top of one another like picture above.
  5. Bake in a 350 oven for 30 mins or until center is baked through.
  6. Take pans out of the oven and set directly on a wire rack.
  7. When completely cool turn over first cake.
  8. Frost top. Then turn second cake on top of first cake.
  9. Frost the top and sides.
  10. Make a rainbow pattern using Skittles. Place Skittles along the edge and finish with marshmallow clouds.
Signature

Friday’s Feature Recipe


I’ve made many a homemade apple dumplings but NONE have been as simple to make as these! There is a *secret* ingredient in this recipe that will have you floored….come visit me over at my dear friend Courtney’s @ Women Living Well to find out how to make these hot, buttery, gooey bundles of deliciousness!


**This recipe was also featured on my FAVORITE organizing blog “I’m an Organizing Junkie” – you simply MUST go visit Laura- she’s a women of great wisdom, I could browse her blog for hours!**

Signature

Cinnamon Chip Scones

There is nothing that says “welcome” like freshly baked goods- warm out of the oven. These cinnamon chip scones are no exception. They are buttery, dense, simple , and ready in 20 mins to dip in a cup of piping hot coffee .  This recipe was shared on Comfy in the Kitchen and I have kept it a staple for gatherings, bible studies, and meal ministries. You’re going to love it, I just know it…. 

Sift together dry ingredients, then cut in shortening and butter. I simply take two knives and literally do “just that”, I cut it in. {You will get a crumbly texture during this step}.

In a small bowl beat egg with heavy cream {You  may use half and half or milk- your texture will change slightly}.

Stir.

You will have a thicker cookie -dough- batter- like consistency.

You can add whatever you wish at this point….My choice? Cinnamon chips. Other options are blueberries, raisins, chocolate chips, cranberries, or even savory ingredients such as ham and grated cheese. For a sweet scone you may wish to use an egg wash with a coarse sugar topping. This recipe is so versatile!

Mmmmm…

Sprinkle flour on a flat surface and coat your hands. Take scone dough and shape into a ball, then flatten into a disk. 

Cut into 8 slices. Make a cross, then another cross in the other direction…pizza cutters work great doing this.

Place on a baking sheet {I use foil for easy clean-up}.

Bake in a 375 oven for 15 mins until golden in color. Oooo…I wish you could smell these right now!

So rich and buttery…the cinnamon chips melt leaving bursts of flavor throughout the scones.

A wonderful morning or afternoon treat…serve with hot coffee, tea or homemade lemonade.

They are even sweeter, enjoyed with friends…..


Cinnamon Chip Scones
Prep time: 5 mins
Cook time: 15 mins
Total time: 20 mins
Serves: 8
Ingredients
  • 2 cups flour
  • 4 tsp baking powder
  • ¼ tsp salt
  • 1/3 cup sugar
  • 4 T butter
  • 2 T shortening
  • ¾ cup heavy cream
  • 1 egg
  • Handful of cinnamon chips.
Instructions
  1. Sift together dry ingredients.
  2. Cut in the butter and shortening.
  3. In a separate bowl, beat cream and egg.
  4. Add to the dry ingredients.
  5. Stir in cinnamon chips.
  6. With floured hands, shape dough into a ball and lay out onto a floured surface.
  7. Flatten into a disk.
  8. Cut into 8 even wedges using a pizza cutter.
  9. Place individual scones onto a baking sheet covered in foil {for easy cleanup}.
  10. Bake at 375 degrees for 15 minutes or until golden brown.
Signature

MOIST Gluten-Free Double-Layer Chocolate Cake {From a box?! Oh yeah…}

Just look at it.

YES….you CAN make a moist, delicious, double-layer, quick and easy….GLUTEN-FREE chocolate cake! Here are the pictures to prove it! Ladies, I am not kidding here….if there was a blind fold taste test, you still wouldn’t guess this was a “glutenous minimus cake”. I’m grateful for Betty Crocker who recently came out with this boxed cake mix. With a *slight* adjustment to the ingredients this passes the “comfy” taste test for sure. My girls and I made this for a dear friend’s birthday….they had so much fun helping me in the kitchen.  

I love teaching them how to cook from the heart.

For a double layer cake, you want to start with foil-lined parchment paper. Place your cake pans on top and trace them for a perfect fit. The foil liner will go against the pan and the parchment paper side will be at the bottom of your cake.

Mama’s little helper  cutting …

Good job sweetie! {You will also want to butter and flour this…JUST KIDDING, Bahaaa- I crack myself up!!! Just butter it.}

I’m a fan, Betty! You are going to make many GF children very happy on their birthdays {and grown-ups!}. 

My girls baking together.

The secret to making the cake moist: The directions say to use 3 eggs…INSTEAD use 2 eggs, 1 egg yolk and 1/3 cup of vegetable oil. That will do it! We used 2 boxed cake mixes and 2 separate bowls so the cakes would be even.

Pour the batter in parchment- lined and buttered 9 ” cake pans. 

The directions say to bake them waaaaay too long! This was 30 mins a 350 oven- perfecto.

Cool the cakes in the cake pans on a wire rack for approximately 20 mins. Check this out…it didn’t stick at all! 

See? So, stop worrying if it’s going to stick….you can do this. 

I used 2 containers of chocolate frosting and started with the top of the first cake {the middle}.

Plop the second layer on as evenly as possible like so…

Frost all over.

Add some sprinkles….you’ve got to have sprinkles.

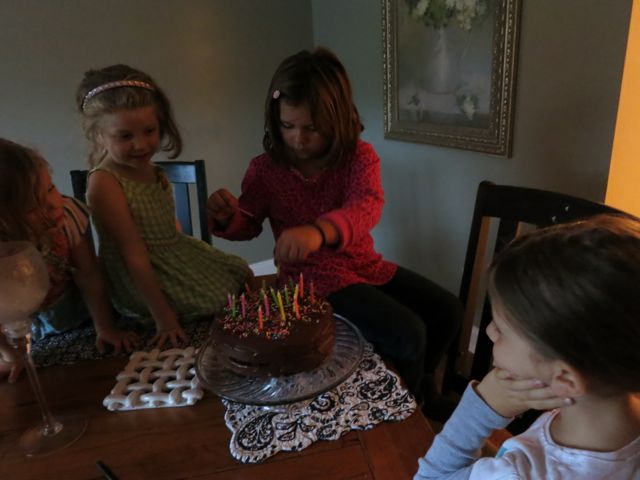
Let the kidos put on the candles {you gotta have trick candles- the kind that don’t blow out right away…the kidos love em}.

Turn out the lights and let the singing begin!!!!! 

Happy Birthday sweet friend!!!!! 

Mmmmmm…….Oooey, gooey chocolate cake without the gluten! I’m sold.


MOIST Gluten-Free Double-Layer Chocolate Cake {From a box?! Oh yeah…}
Prep time: 15 mins
Cook time: 30 mins
Total time: 45 mins
Serves: 12
Ingredients
  • 2 Boxes Betty Crocker GF Devils Food Cake
  • 4 eggs
  • 2 egg yolks
  • 2/3 oil
  • 2 sticks butter
  • 2 cups water
  • 2 tubs chocolate frosting
  • sprinkles
  • Parchment paper and butter
  • 2- 9″ round cake pans
Instructions
  1. Pre-heat oven to 350.
  2. Trace cake pans on parchment paper with a pen. Cut out and place foil lining down.
  3. Butter the top of parchment paper side.
  4. In 2 large bowls add all ingredients for each cake. {halve the above ingredients evenly}
  5. Bake 30 mins.
  6. Cool on wire rack for 20 mins.
  7. Flip upside down onto cake stand and frost the top of the first cake.
  8. Place the second cake on top and frost the top and sides.
  9. Garnish with sprinkles and candles!
  10. Happy Birthday!


Signature

Friday’s Featured Recipe

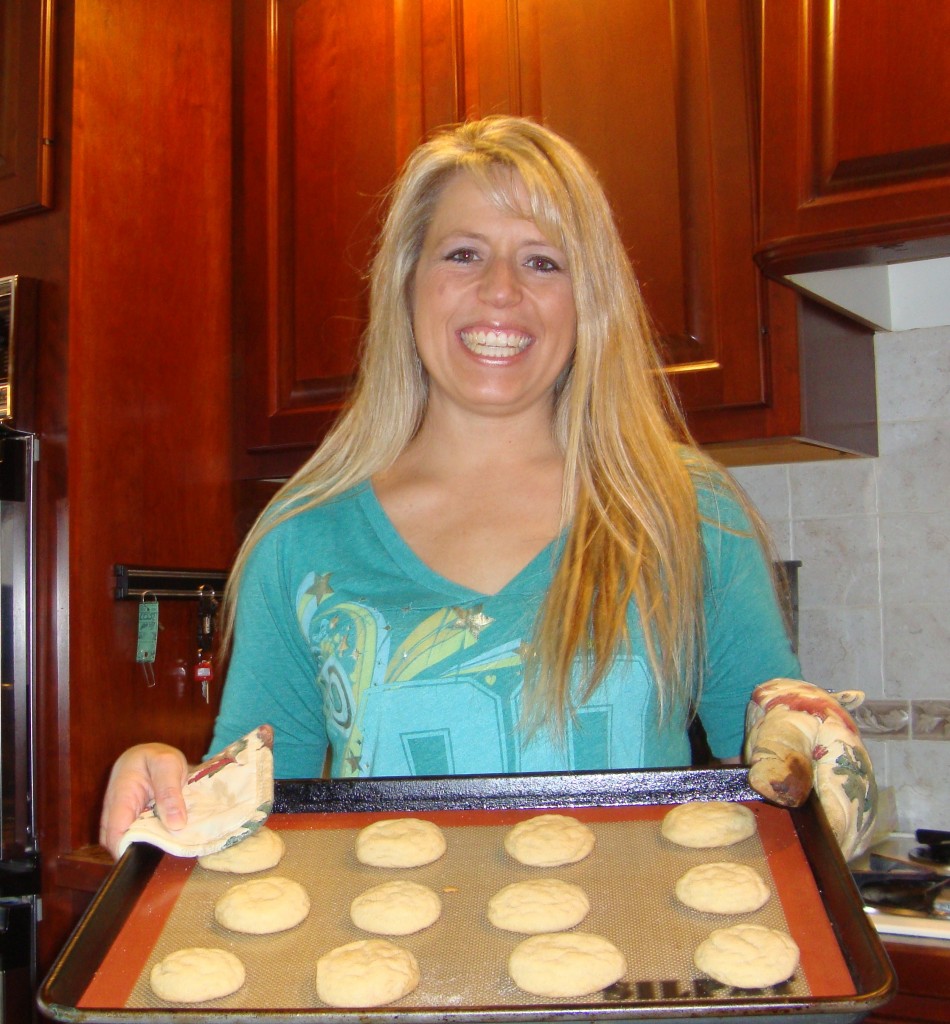
There is nothing….I mean- nothing, that smells as good as Snickerdoodles baking in the oven. Pair these up with a cool autumn evening, some hot apple cider and you will have yourself some very happy campers.

The thing I love most about this recipe is that you’ll likely have all the ingredients on hand. So, when you have no idea what to bake and take – remember this batter! They’ll be a hit….they always are in my home.

Courtney from Women Living Well is trying them out in her kitchen today…come take a peak and grab the recipe! 

The Silpat…girl, I love it! Those cookies look good enough to eat! You did AWESOME!!!!!! 


*Make sure to refrigerate the dough- it matters!

Signature

Sauteed Cabbage with Bacon

Sometimes we are just “at a loss” when it comes to side dishes….mashed potatoes and corn are lovely, but when you are in the mood for something different this sautéed cabbage hits the spot! This is something I remember my mom making for me as a child~ I always loved it and still do. It’s quick, simple, and tasty! Hope you’ll enjoy it too!

Brown 6 slices of bacon {I use center cut} in a large stock pot on med-high heat. Add 2 Tbsp of olive oil and 1/2 of an onion chopped.

Rinse cabbage , tear into small pieces, then place in the stock pot. Use tongs to stir well. Set stove to medium heat and let cook for appx 15-20 mins until tender.

Season with cracked black pepper and salt! Mmmm….


Sauteed Cabbage with Bacon
Prep time: 10 mins
Cook time: 20 mins
Total time: 30 mins
Serves: 6
Ingredients
  • 1 head cabbage
  • 6 slices bacon {I use center cut}
  • 1/2 onion chopped
  • 2 Tbsp olive oil
  • Salt/pepper to taste
Instructions
  1. On medium-high heat, brown bacon in a large stock pot.
  2. Add olive oil and onions- sautee for appx 3-4 mins.
  3. Rinse cabbage and tear apart in small pieces.
  4. Add cabbage into stock pot with bacon, renderings, and onions.
  5. Toss with tongs. Bring heat down to medium and let cook for 20 mins until tender.
  6. Season with salt and pepper.
Signature