Archives for September 2013

The Comfy Meal Plan {Week 3} and Winners Announced for WLW!

Comfy Meal Plan

Hi Ladies! It’s another week of “Comfy” meal planning! Thanks for all of your kind e-mails and comments. I hope this week’s plan will help you just as much. I know it always helps to get ideas (hand is raised).

Click Below for your FREE PDF!

Comfy Meal Plan Week 3

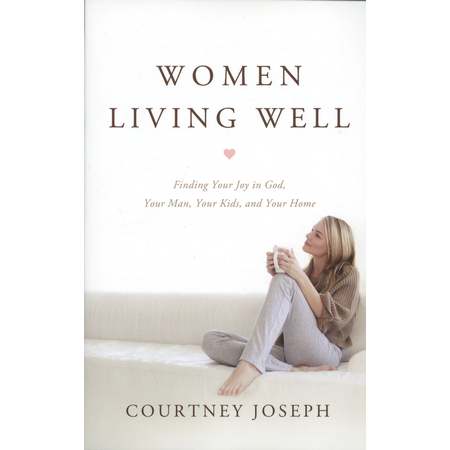
NOW….for the WINNERS of the book “Women Living Well” by Courtney Joseph!

(((drum roll please)))


 please e-mail me at JMNehrenz@me.com so I can get your addresses to give to

Courtney to send out your signed copies…

Monique Condon

Denice Adrian

Congratulations Ladies! 


Signature

“Comfy” Place Cards


IMG_2999

“I am the good shepherd. I know my own and my own know me.”~John 10:14

He know’s us by name..isn’t that amazing? The God of the universe, the All Mighty King, The One who keeps our hearts beating and lungs breathing…knows our names.

That makes me feel special…Think about it. If Elvis, Justin, Michael, whoever it is that just melts your heart in a most  silly (and yes, idolizing way) yelled out YOUR name in a large audience- wouldn’t you just be giddy beyond words? I bet it would be your Facebook status , you would tell people next to you…you’d call your moms,  daughters, neighbors and friends. I know it because I sure would!

Well guess what Sister- the most powerful, loving, true, honorable, Maker of all things knows YOUR name- brag about it. You are something. It’s true.

The reason I bring this up is because sometimes it’s nice to remind your loved ones how special they are. One way I’ve done this is by making very inexpensive place cards at their table settings. Nothing fancy…just “Comfy”. The above place cards are simple index cards – I typed in “Word” the names of my friends and taped them on the cards. You can also write a note , a prayer for them, or encouraging bible verse inside. Those of you who are “Comfy crafters” could probably give us  more ideas 😉

In some instances it’s also  nice because it gives ladies a specific place to sit. They don’t have to worry about offending anyone – They were assigned a seat and  can blame it on the hostess (haha). It’s also nice because, as a hostess, you can predetermine conversation by place settings.  It’s comforting to sit next to a person you know well, and with and a person you don’t know as well but may have something in common with. This could encourage a bond and possibly another friendship. That’s what it’s all about. Loving and connecting people to Him and to each other!

So, just a comfy little tip on hospitality. I hope you will take the baton and pass it along! Much Love to you! ~Janelle

Signature

The “Comfy” Meal Plan – Week 2


Comfy Meal Plan

Wow! What a great response I got last week after posting the first EVER “Comfy Meal Plan”. Thank you to all who commented and shared! 

Below is a very typical meal plan for my family and I. There are many gluten-free options listed (a shout out to my intolerant friends!), but they are naturally gluten-free- not the weird stuff you have to get at specialty stores and spend tons of money on…I don’t cook gluten-free for my family all of the time, there are times I cook a “glutenous maximus” entree then I make myself something gluten-free from the ingredients I used for them. 

Love to you, Janelle 

P.S. Friday’s meals are typically more “Kid-oriented”, but yummy for the entire family.


CLICK BELOW FOR YOUR FREE PDF! 

Comfy Meal Plan Week 2

Signature

I {Love} Fake Silverware

IMG_2902

By the looks of this photograph, who would guess that the silverware is “fake”?

I’m all about it…I just love “fake” silverware. Honestly, I am all about anything that can look nice, cost little, and be lost without a fret. Do you know what I’m sayin, Ladies? I know you do…

It’s called being “Comfy about it”. 

IMG_2862

I purchase my “fake” silverware for parties at a store called “Deals”-it costs $1 for 4 knives, spoons and forks. Not bad hu? I’ve also seen Target carry it.

Personally, I think it looks much better than the plastic colored kind. What do you think?

Signature

EASY Breakfast Pockets (Freezable!)

IMG_2813

Mmmm…these breakfast pockets are absolutely delicious. My children LOVE them. Best yet, you can eat them piping hot out of the oven, then freeze the rest overs to bake in the oven for a later time. Enjoy!

IMG_2792

Place 8 frozen Rhodes large dinner rolls in a prepared 9×13 pan. Spray the tops with Pam and cover with plastic wrap. Let rise for 4-6 hours until  frozen dough looks like so…

IMG_2794

Start making your filing…I chose cheese, eggs and bacon. You can put anything you like in these little pockets- eggs, ham and swiss…veggies, anything goes!

IMG_2797

For 8 pockets I used 4 eggs to scramble. I simply add 1 Tbsp of water, whisk together with a whisk or fork.

IMG_2799

Add 1 Tbsp of butter to a pan, on med/high heat scrape continuously with a plastic spatula until they are done. Add some salt and pepper as desired.

IMG_2800

Fry 8 slices of bacon and let drain on paper towels. Crumble.

IMG_2802

Take a roll and on a floured surface roll out as far as it will go in a circle.

IMG_2803

Like so…not to thin, not too thick…

IMG_2804

Add your cheese, eggs and bacon. Any other ingredients are a bonus 😉

IMG_2805

Fold up into a pocket

IMG_2806

Line em up!

IMG_2808

Brush with butter and place on a baking sheet. Bake in a 350 oven for appx 20 mins or until lightly golden in color.

IMG_2811

Serve hot out of the oven with some fresh berries

IMG_2813

Mmmmm…..I do love Rhodes dough, the aroma of it is ahhhhmazing. The mix of the hot bread,  gooey cheese and savory bacon and eggs make this a winner for the entire family. We’ve even had these for dinner!

Again- freeze the leftovers individually for a quick/on the go breakfast! 

EASY Breakfast Pockets (Freezable!)

Prep time:
Cook time:
Total time:
Serves: 8
Ingredients
  • 8 Rhodes frozen large dinner rolls
  • 4 eggs
  • 1 Tbsp water
  • 1 Tbsp butter
  • salt/pepper
  • 1 1/2 cup freshly shredded cheddar cheese
  • 8 slices of bacon; cooked and crumbled
  • Butter for brushing
Instructions
  1. Place 8 frozen rolls in a prepared 9×13 pan, spray tops of rolls with Pam and cover with plastic wrap, let rise for 4-6 hours.
  2. Pre-heat oven to 350 when dough is done rising.
  3. Scramble eggs with water. Add butter to skillet, scramble eggs- add salt and pepper as desired. Set aside.
  4. Roll out each dough ball onto a floured surface into a circle.
  5. Add fillings: eggs, crumbled bacon, cheese.
  6. Make into individual pockets by closing up all sides.
  7. Place every one on a baking sheet and brush with butter.
  8. Bake for appx 20 mins or until lightly browned.
Signature

“The Comfy Meal Plan”- Week 1

 
Comfy Meal Plan


Hi Ladies!

So often I get e-mails asking me to create a weekly meal plan. Well, here you go, my dear friends! This is a very typical meal plan for my family and me. There are many gluten-free options listed (a shout out to my intolerant friends!) but they are naturally gluten-free- not the weird stuff you have to get at specialty stores and spend tons of money on…I don’t cook gluten-free for my family all of the time, there are times I cook a “glutenous maximus” meal, then I simply make myself something gluten-free from the ingredients I used for them.


I hope this helps you this week-if so, let me know and I will continue to make meal plans for you on a week basis.  I would plan to post a meal plan on Fridays so you could gather up your ingredients at the store over the weekend.

Enjoy!

Love to you, Janelle

***Click the link below to download the PDF file. This PDF file has active links that will take you to each recipe! ***

Meal Planning 101 -week1

Signature

Mom’s Famous Homemade Apple Pie


IMG_2329

No one makes an apple pie better than my mom…the crust is flaky, the apples are tender, cinnamony and buttery. Mmmmm…I can go on and on! Serve this warm out of the oven with a scoop of vanilla ice-cream -I guarantee you’ll be back for seconds.

IMG_2985In a large bowl combine apples, butter, all spice, cinnamon, flour, brown sugar, and white sugar.

IMG_2986

Mix well.

IMG_2987

For crust, in a separate bowl, cut in shortening with flour. Yes, you can literally “cut” it in with two knives-it just makes little lumps, like so.

IMG_2989

Add remaining ingredients: milk, vinegar and salt.

IMG_2990

Mix with *clean* hands.

IMG_2991

Divide into two equal balls (one for the top crust, one for the bottom crust).

IMG_2993

Flour a surface and the top of the ball of crust well. Roll out to about 9 inches (enough to cover your pie pan and then some-you can eyeball it).

IMG_2995

Place bottom crust onto an un-greased pie pan and poke with a fork.

IMG_2996

Fill with apple filling.

IMG_2997

Do the same with the top crust and lay on top, pinch the sides together to close up the pie. Brush with egg white and sprinkle with cinnamon and sugar. Cover the crust with foil and bake in an oven pre-heated to 375 for 25 mins.

Uncover and bake an additional 25 mins or until lightly browned.

IMG_2329

Ohhhh YUM!

Mom’s Famous Homemade Apple Pie

Prep time:
Cook time:
Total time:
Serves: 8
Ingredients
  • Apple Filling:
  • 1/4 cup sugar
  • 1/4 cup brown sugar
  • 3 Tbsp flour
  • 1/2 tsp cinnamon
  • 1/8 tsp all spice
  • 6-8 peeled and cored apples sliced into bite sized pieces
  • 3 Tbsp butter, melted
  • Crust:
  • 2 cups flour
  • 1 tsp white vinegar
  • 1/3 cup milk
  • 1 cup shortening
  • 1/2 tsp salt
  • 1 egg white and a sprinkle of sugar and cinnamon for top of crust before baking
Instructions
  1. Pre-heat oven to 375
  2. For Apple Filling: Mix all ingredients together in a large bowl.
  3. For Crust:
  4. In a large bowl cut shortening into flour.
  5. Add milk, vinegar, and salt- mix with hands
  6. Roll into a large ball and cut into half.
  7. Roll both halves into 2 balls and pat with flour.
  8. Roll out on a floured surface with a floured rolling pin. Roll out to fit a 9 inch pie pan.
  9. Pie:
  10. Put first layer of crust onto an un-greased pie pan.
  11. Poke bottom of crust with fork.
  12. Pour apple pie filling inside.
  13. Place second layer of crust over top.
  14. Pinch both crusts together all around.
  15. Beat egg white and brush over top.
  16. Sprinkle with cinnamon and sugar.
  17. Wrap foil around crust line
  18. Bake for 25 mins, remove foil and bake an additional 25 mins until lightly browned.
  19. Serve warm with vanilla ice cream.

Signature

Piggies in a Blanket


IMG_2890

Looking for an easy appetizer for the (big and little) football fans in your life? Look no further, because these “Piggies in a Blanket” always get a touchdown! I’m so serious when I say -there are NEVER any of these left! lol! Serve with ketchup, mustard, and/ or BBQ sauce…and most of all, a side of fun!

Go Browns! hehe!

IMG_2883

Open crescent rolls and press edges together to make a full rectangle.

IMG_2886

Slice with a pizza cutter into smaller squares like so..

IMG_2888

Place a piggie in the center of each rectangle and bring up the opposite sides, twist and pinch together. Place on a prepared baking sheet and bake in a 375 oven for 12-15 mins until golden brown.

IMG_2890

Dig in!

Piggies in a Blanket

Prep time:
Cook time:
Total time:
Serves: 12-15
Ingredients
  • 1 Package of Lil Smokies
  • 2 (8 oz) cans of crescent rolls
  • Pam (for preparing baking sheet) or you can use parchment paper.
  • Condiments (ketchup, mustard, BBQ sauce, etc)
Instructions
  1. Preheat oven to 375.
  2. Drain lil smokies in a colander.
  3. Open 1 crescent roll container at a time – make a full rectangle out of each by pressing together the perforations.
  4. With a pizza cutter, slice vertically and horizontally to make small squares.
  5. Place a Lil Smokie in the center of each square, pull up opposite corners, twist and pinch.
  6. Pepare a baking sheet, place Lil Smokies on top, bake for 12-15 mins.
  7. Serve with your choice of condiments!
Signature

Garlic and Citrus Soda Shrimp


Garlic-Butter-Shrimp

Us moms can seem to run out of ideas when it comes to thinking of new entrees to make. We can’t always serve our families variations of chicken every single day, so we have to come up with new ideas. When I took a look at  the most popular entrees in MyRecipes.com , Jamaican Chicken with Mango Salsa, Diner Meat Loaf Muffins, Flank Steak with Shiitake Mushroom Sauce, Peppered Halibut Steaks, and Chicken & Summer Vegetable Tostadas were all at the top of the list. Sure, they all sound  delicious, but just a little too fancy for a family with kidos.  Sometimes it’s nice to keep things tasty, yet still “Comfy”….

Here’s a great recipe I wanted to share from the Filipino foodie blog Panlasang Pinoy, I love the addition of citrus soda (you can use 7-up or Sprite). I personally use de-shelled shrimp. But, whatever your preference- it will turn out deeeelicious! My little guy absolutely LOVES shrimp (So, I’m always on the look-out for fisherman’s sales!)

Even though this is a “Comfy” dish, it looks fancy enough to make for special occasions! If you’re more of a cook and less of a baker, check out Marks & Spencer  for beautiful birthday cakes! 

Thanks for the recipe Panlasang Pinoy! Love it!

Garlic and Citrus Soda Shrimp

Prep time:
Cook time:
Total time:
Serves: 6
Ingredients
  • 2 lbs Shrimp
  • 1 cup Lemon soda
  • 2 Tbsp Finely chopped parsley
  • 4 Tbsp Minced garlic
  • 1/2 cup Butter
  • Salt and pepper to taste
Instructions
  1. Marinate shrimp in lemon soda for 10-15 minutes.
  2. In a pan, melt the butter. Make sure it’s hot enough to cook the minced garlic.
  3. Add the garlic and cook until golden brown.
  4. Add in the shrimp; cook until color turns orange.
  5. Pour in the lemon soda and let it completely evaporate in the pan.
  6. Sprinkle the parsley. Add salt and pepper as needed.

***Shrimp has a lot of nutritional benefits! According to World’s Healthiest Foods, shrimp has two unique antioxidants: selenium and astaxanthin. Selenium reduces the risk of heart failure and other forms of cardiovascular diseases. Astaxanthin, on the other hand, is known to lower the risk of colon cancer as well as diabetes.

Shrimp is also an excellent low-calorie source of protein! 

Signature

Grandma Ruth’s Homemade Noodles


Noodles

As I was reading my sweet friend, Karen Ehman’s post over at Proverbs 31 Ministries, it brought me back to the times I, myself, walked into my grandma’s house while she was making homemade noodles. There were even times when Grandma was so busy with the other parts of the meal, she would yell to my grandpa, “Ray! Can you please come in here and cut these noodles, the broth is boiling and I’m doing a million things in this kitchen to get dinner ready!” (Us Italian women can get a little bossy- Grandpa was a good man).

Anyways, Grandma didn’t make those noodles because she had to…it was because she wanted to. Trust me, there were times when she’d make the “already made” egg noodles and we would all “call her out on it” saying, “What are THESE?!”…she’d grin and say, ” You people are spoiled, I have a full time job, I’ve raised 5 children,I keep a clean home….if you want homemade noodles, you make em.” We’d all laugh knowing we’d get her riled up -we were honestly completely content with the delicious meal we were eating… It was just fun seeing her make a fuss over noodles.

Now, as I’ve grown,  I can understand why Grandma made homemade noodles-and why she still makes them. Cooking, for some people, is like knitting for others. It’s relaxing…It may sound crazy, but it is. Cooking something homemade is also giving someone else the labor of your love…there is evidence in the smell, taste, and texture.

You can tell when something is homemade- a card, a meal, a floral arrangement, blanket, etc…it feels nice to make it and receive it.

Are there any homemade recipes that bring about good memories in your life? Would love to hear about them…

IMG_20130810_125242_225

Grandma Ruth and me- I LOVE you, Grandma 🙂


Grandma Ruth’s Homemade Noodles

Prep time:
Cook time:
Total time:
Serves: 10
Ingredients
  • The Noodles:
  • 4 egg yolks
  • 2 eggs
  • 1/2 tsp salt
  • 1 tsp baking powder
  • 3 Tbsp cold water
  • 2 cups flour plus more to desired consistency and for rolling
  • Chicken broth:
  • Small chicken cut up (legs, thighs, breast, wings); throw away the bag of the insides
  • Water enough to cover chicken
  • 2 tsp of chicken granules
  • 2 carrots
  • 1 stalk celery
  • 1 onion cut in half
  • 1 tsp black pepper
  • 
Instructions
  1. In a large bowl put in eggs and additional egg yolks and beat with a fork.
  2. Add salt and baking powder and water.
  3. Use fork and mix well again.
  4. Add one cup of flour at a time and mix with hands (take rings off your hands). 5. Add flour slowly to form a ball. This will be sticky.
  5. Add more flour if you need to so that you can roll it out.
  6. Roll out on a floured surface using a floured rolling pin until medium-thin thickness. Sprinkle with flour on top and let dry for 2 hours.
  7. After 2 hours, roll up dough into a cylinder shape..it will be long.
  8. Cut in half and slice noodles with a sharp knife/noodle cutter/pizza cutter.
  9. Lift up and the dough will fall into a noodle.
  10. To make the broth:
  11. Place chicken parts in a large stock pot and pour water enough to cover chicken.
  12. Skim the top to get fat foam off.
  13. Add chicken granules, carrots, celery, pepper, and onion for flavor .
  14. Boil chicken until tender..simmer on low for about 40 minutes.
  15. Pull out chicken and put in dish.
  16. You may add chicken back into the pot or use it for another recipe.( Our family likes just the white meat).
  17. Bring chicken broth to a boil, drop the noodles into the boiling broth and let simmer for 20 minutes.
Notes

If you don’t want the chicken in your noodles you can save it for another meal. Grandma says her dad’s favorite was when my great-grandma would take that chicken and coat it in flour and fry it in a pan with butter. That sounds good to me!


Signature