Archives for August 2011

General Tso’s Chicken (Low-Fat)

One of my husbands favorite dinners “to go” is General Tso’s Chicken. I agree, it is SO good…especially the kind at the mall, right? However, nutritionally speaking, it is enough calories for just about a full day-that is not even including the rice and the egg roll! According to the Center for Science in the Public Interest, a typical restaurant serving of General Tso’s chicken provides approximately 1,300 calories, 11 g saturated fat and nearly 3,200 mg sodium.

Here is a recipe courtesy of Weight Watchers (modified) that I just had to try. It yields 8 points for 1 cup of chicken and sauce and 1/2 cup of rice. Let me tell you…it is excellent. I actually enjoy this MORE than the mall’s version! Not only is it made with fresh ingredients, it tastes better, and doesn’t leave you “feeling sick” (do you know what I mean?) Anyways…you are gonna love it.

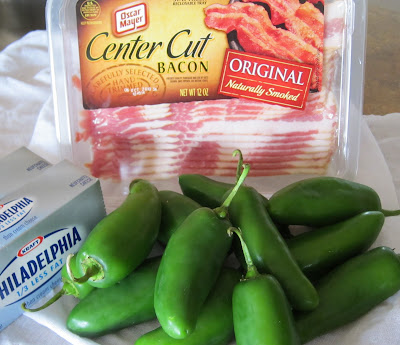
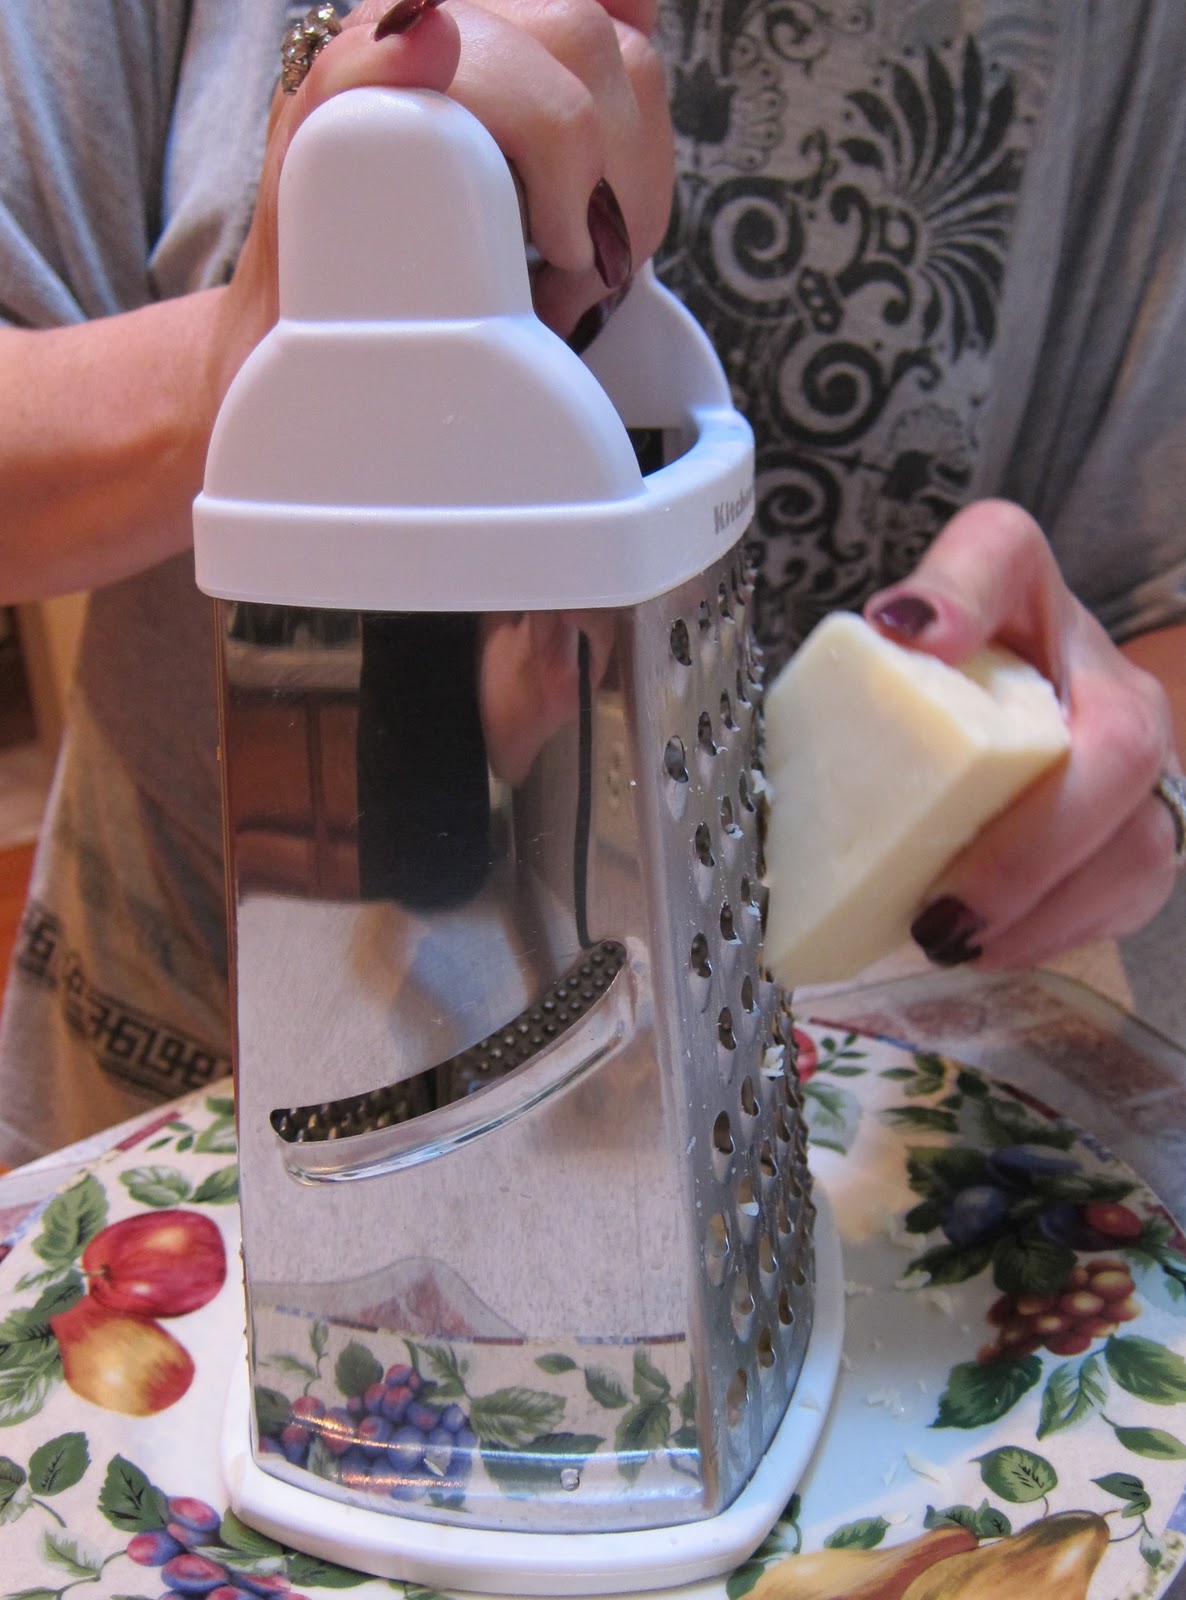
Preparing all my ingredients …

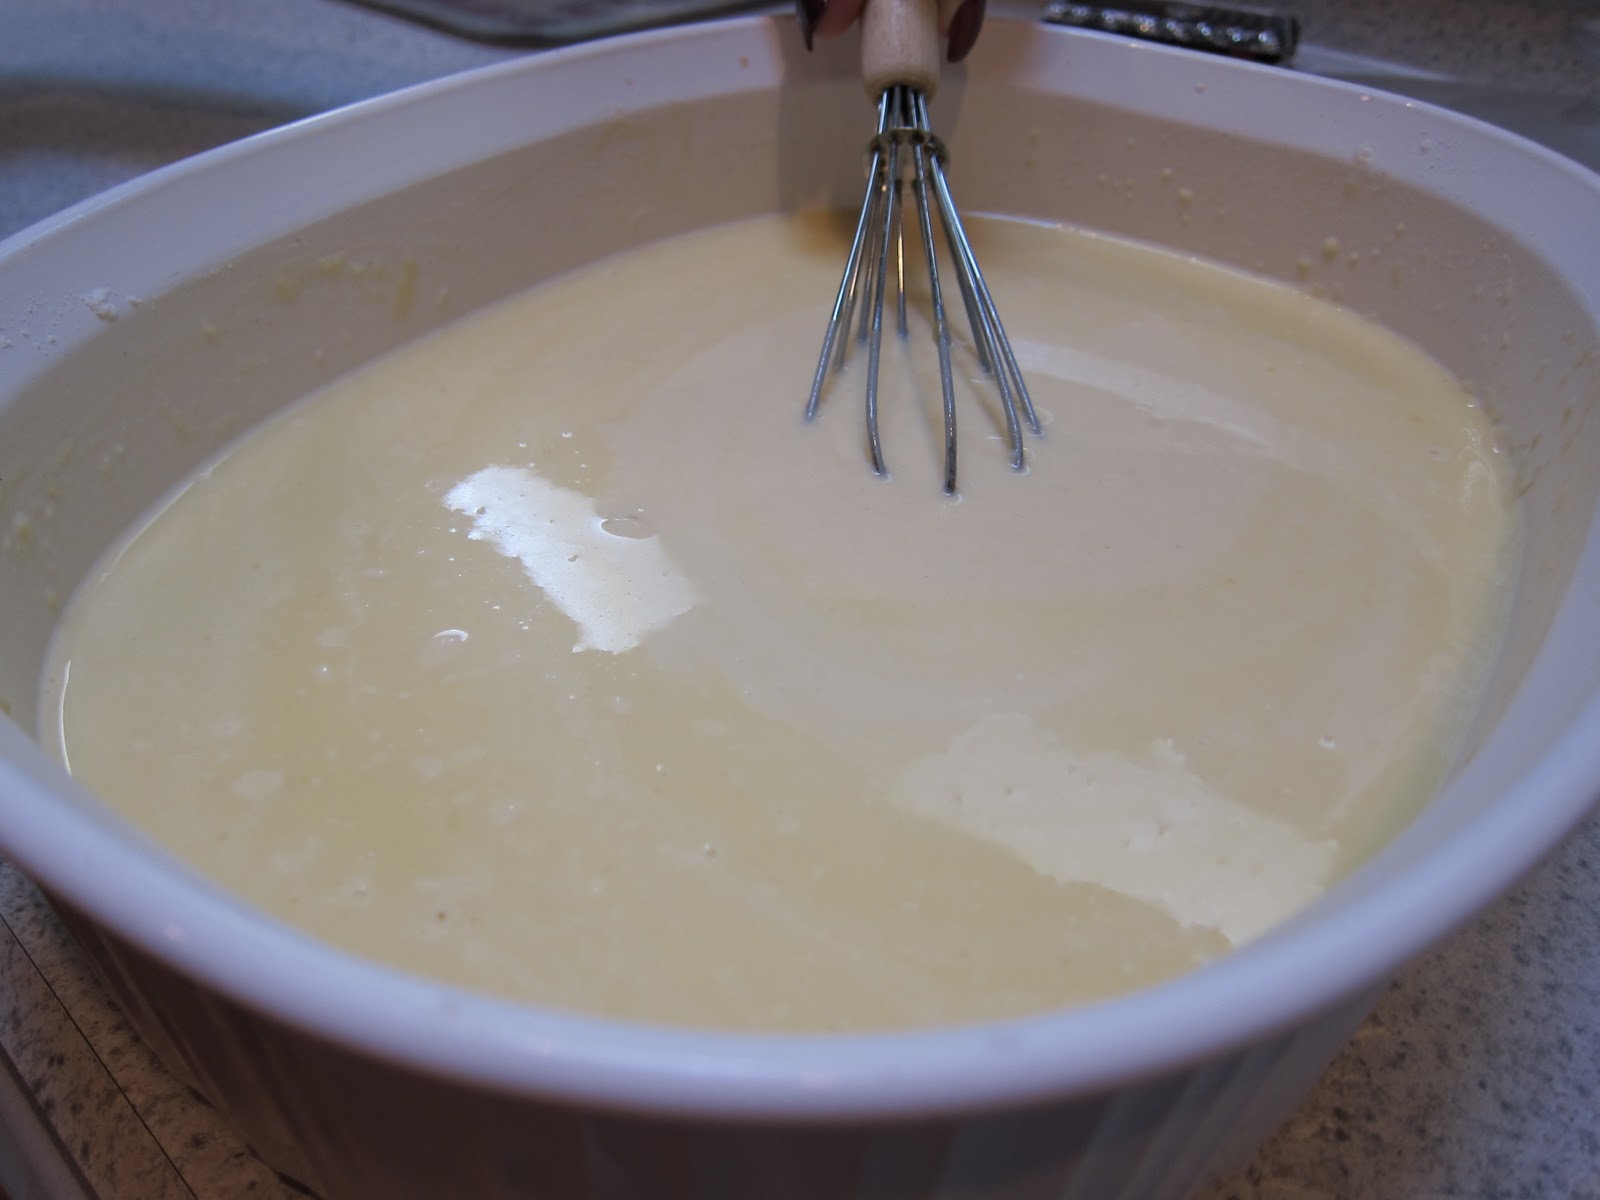
Teriyaki sauce, chicken broth, ginger, vinegar, sugar, cornstarch

Whisk together and set aside

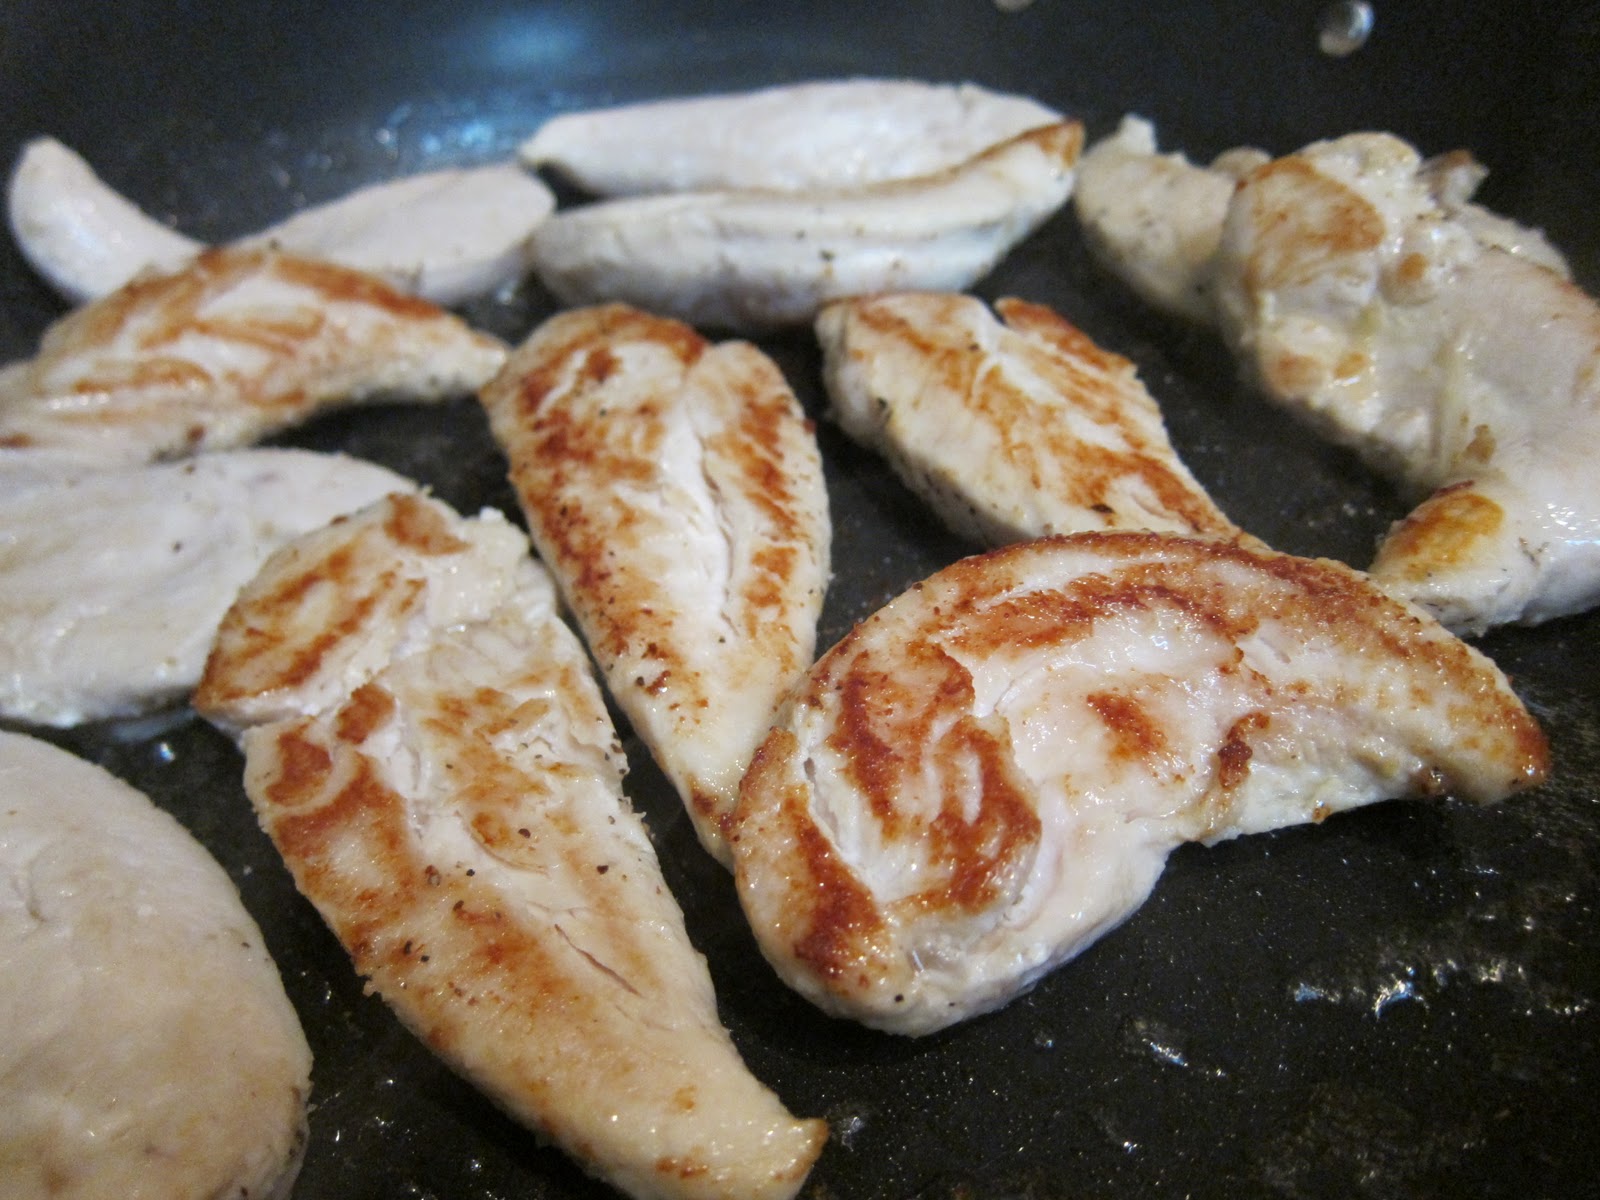
I slice my chicken at an angel like so when I quick cook (stir fry). 

Add oil to a heated wok, then add fresh garlic, scallions and 1/2 chili pepper -you will want to take some seeds out of your chili pepper. The more seeds, the hotter your dish will be. DO NOT underestimate the hotness! 

Add chicken and stir fry with a spatula-then add sauce. Stir until it thickens.


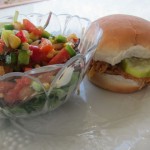
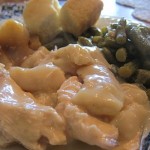
 Serve with rice. I will be making this over and over again….It made my hubby VERY happy!

I like to use Nishiki rice that I boil- it is stickier and much like the kind you get at a Chinese restaurant.

General Tso’s Chicken (Low-Fat)
Prep time: 20 mins
Cook time: 20 mins
Total time: 40 mins
Serves: 4
Ingredients
  • 3/4 cup(s) canned chicken broth, reduced-sodium
  • 1 1/2 Tbsp cornstarch
  • 2 Tbsp sugar
  • 2 Tbsp Teriyaki
  • 1 Tbsp white wine vinegar
  • 1/2 tsp fresh ginger
  • 2 tsp peanut oil
  • 2 medium scallion(s), chopped
  • 2 clove(s) (medium) garlic clove(s), minced
  • 1/2 of a chili pepper with most seeds taken out (FYI-seeds add heat)
  • 1 pound(s) uncooked boneless skinless chicken breast, sliced into 2-inch pieces
  • 2 cup(s) cooked white rice, kept hot -I use Nishiki rice (found in the Asian section of your grocery story), it only takes 20 mins to boil and is SO much better than instant.
Instructions
  1. In a medium bowl, whisk together broth, cornstarch, sugar, Teriyaki, vinegar and ginger.
  2. Heat oil in a wok or large skillet over medium-high heat.
  3. Add scallions, garlic and red pepper ; cook, stirring frequently, 2 minutes.
  4. Add chicken; sauté until browned all over, about 5 minutes.
  5. Add reserved sauce to pan and simmer until sauce thickens and chicken is cooked through, about 3 minutes.
  6. Serve chicken and sauce over rice.
Signature

A Great Date and My little girl goes to Kindergarten!

It honestly seems like yesterday when I first held my newborn baby girl in my arms. Now, she is almost 6 and has started kindergarten. I still hold her~ I always will…

The day before Kindergarten I took time away -just her and I- to have a “date”. A dear friend of mine, Kara, who leading a study this year called “8 Great Dates” by Dannah Gresh reminded me that I needed to take my little girl out on a date for this very special time in her life!

What little (and big) girl doesn’t love a tea party?!

Ok, maybe little girls don’t always love tea~ but hot cocoa will always do!

My lunch- I wish I had known it could be shared!!! Bacon and broccoli quiche, 4 tea sandwiches and more dessert than I needed in one day.

A princess feast of grilled cheese, gold fish, fruit kabobs with marshmallow creme, and gummy bears.

I could do this every day 🙂

This sweet tea room had clothes for little (and big) girls to dress up in…my quirkiness inspired the table next to me! All the grown ups including a grandpa were wearing “Sunday Best” hats! haha. These little girls were having a blast.

The first morning of school …

My “Morning Crew” 

So sweet…a picture of big brother in her locker!

With Daddy…

With baby Sis…she is going to miss her big Sissy!!!!

After pick up! She had a blast and did WAY better than I did!!!

All I Really Need To Know I Learned In Kindergarten

by Robert Fulghum

Most of what I really need
To know about how to live
And what to do and how to be
I learned in kindergarten.
Wisdom was not at the top
Of the graduate school mountain,
But there in the sandpile at Sunday school.

These are the things I learned:

Share everything.
Play fair.
Don’t hit people.
Put things back where you found them.
Clean up your own mess.
Don’t take things that aren’t yours.
Say you’re sorry when you hurt somebody.
Wash your hands before you eat.
Flush.
Warm cookies and cold milk are good for you.
Live a balanced life –
Learn some and think some
And draw and paint and sing and dance
And play and work everyday some.
Take a nap every afternoon.
When you go out into the world,
Watch out for traffic,
Hold hands and stick together.
Be aware of wonder.

Lord, please bless and watch over this little girl you have given me. Let her first year of school get her excited about learning. Please bless her teacher and each student in her class. Let her relationship grow closer with you and please let her be loved . Amen.


Signature

Feasting in Fellowship Friday 8/26

Girls, I have to tell you… I am going to need some PRAYERS today. I am ANOTHER year older AND my little girl is starting Kindergarten!!! How is this fair? There should be no tears allowed on birthdays, but I have a feeling they will be flying.

HAPPY BIRTHDAY also to my birthday TWIN Courtney at Women Living Well! 

Dear Courtney,

Your friendship has been such a blessing to me. Thank you for all of your sound advice, for hostessing bible study, and for being a wonderful friend and Sister-In-Christ! I believe our friendship was God-made and am so thankful for you! Have a BLESSED birthday my friend!

Aug 26 rocks.

Friday’s Top 3

Grilled Fry Bread


Made by: This.That.And the Other…

Lemony Mint Ice Cubes=Spa Water! Genious!

Made By: Catz in the Kitchen


Homemade Ice Cream– NO ice cream maker needed!

Made By: Chocolate isn’t a vegetable?

It’s Feasting in Fellowship FRIDAY! Please link up as many recipes as you wish and place my button on your post.(on sidebar)

Can’t wait to see what YOU have cooking!


Signature

Strawberry Pretzel Salad

Chances are, if you live in the US -you have had this delicious dessert. It is a staple at all my family get togethers. Let me tell you, there are NEVER leftovers of this! I have had many requests to make this on the Comfy blog…so here it is Ladies!!! The pretzel crust along with the cream cheese and strawberries offers a sweet and savory mixture that is SURE to please everyone in your family!

I made this for our bible study…but I knew I had to make a small extra one for my family or I would be in BIG trouble.

By the way- my recipe has a thicker pretzel crust than most…it’s better that way, oh yumm!!! 

Make Jell-O with water according to package directions. Then, take off burner and add frozen strawberries. I do the Jell-O part first so that it is nice and cooled when I am ready to use it. The frozen strawberries help cool it down as well.

Crush your pretzels in a large Ziploc bag with a mallet

Add butter and sugar and stir with spoon. Bake in a prepared 9×13 pan for 7 mins in a 400 oven.

Beat cream cheese and sugar together with mixer

FOLD in cool-whip until well incorporated…this is IMPORTANT!

 Line up all of your ingredients. Crust should be completely cooled (don’t cheat), Jell-O should be cooled (don’t cheat)

Spread cream cheese mixture onto your pretzel crust

 Make sure to spread it evenly and all the way over to the edges!!! If you don’t your Jell-O will spill over and go under your crust.

Pour on the Jell-O /strawberry mixture. Place in refrigerator until well set.

A VERY special treat!

Strawberry Pretzel Salad
Recipe Type: Dessert
Prep time: 40 mins
Cook time: 7 mins
Total time: 47 mins
Serves: 12-15
A delicious dessert that is sweet, savory, creamy and crunchy. When in doubt, make this….it is a favorite in our family.
Ingredients
  • 3 cups crushed pretzels
  • 1 cup melted butter
  • 4 tablespoons sugar, plus 3/4 cup sugar
  • 1 (8-ounce) package cream cheese
  • 1 (8-ounce) container whipped topping
  • 2 (3-ounce) packages strawberry gelatin dessert mix
  • 2 cups boiling water
  • 2 (10-ounce) packages frozen strawberries
Instructions
  1. Preheat oven to 400 degrees
  2. Make Jell-O with water per package instructions.
  3. Take off burner and add strawberries. Set aside to cool.
  4. For the crust, mix the pretzels, butter, and the 4 tablespoons of sugar.
  5. Press pretzel mixture into a 9 by 13-inch pan and bake for 7 minutes.
  6. Set aside on wire rack to cool.
  7. In a mixing bowl, beat together cream cheese and 3/4 cup sugar
  8. Fold whipped topping into the cream cheese mixture.
  9. Once crust and Jell-O is cool you are ready to put your salad together!
  10. On pretzel crust, spread cream cheese mixture evenly then pour Jello with strawberries on top
  11. Refrigerate for 3-4 hours until well set.
Notes

Please be sure to spread cream cheese mixture evenly and up against the edges of the pan…this will ensure that the Jell-O will not seep to the bottom under the pretzel crust.

Signature

Meal Ministry Monday Welcomes FMSC and Ingrid

Love the Lord your God with all of your heart, soul, and mind. This it the first and greatest of my commandments. The second is like it. Love your neighbor as yourself

~Matthew 22:37-40

A couple of weeks ago I received a letter from an online friend, Ingrid from “Reaching His Kids” , she shared with me and some fellow bloggers about how devistating the famine in Africa has been on it’s people. It has been recorded that  29,000 children, under the age of 5, have died in the last 90 days. This famine has impacted Somalia, Kenya and Ethiopia.  Food costs have risen 50% and crops have been damaged because of less rain.

When I got this e-mail I thought about how fortunate I am…I have never felt “hunger” in my life. Starvation… It is just so unnecessary. 

Ingrid didn’t stop at her letter, she decided to go forward and see what was happening to help this crisis. She found a non-profit organization called “Feed My Starving Children”…I will let her take it from here….

The Ultimate Meal Ministry
How do you feed a starving child? It’s easy…
Chicken, veggies, soy, rice…YOU!


Feed a starving child recipe
2 Tbsp of protein powder, vitamin enriched with chicken flavor
1 Tbsp of dried carrots and potatoes
1 cup of soy
1 cup of rice
YOU!


You mix ingredients in the order listed above, package with love, seal with zeal and send with prayer.

Once the package is received ingredients are boiled in water and a child is fed.
It really is that simple!


FACT: 18,000 children will die today because of malnutrition. There is NOT a food shortage in this world, there is a food distribution problem. 

Feed My Starving Children is a Christian 501(c)(3) non-profit organization based in Minnesota. This meal ministry started in 1987 when a local businessman traveled to Honduras. After witnessing incredible needs, he returned and began working with local food companies. After a couple years of sending food donations, he received feedback that the highly processed food was not meeting nutritional needs. He switched gears and worked with food scientists to develop a meal that would meet nutritional needs of children ages 5-8, be acceptable worldwide, have a long shelf life and be easy to prepare. The “recipe” above was created and is still used today. Over the years FMSC has had food scientists and nutritionists reevaluate this meal and they are told it is just what starving children worldwide need.

This ministry is AMAZING! Volunteers, as young as 5 years old, pack the food. It is a hands on way to fight poverty, educate people and provide “local mission” opportunities. This ministry is growing. In 2003 they packaged 3 million meals and in 2011 the goal is 127.5 million! FMSC provides meals free to over 120 mission partners in over 70 countries. The goal is that mission partners are working to make long-term changes in their communities. FMSC is providing the food which is the fuel to help these ministries do the sustainable work. It is piece of fighting global poverty. It truly is a meal ministry!

Last year FMSC had over 500,000 volunteers package their food in 6 permanent locations (3 in MN, 2 in Chicago and 1 in Temple, AZ) and mobile packs. Through their mobile packs churches and organizations all over the country can pack meals on site. You raise the money and FMSC will bring a semi of supplies and staff to oversee and instruct your group.

No doubt you have seen the recent news about the famine that is plaguing eastern Africa. FMSC has committed to packaging 5 million meals to help with the crisis. They are raising additional funds to meet this need. As a believer, living in America, I know that God has blessed me with knowledge, resources and abilities (like blogging!). In Luke 12:48 it says,

“…from everyone who has been given much, much will be demanded; and from the one who has been entrusted with much, much more will be asked.”

In this passage Jesus is telling his disciples a parable about the master, who is returning, and his servants are to be ready. The master wants to find them faithful and wise managers of what he has given them. It is interesting that this section, Luke 12:35-48, immediately follows several verses that begin with, “Therefore, I tell you, do not worry about your life…” (Luke 12:22) and goes on to speak of the lilies of the field and how if God cares for them how much more will he care for you? So don’t worry! You have enough, more than enough, so what are you to do with what you have? Perhaps, feed a starving child?

This famine is real, children are at risk and they are dying. Even without a famine 18,000 children die everyday because of malnutrition. And we eat and eat and eat.

I recently visited FMSC, interviewed staff and photographed a packing session. It was neat to see people who have been given SO much, giving back. Check out the pictures below to learn how these meals are put together with love!

FMSC staff giving a demonstration to volunteers. 

Volunteers package the meals in 2 hour packaging sessions. Many churches, individuals, businesses and both Christian & public school groups participate. The day I visited a group of summer interns from US Bank were volunteering. 

FMSC orders the 4 ingredient in bulk. It costs $.24 per meal. 93% of all donations go toward the meals. 7% cover fundraising, administration and overhead costs.


After ingredients are packaged they are weighed.

Sealed with zeal!


Packed 36 count into shipping boxes.

There are jobs for everyone, ages 5 to…!

Packed With Love by Volunteers!

In 20 years 99.97% of shipments have reached their intended destinations. FMSC believes that it is because every pallet is prayed over!

Check out FMSC’s website www.fmsc.org TODAY and get involved in THE ULTIMATE MEAL MINISTRY!
Would you please consider/pray to be a part of this meal ministry? Also, would you pray for the many currently starving people in Africa today?
My Photo
Ingrid and her husband Dan
Dear Ingrid, Thank you so much for your willingness to LOVE and SERVE others!!! You have such a beautiful heart for those who are in need…God is using you in a very big way. This Meal Ministry has been such a BLESSING to me. 


Signature

Feasting in Fellowship Friday 8/19

Happy Friday!


Come visit me over at Women Living Well Ministries where I share my Baked Chicken Fingers recipe! While you are there, be sure to browse around…you will be blessed!


Top 3 picks from last week!

Preserving Summer Sweet Corn

Made By: Our Simple Country Life

baggedcorn2

String Cheese Pencils

Made By: Money Wise Moms

Marshmallow Flower Cupcakes

Made By: Happy Little Homemaker

It’s a Feasting in Friday Linkup! Please feel free to share AS MANY RECIPES AS YOU WISH! All I ask is that you would copy and paste my button (located on my side bar) to your recipe’s blog post. Thanks for sharing what YOU have cookin!

Signature

Stuffed Bacon Wrapped Jalps


When I was visiting “The Taste of Hudson” a few weekends ago with friends, one of our friend’s Andy ordered these at the Hudson’s restaurant booth. He and my husband went crazy over them. I curiously looked at his “boat cup” filled with these things that I have never seen before and thought “These don’t seem so hard to make!” Hmmm…so here we are, a delicious 3 -ingredient recipe that will be perfect to serve your guests! Who would have thought it could be this easy!?


Start out with a package of bacon, a dozen jalapenos, and 1-2 bricks of cream cheese

Slice jalapeno in half length wise

Scoop out the inside and seeds with a serrated spoon (or something of the like) In this step you can choose how much heat you like in your jalps..the more seeds you leave in the hotter it will be, if you like a mild flavor than scoop out all seeds. I like to leave a few in.

 Slice your bacon in half. Now you have your hollowed Jalps, your brick of cream cheese, sliced bacon and your tooth picks

Simply fill the Jalp with cream cheese to the top

Wrap bacon around and fasten with a party pick

Place your Jalps on anything that will allow bacon grease to drain (broiler pan would work great here)

I used a baking rack and placed a pan at bottom to collect drippings. Bake at 425 for about 15 mins or until your bacon is done. You will be AMAZED how delicious this recipe is!


Stuffed Bacon Wrapped Jalps
Prep time: 10 mins
Cook time: 15 mins
Total time: 25 mins
Serves: 24
Ingredients
  • 12 Jalapenos
  • 1-2 bricks of cream cheese (I used low-fat)
  • 1 package of Bacon (I used center cut for less fat but full flavor)
Instructions
  1. Slice jalapenos lengthwise
  2. Scoop out innards with a serrated spoon.
  3. Fill with cream cheese.
  4. Cut bacon slices in half, wrap around Jalp, fasten with a party pick.
  5. Place on a broiling pan.
  6. Bake in a pre-heated 425 oven for appx 15 mins or until bacon is done to your liking.
Signature

Katja’s Homemade Spaetzle

The internet has been such a blessing in my life… not only have I met Sister’s in Christ I would not have met, I have had the blessing of meeting ladies ALL over the WORLD! Katja is one of those friends that I feel very blessed to know and she comes to us today from Germany sharing a deeelicious recipe. 

Spaetzles just so happen to be one of my husband’s FAVORITE side dishes. Here in America…they sure don’t come easy. We have a favorite German restaurant that serves these but, I have yet to make them. I asked Katja for her recipe and she was so kind and wiling to share. Thank you SO much Katja!

My Photo

Visit Katja at her blog: Ein bisschen Haushalt– be sure to click on the “translate” button! 

Homemade Spaetzle

One of my children’s favorite dish is „Spätzli with cheese and bacon”. Spaetzle is a typical German/Austrian dish and every area has it’s own way of preparation. In Austria Spaetzle are called Nockerln. In south-west Germany the Spaetzli are a little big longer whereas the Swiss “Knöpfli” or the Austrian “Nockerln” are smaller and round. You can eat them as a side dish or as a main meal. A very well known way of serving them is called: “Kasspatzn” where the Spatzli are layered with roasted onions and shredded cheese in a ovenproof bowl and baked.


Here is our favorite recipe:


For the dough for about 4 servings you need:

 1 cup wheat flour

1 cup whole-grain flour

3 middle-sized eggs

1 cup sour cream or plain yogurt

Salt

Additional: Onions, Oil, Bacon and grated cheese

Mix flour, eggs, yogurt (or sour cream) and salt until smooth.

Boil salted water in a big pot.Take the pot off the oven and

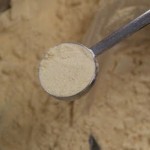
 strain the dough through a Spaetzle-Sieve.

Bring to a boil until the Spaetzle come to the top.

 Pour off and set aside.


In a pan heat up oil and brown onions (cut in stripes), add bacon and Spaetzle. Add butter if you like. Before serving add cheese.

Guten Appetit!


Greetings from Germany!

Eure Katja

 Thank you so much for guest posting today Katja! I can’t wait to make these for my husband..he will be so surprised! 


Signature

My Favorite Bridal Shower Gift (10 years ago)

 Ten years ago my Aunt Kelly sent out invites to my bridal shower in which she included 2 recipes cards and the note below. When guests arrived the day of my shower, they placed their recipe cards in a recipe box my mom purchased for me. This present has been a continued blessing to me-and now (hopefully) a blessing to you. My blog is a “living” version of my family recipes which came about from this very gift.

If you have a friend or relative who is getting married. Please think about doing this for them…it is SO special!

The very letter


 My recipe box given to me on the day of my shower by my mom.


 Does this look familiar? I think stains add character, don’t you?


Signature

Meal Idea-Quick n easy saves the day!

So, I went to my local farmer’s market and would you know that they had pre-shredded cooked white meat chicken in their freezer!? I thought that purchasing an already roasted chicken was a short cut…I hit the jackpot here! This is just a quick example of one of my dinners last week…it’s “Weight Watcher’s” friendly.

A simple mixed green salad with homemade salsa (which I prepared the night before).

The sandwich is simply the shredded chicken, mixed with 1 cup of BBQ sauce, and heated through on the stove top. Then I served it on a bun topped with a sprinkle of freshly shredded cheddar cheese and deli pickles.

* For homemade chicken sliders please see my friend Lisa over at Simply. This.That. And the other..

Signature

Pittsburgh (with an h)

We just got back from a wonderful weekend in Pittsburgh! Here are some photos I thought I would share! We visited the Pittsburgh Zoo and Aquarium, Idlewild Park and The Pittsburgh Children’s Museum. We also stopped at “Primanti Brothers” for lunch…this is where I ordered a “turkey sandwich” and received a delicious monstrosity of homemade bread, turkey, cheese, cole slaw and french fries. I struggled to finish half of this sandwich! What a neat place…my hubby bleeds orange and brown (Cleveland Rocks) so he was a bit out of his element being submerged in Steeler’s Town. But, we managed to blend in enough and get along just fine on the strip! I have to say ladies….my favorite pit stop had to be this little frozen yogurt place called “Razzy Fresh”- there were so many different flavors to choose from and it was all buffet style. I think it is the “trend” in the city because there were TONS of people walking around with the “Razzy Fresh” cups in hand. I would have gone here every night if I didn’t have a conscience! I tried the cake batter frozen yogurt with peanut butter cups and cookie dough…oh yum. You girls who live in the Burgh must have serious will power!

A HUGE thank you goes out to the ladies who gave me advice on where to go- AWESOME suggestions! SO sorry I spelled your city wrong..lol. I need grace…any givers?!

Signature

Creamed Chicken Crepes- My family’s FAVORITE

OH BOY! Here it is! This is my most requested recipe!!! These Creamed Chicken Crepes have been in my family for years. My grandma made this “copy cat” recipe which was inspired from one of her favorite restaurants…she passed it to my mother and she on to me. I make these most often for company because they are just so beautiful served in individual “au gratin” dishes…it truly is a special dinner for our family. I may be in trouble for sharing…but it will be worth it, I know you will enjoy this one…..

(my mom and I are cooking together in this photo-it was my birthday dinner!)

Shredding a block of Swiss cheese-it melts better and is creamier than pre-shredded 
Well worth the extra effort….trust me?
Mom made the crepe batter before I came over- she should have known better! haha. I have the recipe at the bottom..it is so simple.
Place butter in a med-high heat pan and add chicken tenders- season with salt, pepper, and onion powder.
Cook until lightly browned
Place to the side and cut with a fork and knife into bite sized pieces
In a well buttered pan, on med-high heat place about 1/2 cup of crepe batter into a small pan (this is an omelette pan)
Cook until lightly browned and flip over
Flip in half
Place each crepe into each au gratin dish and place 1/2 cup of cut chicken on top of each
Start making your basic white sauce: In a saucepan on med heat melt butter, then add flour to make a “rouge” -it will look like a paste
Add milk, salt and pepper. Whisk all together…then continue to stir until it thickens..it will take about 20 mins. 
Pour approximately 1/4 cup of white sauce over top of chicken and crepe
Add shredded cheese to cover- place under pre-heated broiler until lightly browned
Serve this on top of a plate (the dish will be hot!) accompany with french bread and salad. 
Save your extra crepes for the next morning! 
Creamed Chicken Crepe Recipe
(serves 8)
Crepes:
¾ cup of milk
½ cup water
2 eggs
1 cup flour
1 tsp vanilla
1 tsp sugar
Mix all ingredients well with mixer and toss in refrigerator for at least an hour
Shred 2 lbs of Swiss Cheese
Chicken
Appx 20 boneless chicken tenders (you may also use chicken breasts and cut up)
Sauté in butter over medium heat in batches.
Sprinkle salt, pepper and onion powder to your liking.
*set aside and cut into bite sized pieces
White Sauce (6 cups)
¾ cup flour
¾ cup butter
6 cups milk
salt & pepper
Stir flour and butter into a pasty consistency, then whisk in milk. Add salt and pepper. This mixture may take about 20 mins to thicken, but it will..I promise. Keep the heat on med-low to avoid scalding.
Making the crepe-
Butter omelet pan and add approx 1/2 cup crepe batter to pan and roll the pan around to spread evenly. Wait until crepe begins to bubble and flip over. Each crepe will be made individually- this is not hard, but takes a little of your time. The first crepe never turns out as good for me like the rest..do not be discouraged. Stack them up on a plate together; they will not stick to one another.
Assembly:
You will need 6 large 9 ½ “ “Au Gratin” dishes. (I bought mine at Marcs for 50 cents a piece).
1.     Place one folded crepe on bottom of dish
2.     Place cut/cooked chicken on top of crepe
3.     Pour appx 1 cup of white sauce on top of chicken
4.     Sprinkle with freshly shredded Swiss cheese
Broil individual dishes until lightly browned on top. Serve on top of dinner plate with napkin in between the two dishes to avoid slipping. Serve with fresh, crusty French bread and salad.
Notes:
My children prefer just the crepe part of this meal with syrup
 I like to make 2 x the crepe batter and we have dessert crepes for after dinner. (I warm up the crepe in the microwave, put a scoop of ice cream on top, ladle hot fudge, strawberries and whipped cream)You may also use the crepe batter for breakfast the next morning. I would keep batter up to 3 days before pitching.If there are extra ingredients, make more crepe dishes and stop right before you broil and put them straight into the freezer covered with plastic wrap then foil….when you want to eat them put them from the freezer into the oven removing plastic wrap, and replacing foil. Bake for appx 35 mins or until bubbling, then turn broiler on to brown top of cheese.
Signature

Feasting in Fellowship Friday!

Happy Friday Ladies!

Thanks for linking up last week…those recipes looked DEEEElish! I wonder what you have cooking this week? Hmmmm……I can’t wait to find out! Keep serving your families, friends, and community! Your gift of hospitality is more precious than you could ever know…

Homemade Waffle Cones

Made By: This.That.And the other…

Homemade Hummus

Made By: My Heart’s Desire

Loaded Twice -Baked Potato Casserole

Made By: One Small-Town Girl


It’s a “Feasting in Fellowship LINK-UP”!!!

Please link your recipes below and add my button (on the sidebar) to the bottom of your post on your blog! Thank you for sharing!


Signature

Pineapple Pretzel Fluff


This is my “go to” dessert recipe for large crowds…I have made this many times for the church. It never fails that I get asked for the recipe. In fact, this may be the recipe I get asked for the MOST! lol! It is SO easy to make and is deeeelish! My mother in law first made this and brought it over to my house…and since then I have made it more times than I can count!

Pineapple Pretzel Fluff

1 cup coarsely crushed pretzels

1/2 cup butter or margarine, melted

1 cup sugar, divided

1 (8 ounce) package cream cheese, softened

1 (20 ounce) can crushed pineapple, drained

1 (12 ounce) container frozen whipped topping, thawed

Directions

In a bowl, combine pretzels, butter and 1/2 cup sugar. Press into a 13-in. x 9-in. x 2-in. baking pan. Bake at 400 degrees F for 7 minutes. Cool.

Meanwhile, in a mixing bowl, beat cream cheese and remaining sugar until creamy. Fold in pineapple and whipped topping; chill until serving.

 Break pretzel mixture into small pieces; stir into pineapple mixture and layer some along the top.


This recipe was featured on www.womenlivingwell.org 

I am participating in

Signature

Finger Jello -This is how ya make it…..

Have you ever made the Jell-o Jiggler recipe on the back of your Jell-o box only to be disappointed because it just wasn”t solid enough to cut?  Well, here is secret you all have been waiting for…..drum roll please! (lol)

I posted this recipe back in December, but because I have made this SOOO many times this Summer…I thought I would share it again with more photos. My children LOVE when I make finger Jell-O. I am officially a very cool mom just because I bring finger Jell-o to play dates. That is all it takes girls…

Making finger Jell-O for the masses….lol.

My son’s buddy enjoying a good ole fashioned kid lunch at our playdate.

Finger Jell-O

3 small boxes of Jell-O
4 envelopes of Knox gelatin (the secret!)
4 cups boiling water
Whisk all together in a 13×9 pan (no cleanup) and refrigerate until firm. Before cutting, dip the bottom of your pan in warm water.

 (Thanks Grandma Puppies!)

Signature

Easy Chicken n Dumplins!


“Out of the top 10 comfort foods ever, Chicken N Dumplins just HAS to be on top of the list! This particular recipe cuts out hours of preparation by using a canned chicken broth and a ready- roasted chicken (no dicing veggies and boiling chicken here!). My entire family gobbles this meal up!! I have also been known to make this for friends/family who need a meal if they are sick…it is easy to transport in a covered plastic container.”


Chicken broth, a pre-roasted chicken from your grocery (deli area-$5.00 per chicken at Giant Eagle), flour, baking powder, milk, salt and pepper

Place the 6 cups of chicken broth in a heavy sauce pan and boil on high.

Peel skin away and discard…flake off medium sized chucks of white meat with a fork.

set aside chicken

To make the dumplins (DO NOT be leery, this is so simple!!) : Combine the flour, baking powder, 1 1/4 tsp salt and milk in a medium bowl. Stir well until smooth, then let the dough rest for 5-10 minutes.

This is what your ball of dough will look like…not fancy!!

Sprinkle flour on top of your counter…again, this is not a fancy step. Place the dough ball on the flour and add a little flour to the top of the dough ball so it will not stick to your rolling pin. Roll out the dough. Dough is very informal so please don’t get yourself upset during this step..roll it out until it is about 1/2 inch thick.

Take a knife or a pizza cutter (even better) and cut 1/2 inch squares

Toss your squares of dough into the boiling broth (turn the broth down to a med-high)

Keep tossing them in..they won’t stick to each other! They will puff up and the flour from them will dissolve into the broth and make a gravy..isn’t that easy?!

Add in your chicken and flavor with pepper. Because we used pre-made chicken broth DO NOT add any salt until you eat…broth is very salty on its own.

A delicious homemade meal!

Chicken n Dumplins made EASY!

1 Pre-Roasted Chicken (near your grocer’s deli area)

6 Cups Low Sodium canned chickenbroth

1 Cup water

Dumplins

2 cups all purpose flour

1 Tbsp baking powder

1 ¼ teaspoon salt

1 cup plus 2 Tbsp milk

Directions:

Pour your broth and water in a large heavy saucepan/pot and boil on high heat. Peel back and discard chicken skin and flake off medium sized chunks of your chicken and set aside.

To make the dumplins: Combine the flour, baking powder, 1 ¼ tsp of salt and milk in medium bowl. Stir well until smooth, then let the dough rest for 5 mins. Roll the dough out onto a floured surface to ½ inch thickness. Cut ½ inch squares with a knife or pizza cutter.

Drop each square into the simmering broth. The dumplins will swell then shrink as they partially dissolve to thicken the broth into gravy. Simmer 20-30 mins until thick. Stir often. Add chicken and cook another 5 mins. Season with pepper (no salt needed because the broth is salty enough). Enjoy!

I am participating in

Signature

Weeknight Dining-Baked Chicken Fingers and Fixins

Nothin fancy about it Ladies! But, it’s still tasty! (and I trimmed some fat/calories too!)

Many people have asked me what I do for weeknight dinner planning. How do I know what to make? What do I pair with what? How do I make something quick, easy, tasty, healthy…

Well, this is just one dinner “on the go” that I made last week.

Football season has started, which means I have to say goodbye to my boys (coach hubby and my son) a lot quicker than I would like in the evenings. So, dinner needs to be set out by 5:15 and by 5:45 -we have prayed, have eaten, and have said goodbye for the second half of our evening! *tear*

Just because we are a busy family doesn’t mean that we must  run through McDonald’s every night (I must admit, I have made those trips though!)…but I also know that I just can’t make huge elaborate dinners every night either. This is where the “easy middle” comes in…

My goal is this:

Meat, Starch, Veggie

That’s it!

These are homemade baked chicken fingers. They are SO easy. I baked them on the top rack of the oven…

And place red potatoes on the bottom rack.  I rolled them in olive oil and covered them in salt-

I baked them at 425 for 45 mins. These were set in before the chicken fingers because they take longer to cook. But, they can both be cooked in a high degree oven! That helps!

While those two items were baking, I sauteed asparagus on the stove in olive oil. I added salt and cracked pepper.

This is my plate (I typically show you my hubby’s plate, lol) A little honey mustard for the baked chicken fingers is on the side…I topped the small red potato with a squirt of ” I can’t believe it’s not butter” a tsp of cheddar cheese and a sprinkle of bacon crumbles.

It helped to have a Veggie Tale plate advertising the Asparagus. But, my children call

Asparagus green noodles anyways..lol.


Baked Chicken Fingers

(serves 6)

6 chicken breasts (1 breast per person cut into thirds -fat trimmed off)

3 egg whites (in an individual bowl)

1 cup bread crumbs (in an individual bowl)

salt and pepper

Preheat oven to 425

Rinse chicken, pat dry and remove fat. Cut into thirds. Dip chicken pieces into egg whites then roll in bread crumbs. Foil line a cookie sheet (easy cleanup) Spray cooking sheet with Pam. Salt and pepper chicken fingers and spray the tops with cooking spray. Bake for 20 mins until cooked through. Serve with honey mustard or BBQ sauce.


Signature

Dump Cake (cherry-pineapple)

This recipe is so easy, a 4 and 6 year old can make it! I am not typically a pineapple lover..but I have to say this recipe is deeeeeelicious! It is one of “those” recipes that if left on the counter, covered, you get a fork..lift the foil… and take a bite before you leave the kitchen…over and over….agh! This is a keeper!

5 Ingredients. 1 box yellow cake mix, 1 21 oz can cherry pie filling, 1 15 oz can crushed pineapple, 8 oz chopped walnuts, 1/2 cup butter. I’m serious…that’s it.


Pour the cherries and the pineapple in a pan-( I used a throwaway pan because I was cooking for a family on this night.)


Stir together


“Dump” dry cake mix over top


Stir until just combined (you may also leave it just like this-whatever you prefer) 


This is what it looks like just combined


Add nuts to top


Ladle on the butta 


Bake for 35-40 mins in a 350 oven


Dump Cake


1 (21 oz) can cherry pie filling

1 (15 oz) can crushed pineapple

8 oz chopped walnuts

1/2 cup butter

In 9×13 pan mix cherries and pineapple. Sprinkle with dry cake mix over top and stir until just combined. Sprinkle walnuts on top and drizzle with butter. Bake in 350 oven for 35-40 mins. 

OHHHH YUMMMMM 


Enjoy!


Recipe featured on Women Living Well


Signature

Amish-Style Cinnamon Chip Bread Pudding with Warm Vanilla Milk Topping

A little while ago I asked had an online poll asking “ What kind of recipes do you like the best?” The most popular answer was…..homemade! (with a close second to quick and easy) I also had some requests for economical (amen to that!). Here is the perfect recipe for ALL 3 of those requests! Best of all, you probably have most, if not all, of these ingredients on hand at all times!

This traditional Amish- style bread pudding is absolutely delicious… The smell of it baking will draw your family into the kitchen with anticipation! Even better is the warm vanilla milk that is poured on top after it is fresh out of the oven. You will never want to throw out day-old buns, rolls, or bread again, especially when you know what potential they can live out! Enjoy!


Ingredients for Bread Pudding: Half & Half (you may substitute milk), bread (I used rolls), vanilla, sugar, eggs, butter, ground nutmeg and cinnamon chips (if you do not have these, you may sprinkle on cinnamon)

Pour Half & Half into a pot on med-high heat , add butter and let simmer (do not boil)

In a separate bowl add eggs, nutmeg and sugar and mix well

Add your warm milk/butter mixture and mix well again

Rip bread into small cubes and place in a lightly “pammed” casserole dish and cover evenly with mixture

Sprinkle with cinnamon chips (if you don’t have these, sprinkle with cinnamon)

Cover and bake in a 350 oven for 30 mins

Start your Vanilla Milk Topping: Heat butter in a saucepan, then whisk in flour to make a paste

Add milk, vanilla and sugar and let simmer until it thickens

After 30 mins is over, take off the foil and bake for another 15 mins until set and lightly browned on top

Remove from oven and pour warm vanilla milk over top

Serve fresh and pipping hot out of the oven! Those buns didn’t know their potential until this very moment!! Enjoy!!!

Cinnamon Chip Bread Pudding w/ Warm Vanilla Milk Topping

(Serves 6)

Bread Pudding

2 cups Half&Half (you may substitute milk)

2 Tbsp butter

3 eggs

1/3 cup sugar

¼ tsp ground nutmeg

1 tsp vanilla extract

3 cups of bread, torn into small pieces

A handful of cinnamon chips to sprinkle over top (you may substitute cinnamon to sprinkle)

Pour Half & Half and butter in saucepan on med-high heat, let simmer (do not boil). Beat eggs, nutmeg, and vanilla in separate bowl.

Add warm milk and butter mixture and beat well.

Tear bread into small pieces and place in a prepared casserole dish.

Pour mixture over top and sprinkle with cinnamon chips.

Cover with foil and bake @350 for 30 mins.

Take foil off and bake an additional 15 mins.

Warm Vanilla Milk

1 cup milk

¼ cup butter

1/3 cup sugar

1 tsp vanilla

1Tbsp flour

½ tsp salt

Melt butter, add flour to make a paste.

Whisk in the milk, sugar, vanilla and salt.

Let boil for 5 mins stirring constantly until it thickens into a syrup.

Pour over warm bread pudding and serve warm. Enjoy!

A recipe featured on Women Living Well.

Signature

Feasting in Fellowship Friday with some Friends!

YES! It’s FRIDAY! Hooray for the weekend! Hope yours is a blessed one filled with laughter, love and fun.

Courtney from Women Living Well is sharing my Perfected Southern Sweet Tea on her blog today. Pull up a chair, pour yourself a glass of iced tea and mosey around her site…you will surely be inspired!


Friday’s Top 3 Picks!


Open Face Chicken Caprese Sandwiches

Made By: Bleucloud

Made By: Catz in the Kitchen
(Inspired by her Grandma Ruth)
Made By: My Little Corner of the World

~~~~~~~~~~~~~~~~~~~~~~~~~~~~~


Some  Bloggy Friends gettin’ “Comfy”….

Meet my friend Clare
at Peak313

Clare’s Homemade Guacamole


Meet my friend Courtney
at Women Living Well

Meet my friend Olivia

at Her Noble Character

Olivia’s Homemade Granola Recipe

Meet my friend Darlene

at The Time Warp Wife

Darlene’s Strawberry Banana Pops

It’s A Feasting in Fellowship Link up! Post as many recipes as you wish..I love seeing what YOU have cookin! Please place my button (located on the side bar) on to your post and link back.


Signature

Low-fat Grape Salad with Pecan Topping

I tried this amazing dessert for the first time at a recent family gathering. I took my first bite with a bit of caution because I didn’t really know what it was…to my surprise it was one of the most delicious treats I have ever tasted!!!!! In this recipe, I scaled down the calories and used low-fat sour cream and lite cream cheese. If the thought of putting sour cream over grapes makes you question this recipe…think of old-fashioned cheesecake. Trust me you are going to love this one….I just made this for guests at our house and we all had seconds around the table!!!!! I am SOOOO excited for you to try this…..it is DEVINE! (no pun intended! haha)

Red and Green Seedless Grapes, Low-Fat Cream Cheese, Lite Sour Cream, Sugar, Brown Sugar, Vanilla, Chopped Pecans

In a medium bowl add cream cheese, sour cream, white sugar, and vanilla

Beat with mixer until well combined and smooth

Remove grapes from stems and rinse…aren’t these beautiful?! MMmmm!!!!!

Combine brown sugar with chopped pecans

Place over top of grapes (you may also place on the side if you desire) Note: While I was at the store I looked at the calories on the 1/2 Splenda 1/2 brown sugar box and regular brown sugar has less calories.

Stir cream cheese mixture with the grapes and place in a serving dish

Low-Fat Dessert – Grape Salad


1 ½ lbs green seedless grapes

1 ½ lbs red seedless grapes

8 oz lite sour cream

8 oz low-fat cream cheese

½ cup granulated sugar

1 tsp vanilla

Topping

¼ cup brown sugar

½ cup chopped pecans

Remove stems from grapes and rinse. Beat sour cream, cream cheese, granulated sugar and vanilla with mixer. Stir grapes into the mixture and place in a serving dish. Combine topping ingredients and sprinkle over top.

Signature

Scrambled Eggs~done light~

Ladies, you asked for it-MORE HEALTHY RECIPES!

Well, I am like butter…I am on a roll! (I know, I am hilarious). Here is a lighter yet just as yummy (promise) way to make scrambled eggs.

(5 points for those of you on weight watchers)

Add 1 egg (yolk and white) and 3 egg whites. Add 1 Tbsp of water and whisk. Melt 1/2 Tbsp of butter in a pan and scramble on medium heat. Add a dash of salt and pepper.

How do you just add egg whites? Crack the egg and toss the egg yolk back and forth from one shell to the other. The yolk will stay in the shell and the whites will fall into your bowl.

Whala! Sprinkle with freshly shredded parmesan cheese…It melts..it’s yummy.

I added 1 egg yolk to this recipe because, in my mind, scrambled eggs should be yellow (lol). I will not give up butter in my eggs. So, cutting the amount in half helps with calories but still gives the eggs a buttery flavor. Exchanging milk with water makes for a lighter texture-the water evaporates while scrambling.

Scrambled Eggs~done light~

1 egg (yolk and white)

3 egg whites

1/2 Tbsp butter

1 Tbsp water

salt/pepper

sprinkle of shredded parmesan cheese

Beat egg and egg whites together and add water. Melt butter in a pan heated to medium heat. Scramble and add your salt and pepper. Top with parmesan cheese.

Signature

It’s a WRAP for the kidos! Grilled Banana-Peanut butter


And here is a grilled panini for the kidos- (or grown-ups, I know I am a fan!) Check out the gooey melted peanut butter …who could resist?

For a crunch, add some granola. If you are using natural peanut butter add a touch of honey. Enjoy!

On a whole wheat tortilla shell spread 1-2 Tbsp of peanut butter. Slice one banana and place on top

Fold in the two sides and wrap

Place on a heated panini press-press for 4 mins until golden.

A wrap that would make Elvis proud..Uhhuu.. 😉

Grilled Banana Peanut Butter Wrap Panini

(per 1 wrap-split them in half for 2 children)

1 whole wheat tortilla

1 banana

1-2 Tbsp peanut butter

Spread peanut butter on tortilla and add a sliced banana. Wrap and grill on heated panini press for 4 mins until golden.

(again you may use a George Forman or a pan)

Signature

It’s a WRAP! Lime- Grilled Chicken Mexi Paninis


One of my favorite places to eat for lunch is called “Nectar”-it’s a little smoothie joint that has surprisingly awesome wraps and salads! This is where I got the inspiration for this delicious wrap…

If you don’t have an official Panini maker -a George Forman or even a simple skillet/pan will do!


Marinate chicken breasts in Italian dressing over night. Then, on a foil covered grill , sprinkle  garlic powder, seasoned salt, cracked pepper and a squeeze of lime on each. Grille on medium heat for appx 5-6 mins on each side for small chicken breasts. (I heart organic chicken)

On a wheat tortilla place mixed greens, homemade salsa, sliced chicken, and teaspoon of shredded cheddar cheese.

Tuck the two sides in and roll up. Place on a heated Panini grill. Press for appx 4 mins.

Whala! YUM!

Lime- Grilled Chicken Mexi Panini

(4 Paninis)

4 Chicken Breasts marinated in Italian dressing overnight

1 tsp garlic powder

1 tsp seasoned salt

1 tsp black pepper

1 lime

4 whole wheat tortilla shells

1 cup shredded cheddar cheese

1 cup mixed salad greens

Homemade Salsa (or you may purchase)

Grill chicken breasts on a foil lined grill heated to medium. Sprinkle with garlic powder, salt, pepper, and a squeeze of lime. Cook for appx 5-6 mins on each side until chicken is *just* white throughout (remember chicken will continue to cook after you take it off the grill-do not over cook). Lay out your tortilla shells and disperse mixed greens, salsa, slices of your chicken breasts, and cheese. Take the two corners and fold in-then wrap. Place on a heated Panini press (or George Forman or pan). Press for 4 mins until lightly golden.

Enjoy!

Signature

Wild Berry Salad

A friend and I went out to lunch a couple of weeks ago and ordered the MOST delicious salads. We literally did everything but lick our plates clean..lol.

The funny thing is, that week, we both re-created this salad because we hadn’t had enough. Here are some photos of our “Copy Cat” Wild Berry Salads! YUM!

Katina’s Creation!!! YUM!!!!!!

My take, with chicken!

Do great minds think alike or what?

Mixed Berry Salad

(Per 1 salad)

2 cups of mixed greens

a small handful of:

blackberries, raspberries, strawberries, grapes,  cranberries,raw almonds

1 Tbs goat cheese (you may use blue cheese or feta)

Light poppy seed dressing on the side

1 chicken breast marinated in Italian dressing overnight and grilled

Signature