Archives for March 2012

Feasting in Fellowship Friday and Link up!

Can you believe it’s Friday already?

It crept right up on me, but I am not complaining! I hope that you have had a wonderful week and are getting ready for all the festivities leading up to Easter.

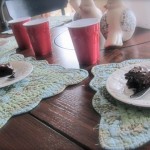
I wanted to take a minute and share with you the most beautiful display that a restaurant in our town has up….what a blessing it is to the community that this establishment is outward in their faith. We live in a dry village that has no freeway access- yet thousands of people come to eat here (even from out of state)- God blesses those who boast in Him-how awesome!

Searching for some more Easter recipes? Come check out Women Living Well today! Courtney has some delicious things cooking in her kitchen! You don’t want to miss her Easter lineup!
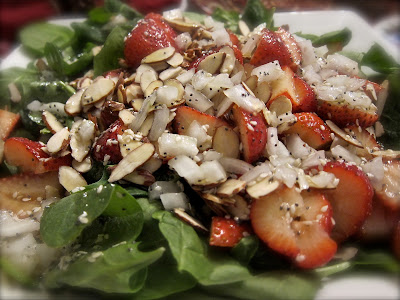
Fridays Top 3

Easter Resurrection Garden

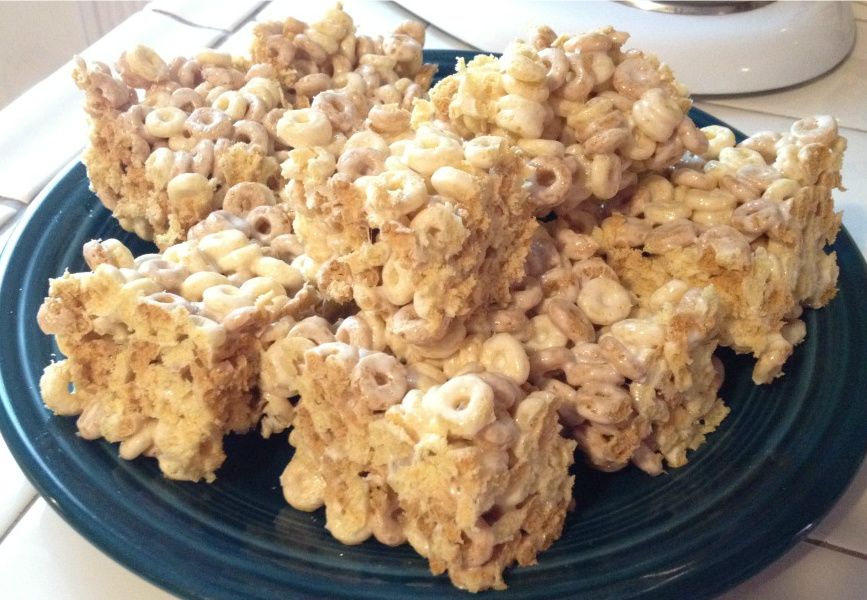
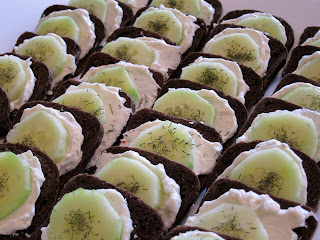
Made By: The Encouraging Home

(ok, it isn’t a recipe- but it is so worth featuring)

(Credit:Melissa Holt)

Olive Garden “Copycat” Salad

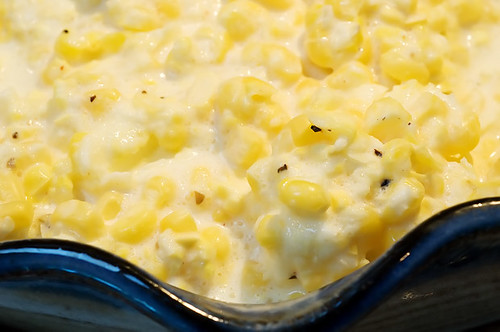
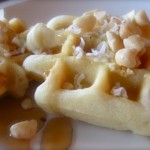
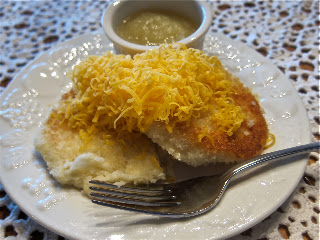
Made By: The Joy of Everyday Cooking

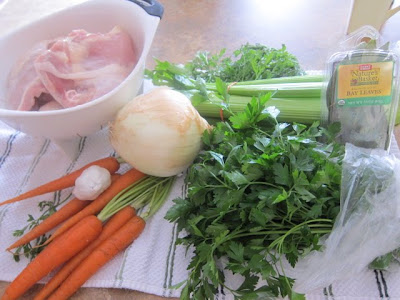
Lime Infused Coconut Macaroons

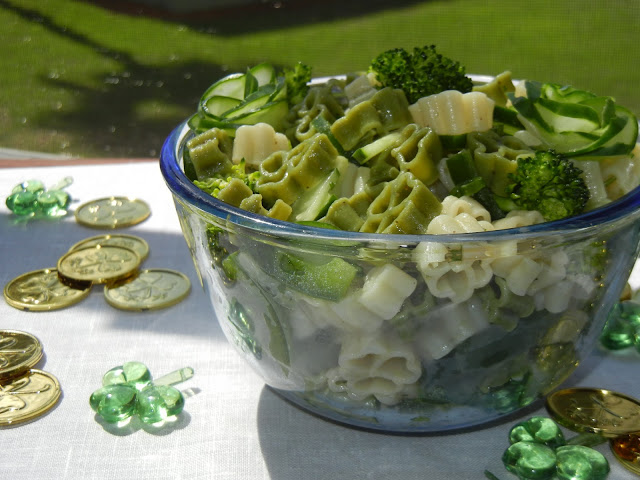
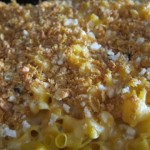
Made By: Simply…this, that and the other.

It’s a Feasting in Fellowship LINK UP! Please link up as many recipes, Christian posts, and/or Holiday inspired posts as you like. All I ask is that you add my button (located on the sidebar) to your post. Share the love by tweeting and FB to your friends. Thanks so much- enjoy your weekend my friends!


Powered by Linky Tools


Signature

Easter Eggs @The Better Mom

It’s that time of year again Ladies!!! Get out your pots, eggs, and coloring tools (oh, and the kidos too-hehe) and let the Easter festivities begin! Did you know there is a certain way to “boil” eggs? Come visit me over at The Better Mom to find out how….

Signature

An Easter Spread

Hi Ladies! I get asked quite a bit how I would create a “spread” for a gathering. Today I want to do just that- here is an example of an “Easter Spread” for your family and friends! Please use this tool to help make your Easter just a little easier. If you are having guests bring a dish (which I am completely fine with!) you can send them on over this way for proven recipes that are sure to please. There is nothing wrong with being specific about what your needs are-your loved ones want to help! Have you ever been to a gathering with 3 dishes of cheesy potatoes and no veggies? I sure have! 

Easy Spinach Dip- 

Have this set out when guests arrive.

Strawberry Spinach Salad with Poppyseed Dressing

I always start off with a salad-this one is one of my favorites. I get asked all the time for the recipe.

Rhodes Dinner Rolls

All you do is thaw, let rise and bake. These are incredibly good- you can make your own from scratch, but why when these are every bit as good! 

An Easter Ham

A Classic.

 Cheesy Potatoes

Another crowd pleaser!

Classic Green Beans

Simple and you can make them ahead of time- just set on low and cover.

Fresh Corn Casserole

(Ree Drummond)

Oh yum. 

Carrot Cake 

(Paula Deen)

My Father-in-Law’s favorite. 

Easter Bunny Cupcakes

What child wouldn’t smile? 

I hope this serves you well – please feel free to add links to your comments of YOUR favorite Easter recipes! I can’t wait to hear all about them 🙂 

Signature

Loving little, is big.

“Do not think that love in order to be genuine has to be extraordinary. What we need is to love without getting tired. Be faithful in small things because it is in them that your strength lies.” 
― Mother Teresa

 loving others does not have to be imaginative, wrapped with a handmade bow, or something pretty on a stick. Love comes in a variety of packages and is available for anyone to give …at any time, as long as that person is willing. 

Please do not feel like your home has to be perfect to invite someone into it… That you have to look perfect to approach someone…to have a theme in order to have a gathering, be an amazing cook, or have something important to talk about.  Loving others without planning is so okay. 

I had the blessing of  hostessing a sleepover/playdate for my son this weekend. Nothing I share with you is  worth “pinning”, but ladies….the memories these boys made together fishing in my backyard was priceless. I didn’t make anything special, or decorate, or even plan an event. I just let them be boys. 

Here was their weekend…

They fished, for what had to be 12 hours. Not kidding. 

I bought them night crawlers….did you hear that? Night crawlers were in my refrigerator. Eww.

My son ran in to get me when they caught this one…he was a doozy!

I was there to take this picture and rejoice with them …

“I want to be the Mom who has the kids at her house”…words I told my hubby when we first had our son.  

Nothing to “Pin” here! It’s what I had on hand- burger melts, cheese curls, mixed berries, cottage cheese, pickles and juice boxes. That’s it. 

They ate every bite and loved it. 

They had tasty food and got to eat it together! 

They fished some more, then I called them in for some chocolate cake and milk. 

It was warm and it made them smile….the chocolatey kind of smile. 

May you love little in a big way this week. 

Signature

A Life that says “Welcome” and the “5 senses of Hospitality”

Hi Ladies! I am so excited to be a part of Karen Ehman’s Hospitality Study! Please come visit me over at her blog where I share the “5 senses of hospitality” and how to be a hostess with the mostess!

Signature

Feasting in Fellowship Friday- Resurrection Rolls (link up!)

Happy Friday Ladies!

My friend Courtney from Women Living Well is baking up some awesome Easter treats for us! Please come take a look at her Resurrections Rolls…what a great recipe to make with the children and at the same time teach them all about the true meaning of Easter.

These are so simple and look delicious!

Be sure to *pin* this one on your Easter Recipe Board! 

DSC01407.JPG.jpg
Top 3 Picks of the Week! 

South of the Border Breakfast

Made By: Inspired By Family

Cheerio Treats!

Made By: Merry, Married, Mary Mom

Photobucket

Butterfly Cupcakes

Made By: Baking {and cooking} with Giggle Girl

It’s a Feasting in Fellowship Friday Link up! Please link up as many posts as you wish! All I ask is that you place my button (located on my sidebar). Posts may be recipe, christian or holiday in nature. Thanks so much!!

Signature

Chicken and Rice Soup


This Chicken and Rice soup is so savory, so yummy, so allergy friendly, so kid friendly….so blog worthy 🙂 This is a great recipe to make for someone who is not feeling well- the combination of chicken (boiled with bones on) and rice is very easy on the stomach and has healing properties to boot! Love IT! 

Don’t let the “time” it takes to make this scare you off- it is a very easy soup to make…it’s just simmer time. Make this on one of your cleaning days (thats what I did!)

Making the broth:

Chicken breasts- very important that it has skin on and bones in- this gives more flavor to the water and adds healing properties. carrots, onions, parsley, garlic, celery, bay leaves.

Boil all together

Add lemon juice and let boil for 2 1/2 hours.

Prepare rice

When stock is done simmering, take the chicken (and bay leaves) out. 

Pull skin aside and “fork” the meat off of the bones. Place chunks of chicken back into broth. 

Add a 32 oz carton of chicken broth to homemade chicken broth. This gives it added flavor without adding “bouillon cubes”  – if you have a gluten intolerance bouillon has wheat in it, so stay clear- if you do not have an intolerance, you may certainly add them instead of adding broth

(appx 4 bouillons and appx 2 more cups of water).

Melt 1 stick of butter and make a roux by adding 2 Tbsp of cornstarch

(for those with no allergies- you may use 4 Tbsp of flour in place of cornstarch)


This is a thickening agent for the soup…add this to the broth. 

Add rice and let it simmer for 1 hour on low heat. Season to you liking with salt and pepper. 

Some seriously delicious soup…Mmmmmm…


And best yet, kid approved and loved! YES!!!

Chicken and Rice Soup
Prep time: 30 mins
Cook time: 4 hours
Total time: 4 hours 30 mins
Serves: 8
Ingredients
  • Broth:
  • 8 cups of water
  • 4 chicken breasts with bones and skin ON
  • 2 cloves of chopped garlic
  • 1/4 cup chopped parsley (you can use a few shakes of dry if you need to)
  • 1 cup chopped onion
  • 1 cup chopped celery
  • 1 cup chopped carrots
  • 1 Tbsp lemon juice
  • 2 bay leaves (whole)
  • 32 oz carton of chicken broth (this adds flavor)
  • 1/2 cup (1 stick) butter
  • 2 Tbsp corn starch (you may use 4 Tbsp of flour if you prefer/have no allergies)
  • 4 cups COOKED rice (per package instructions)
  • salt and pepper to taste
Instructions
  1. In a large pot on the stove place chicken, water, garlic, parsley, onion, celery carrots, lemon juice, and bay leaves on medium high heat. Let simmer for 2 1/2 hours.
  2. After 2 1/2 hours, take bay leaves out.
  3. Take chicken out of pot (leave veggies in). Pull aside skin and fork meat off of bones, place chunks of chicken back into pot of broth.
  4. Add carton of chicken broth to homemade broth.
  5. Prepare rice per package instructions and add to broth.
  6. Melt butter on stove top in separate pan- add cornstarch (or flour) to make a roux. Add this to broth.
  7. Let soup simmer on stove for one hour.
  8. Season with salt/pepper to your liking.
Signature

Macadamia Nut Waffles With Coconut ~ Thumbs up GF Bisquick!


Every time I try a “gluten free” product that impresses me, I want to share it with my girls who are on the GF journey with me! Let me tell you…Bisquick GF is delicious (and SO easy)! A few additions spruced ordinary waffles to into “Macadamia Nut Waffles with Coconut”…dot with some butter and warm maple syrup and Mmmmmm!!!!! I don’t miss that gluten one bit! haha. 


Bisquick mix, milk, vegetable oil, egg, vanilla, chopped macadamia nuts

Heat waffle iron and spray with non stick oil (Pam). Pour 1/2 cup batter onto center of each portion of iron. Bake appx 5 mins until lightly golden. Repeat until batter is used. 

Macadamia Nut Waffles with Coconut ~ Thumbs up GF Bisquick!
Prep time: 5 mins
Cook time: 5 mins
Total time: 10 mins
Serves: 6
Ingredients
  • 1 1/3 cup Gluten Free Bisquick
  • 1 1/4 cups milk
  • 3 Tbsp Oil
  • 1 egg
  • 1 tsp vanilla
  • 1/2 cup chopped macadamia nuts
  • 1/2 cup coconut (garnish)
Instructions
  1. Heat waffle iron.
  2. In a medium bowl add Bisquick, milk, oil, egg, vanilla and 1/4 cup nuts.
  3. Spray iron with Pam.
  4. Add 1/2 cup batter per waffle and press together- bake appx 5 mins.
  5. Top waffles with coconut and a sprinkle of macadamia nuts- dot with butter and drizzle with warm maple syrup.
Signature

Feasting in Fellowship Friday 3-16-12

Top of the Mornin to Ya! Hooooray for Friday!

“Hop” on over to Women Living Well where I am sharing how to make these ADORABLE Easter Bunny cupcakes– these will be sure to please the little ones in your life!


Top 3 Picks of the Week

Lucky Pot O Pasta Salad

Made By: Will Cook for Smiles

Oat Fruit Breakfast Bars (allergy friendly!)

Made By: Sugar Free Mom


Oatmeal Bar

Made By: Simply… This, That and the other

EASY St. Patty’s Day Recipes – “Going Green”! 

St Patty’s Day Popcorn

Made By: Taste of Home

St. Patrick's Day Popcorn Recipe

Easy Cucumber Sandwiches 

Made By: Comfy in the Kitchen

Pot O Gold

Family Fun Magazine

(This is how I make finger jell-O)

St. Patrick's Pot of Gold

Potato Pancakes (or Boxty) 

Made By: Comfy in the Kitchen

It’s a Feasting in Fellowship Friday LINK UP!

Please share as many posts as you wish! Recipes, Christian posts and seasonal posts are welcome and enjoyed! I love to see what you have cookin! All I ask is that you place my button (located on my side bar) onto your post. Have a wonderful weekend ladies! 

Signature

Creamy Beef Taquitos


What a blessing it is that my husband’s company is so close to home. We take full advantage of more time together and cherish our lunch dates. This is something I made for us for lunch last week and thought I would share! These are not only yummy but very easy to make (and yes, for those of us with allergies- it is naturally allergy friendly!). Serve with homemade salsa!

Creamy Beef Taquitos
Prep time: 25 mins
Cook time: 20 mins
Total time: 45 mins
Serves: 4-6
Ingredients
  • 12 corn tortillas
  • 1/2 cup Salsa Fiesta (This is a mix of salsa and cream cheese- you can buy it pre-made at the grocery store, or mix 1/2 parts of each to make your own)
  • 1 lb ground beef
  • 1/2 tsp cumin
  • 1 tsp chili powder
  • 1/2 tsp onion powder
  • 1/2 tsp garlic powder
  • 1 cup shredded pepper jack cheese
Instructions
  1. Heat oven to 425, line baking sheet with foil and spray with Pam.
  2. Cook ground beef on stove and season with cumin, chili powder, onion powder and garlic powder.
  3. Place tortillas on a plate and cover with a damp paper towel- microwave for 1 min to soften.
  4. Spread Salsa Fiesta on tortilla, place about 1/4 cup cooked ground beef 1/2 inch from edge of tortilla and sprinkle with cheese.
  5. Roll up and place seam down on baking sheet.
  6. Repeat with the rest of ingredients.
  7. Spray or brush tops with vegetable oil.
  8. Bake for 15-20 mins until golden brown.
  9. Serve with homemade salsa!
Signature

Buffalo Chicken Mac and Cheese (Can make it Food Allergy Friendly!)

Oh. Wow. This recipe may not get a prize for guiltless pleasure….but let me tell you something- it is AWESOME. I have to really like something to have it for leftovers. I had this for dinner, then a second bowl at 8pm then for lunch the next day, and then seconds.  UGH! I can’t think of a time I have ever done this! lol! Nevertheless, I had to share it with you….be careful-it’s addicting!

P.S.- Guess what?! 6 months on a strict “elimination diet”  and I have just found out that my diary intolerance is very mild-so I can have it sparingly! Wohoo. I *may have over done it a bit in this dish, shhhh.  No eggs or gluten for life, but it’s ok if I can splurge every so often on treats like this one!

Dice onions and celery

Boil elbow noodles until al dente (package instructions). These are gluten-free rice noodles…very little difference. (bread, that is a different story)

Shred a purchased rotisserie chicken by pulling it apart into chunks with a fork. Mmm…these always smell so good.

Saute onions, and celery in butter and add chicken and garlic.

Add Franks Red Hot Sauce

Slice Pepper Jack and Cheddar Cheeses…

In a sauce pan melt butter, add flour (This was gluten- free flour).

Add milk,  half and half, and the rest of the hot sauce until thickened. Then add cheese.

Add sour cream


Stir …oh is this yummy.

Melt remaining butter in a small bowl, add crushed corn flakes and blue cheese. (If you are not gluten intolerant, Panko also works well!)


In a prepared pan add half the macaroni, then cheese sauce, repeat. Add topping and bake 30-40 mins. This is so good…seriously.

Buffalo Chicken Mac and Cheese (Food Allergy Friendly too!)
Author: Adapted from Food Network
Prep time: 20 mins
Cook time: 40 mins
Total time: 1 hour
Serves: 8
Ingredients
  • Ingredients
  • 7 tablespoons butter
  • 1 pound elbow macaroni (I used gluten- free elbow noodles)
  • 1 small onion, finely chopped
  • 2 stalks celery, finely chopped
  • 1 rotisserie chicken (flaked with fork)
  • 2 cloves garlic, minced
  • 3/4 cup hot sauce (preferably Frank’s)
  • 2 tablespoons all-purpose flour (I used gluten- free flour)
  • 2 cups milk
  • 1/2 cup half and half
  • 8 ounces yellow sharp cheddar cheese cut into cubes
  • 8 ounces pepper jack cheese cut into cubes
  • 2/3 cup sour cream
  • 1 cup crushed cornflakes
  • 1/2 cup crumbled blue cheese
Instructions
  1. Preheat the oven to 350 degrees
  2. Butter a 9-by-13-inch baking dish.
  3. Bring a large pot of salted water to a boil; add the pasta and cook until al dente, about 7 minutes. Drain.
  4. Meanwhile, melt 3 tablespoons butter in a large skillet over medium heat.
  5. Add the onion and celery and cook until soft, about 5 minutes.
  6. Stir in the chicken and garlic and cook 2 minutes
  7. Add 1/2 cup hot sauce and simmer until slightly thickened, about 1 more minute.
  8. Melt 2 tablespoons butter in a saucepan over medium heat.
  9. Stir in the flour with a wooden spoon until smooth.
  10. Whisk in the milk and half-and-half, then add the remaining 1/4 cup hot sauce and stir until thick, about 2 minutes.
  11. Whisk in the cheddar and pepper jack cheeses, then whisk in the sour cream until smooth.
  12. Spread half of the macaroni in the prepared baking dish, then top with the chicken mixture and the remaining macaroni.
  13. Pour the cheese sauce evenly on top.
  14. Put the remaining 2 tablespoons butter in a medium microwave-safe bowl and microwave until melted. Stir in the corn flakes, blue cheese.
  15. Sprinkle over the macaroni and bake until bubbly, 30 to 40 minutes.
  16. Let rest 10 minutes before serving


Signature

Crescent Chicken

*This is a repost- for some reason the other link is not working- I have received quite a few e-mails about this particular recipe. So sorry- I will be looking into the original link. 


This delicious recipe comes from my Grandma (or “Nana B” as we call her)…I have wonderful memories coming home from college to this delicious home cooked meal. It has become one of my husband’s favorites too. I like serving it along side of mashed potatoes …. the cream of chicken soup serves as a delicious gravy. Enjoy this simple yet delicious meal! 
~Janelle 
Crescent rolls, chopped and cooked chicken (I simply boil chicken breasts and cut), cheddar cheese, cream of chicken soup (milk).
Make soup in a medium saucepan using milk according to directions.  
Lay out one crescent roll at a time and place appx 3-4 bite sized pieces of chicken and appx 1Tbsp of cheese in the center of each triangle. 
Gently roll up
Seal edges by pinching the dough. (You will not get perfection, just make sure the filling cannot leak out)
Place all of your rolls in a 9×13 dish and pour soup mixture over top ( salt and pepper as desired).
Bake at 350 for 30 mins until crescents are golden brown
Serve with mashed potatoes and your choice of veggies! 
A combination of buttery crescent roll, melted cheddar and juicy chicken…Mmmm…
Crescent Chicken
(serves 6-8 rolls)
1 (8 or 6 jumbo count) package refrigerator crescent rolls
2 cups chopped cooked chicken
1 cup shredded cheddar cheese
1 can cream of chicken soup
1 can of milk (using soup can)
Preheat oven to 350
Prepare soup using milk and set aside. Separate crescent rolls. Spoon chicken and cheese onto each crescent; roll and seal to enclose filling. Place in a 9×13 baking dish. Pour soup over rolls. Bake at 350 uncovered for 30 mins.

Anchor Hocking Glass Bake ‘N Take 9 Inch x 13 Inch Dish With Snap On Cover


Prep time: 15 mins
Cook time: 30 mins
Total time: 45 mins
Serves: 6-8
Ingredients
  • 1 (8 or 6 jumbo count) package refrigerator crescent rolls
  • 2 cups chopped cooked chicken
  • 1 cup shredded cheddar cheese
  • 1 can cream of chicken soup
  • 1 can of milk (using soup can)
Instructions
  1. Preheat oven to 350
  2. Prepare soup using milk and set aside.
  3. Separate crescent rolls.
  4. Spoon chicken and cheese onto each crescent; roll and seal to enclose filling.
  5. Place in a 9×13 baking dish. Pour soup over rolls. Bake at 350 uncovered for 30 mins.
 
Signature

Feasting in Fellowship Friday!

Happy Friday Everyone!

What a praise….we have sunshine where we live today! It is amazing what a little vitamin D does for the soul, isn’t it? I have some delicious recipes to share….and a link-up!!! Please feel free to link up recipes, seasonal posts and christian posts at the bottom. All I ask is that you place my button (located on my sidebar) on your post. Thank you so much for sharing your gifts with us today. Much love going out…

Friday’s Top 3 Recipes

Whole Wheat Blueberry Lemon Pancakes

Made By: Angie’s Sweet Natured Treats

Cream Cheese Pound Cake

Made By: Inspired By Family Magazine

Chicken Salad Cucumber Bites

Made By: Sugar Free Mom

Aren’t these ladies amazing?! Wowsa!


I wanted to leave you with this story….one of my favorites and one that I think of often.


A story told to me about a woman praying one night to God.


With tears running down her face, she was telling Him how heavy her cross was and she did not think she could bear it anymore.

“Forgive me, Lord, but I just can’t bear this cross anymore”.

God heard her prayer, said it was all right and asked her to come with Him.

She found herself in the presence of Jesus, Who looked upon her with loving eyes.

“Jesus, please forgive me, but I can’t bear this cross anymore”.

Jesus told her that He understood and took the cross from her.

Jesus then showed her a place where there were countless crosses. He told her to look around and find a cross that she thought she could bear. The woman looked upon the crosses available and shuddered. There were huge, dark crosses…some with thorns…some with nails and some too awful to even describe. Then, her eyes fell upon a small cross, one she thought she could bear.

“Jesus”, she said, “I think I can bear that cross”, as she pointed to the small cross she had found.

Jesus smiled at her, placed His hand on her shoulder and replied, “That is the cross you just gave me”.*

When you think your cross is to heavy to bear…

take a look around…

it may not be so heavy, after all.

Signature

Buttery Snack Cake with Broiled Coconut

This is such a delicious classic from Betty Crocker herself! The first time I tried this was in a bible study -one of my “comfy in the kitchen” friends (Kelly!) made it and it was love at first bite! The broiled topping just “makes” it. This is a great recipe to save for an Easter brunch!

Put all cake ingredients into a large bowl (Don’t you love that?)

Bake 35 mins in a 350 oven until nice and golden brown. (I used a throw away 9×13 and doubled the recipe- this was a meal ministry)

Beat together topping: Coconut, brown sugar, butter and milk. ( I know, I know) 

While the cake is warm, gently spread topping over top- this works well with a butter knife. Broil on low for a few mins until lightly browned on top- do not over broil! 

And away it goes to a teacher meeting!  


Buttery snack cake with broiled coconut
Author: Betty Crocker
Prep time: 15 mins
Cook time: 35 mins
Total time: 50 mins
Serves: 8-10
Ingredients
  • 1 1/4 cups all-purpose or 1 1/2 cups cake flour
  • 1 cup sugar
  • 1/3 cup butter or stick margarine, softened
  • 3/4 cup milk
  • 1 1/2 teaspoons baking powder
  • 1 teaspoon vanilla extract
  • 1/2 teaspoon salt
  • 1 large egg
  • Broiled Coconut Frosting
  • 1 cup flaked coconut
  • 1/3 cup packed brown sugar
  • 1/4 cup butter or stick margarine, softened
  • 2 tablespoons half-and-half or milk
Instructions
  1. Heat oven to 350°.
  2. Grease bottom and sides of square pan, 8 X 8 X 2 (or you may double recipe and 9×13)
  3. Beat all ingredients except Broiled Coconut Frosting with electric mixer on low speed 30 seconds, scraping bowl constantly.
  4. Beat on high speed 3 minutes, scraping bowl occasionally.
  5. Pour into pan.
  6. Bake 35 minutes or until toothpick inserted in center comes out clean.
  7. Make Broiled Coconut Frosting.
  8. Set oven control to broil (low).
  9. Carefully spread frosting over hot cake.
  10. Broil with top of cake about 4 inches from heat about 2 minutes or until frosting is light brown.
  11. Watch carefully so frosting does not burn.
  12. Cool 15 minutes.
  13. Serve warm or cool.
Signature

Cashew Chicken


 The cashews add a sweet crunch to this savory meal…I hope you enjoy this as much as we do! 
Marinade ingredients 
let chicken marinate for 1/2 hour – I like to slice my chicken into angled slices for quick cooking. 
A roux- a thickening agent…this is what makes the sauce have a “gravy like” texture. 
Sliced carrots and snow peas
Stir fry chicken, then add veggies- then roux with remaining sauce ingredients. 
Add sauce -let simmer until thickened, then add cashews. 
 

 Mmmmm…..

Cashew Chicken
Prep time: 30 mins
Cook time: 20 mins
Total time: 50 mins
Serves: 4
Ingredients
  • 3 Tablespoons soy sauce,divided
  • 1/2 chicken broth
  • 3/4 teaspoon sesame oil, divided
  • 1 pound boneless skinless chicken breasts, cut into 1-inch pieces
  • 1 Tablespoon cornstarch
  • 1/3 cup chicken broth
  • 1 tablespoon sugar
  • 1 tablespoon rice vinegar
  • 1/2 teaspoon minced fresh gingerroot
  • 1/4 teaspoon salt
  • 2 teaspoons canola oil
  • 1-1/2 cups fresh snow peas
  • 2 medium carrots sliced at an angle
  • 3/4 cup cashews
  • Hot cooked rice
Instructions
  1. Make marinade: Combine 2 tablespoons soy sauce, 1/2 cup broth and 1/2 teaspoon sesame oil; add the chicken. Refrigerate for 30 minutes.
  2. In a small bowl, combine cornstarch and 1/3 cup broth until smooth.
  3. Stir in the sugar, vinegar, ginger, salt, and remaining soy sauce and 1/4 tsp sesame oil; set aside.
  4. Drain chicken and discard marinade.
  5. In a large nonstick wok or skillet, stir-fry chicken in canola oil until done.
  6. In the same pan, stir-fry peas and carrots.
  7. Add sauce and bring to a boil
  8. Cook and stir until sauce thickens (this will not take long!).
  9. Add cashews.
  10. Serve with hot rice.
Signature

Dr. Seuss Day (Green Eggs and Ham)

I’m Baaaaack 🙂 It was so nice to have some “screen time away” for a week, but I feel very blessed to get back into the “swing” of things! I hope YOU had a very BLESSED week! 

One of last week’s events was “Dr. Seuss Day” for my Kindergartener. The kids and I had fun making a t-shirt, reading Dr. Seuss books and eating “Green Eggs and Ham”. I even had the blessing of visiting the Kindergarten class on their special day! 

Early Friday morning the kids awoke to me making this delightful dish, lol.  Scrambled eggs with 2 drops of green food coloring and bacon (it was the closest thing I had to ham- it worked!)

My little guy read us the book “Green Eggs and Ham” (notice the bacon is gone off their plates, but the eggs remain…oh, and the half smile- LOL!)


A breakfast fit for a…

Dog?!!!??!!!! HEY!!!!! I see you!!! lol!

How could I hold a grudge with this Cutie Pie? My “Thing 2” – We went to Jo-ann Fabrics and purchased a red shirt, some sticky felt, and puffy paint…I am not known for my crafting ability, but it worked!

A little later, I had the blessing of being a room mom in the Kindergarten class. I just LOVE these children…they are so dear to me. I could go on and on about each one of them and their unique little personalities. I can’t help it- I tell them all the time how much I love them and what I love about them, lol. I also LOVE their teacher (you know who you are!)


And here is the Kindergarten version of “Green Eggs and Ham” 🙂 Love it. 

I even got to “borrow” another little girl’s hat, lol. 

So…how do you like YOUR Green Eggs and Ham? In a house? With a mouse? I know where I would like them….at the beach!!!! Ahhh..dreaming away these winter blues 🙂

Happy to be back!

Signature