Archives for December 2012

New Year’s Eve Appetizers!

What are YOU doing New Year’s Eve???

Might I suggest keeping safe, inviting some friends and family members over, making yummy food and playing games! If you take me up on this offer…here are some “comfy” appetizers that will be sure to please and won’t stress you out {they are EASY}!


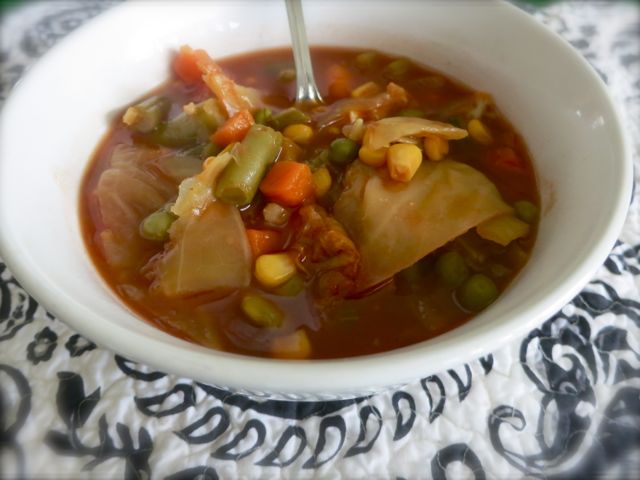
The Tidbit Tray– It’s naturally gluten and carb free {for those who may be watching!}, nutritious, yummy, simple, and filling. Need I say more? Add as many veggies, cheeses and meats as you wish- trust me, it won’t last long!

Sweet and Sour Little Smokies– Adults and children alike cannot resist this tasty treat. You can also purchase pre-made meatballs and prepare the same way!

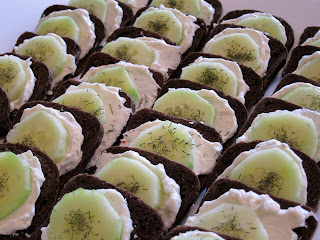
Cucumber Sandwiches- These are SOOO good!!! Not to mention….pretty.

Poppyseed Ham and Cheese Sliders-are a great addition to any spread. I can’t tell you how many people have asked me for this recipe!


Hot out of the oven Loaded Baked Potato Chip Dip. Need I say more?


Easy Spinach Dip– So simple, so addicting!!!! Serve with veggies and cubed pumpernickel.

And the Finale???? Why not end with something “Better than a Hug?!” {hehe}

{Make sure you still give your sweetie a kiss when the ball drops!}

Better than a Hug Cake– Oh yum.

Be SAFE, have fun, enjoy in sweet fellowship and have a Happy New Year, my sweet friends!!!  

Signature

Grandma’s Veggie Soup! {Roomag}

Mmmm…this recipe brings me back to my childhood. Grandma made this soup often … it was and still is one of my favorites. You can keep the recipe “as is” or for a heartier meal you may wish to add a chuck roast …either way, it’s delicious. Join me at Candace Cameron Bure’s Roomag where I’m sharing Healthy Vegetable Soupin the crockpot! Perfect for a cold winter day

Signature

Snowman Cheese Ball

Oh, Pinterest! You inspire me!

I’m making some appetizers for a family Christmas party tonight and wanted to bring something a little more “cheerful”….I typed in “Snowman Cheese Ball” and Voila! A winter wonderland appeared right before my eyes! Serve with crackers and/or veggies!

Frosty- you ARE adorable.

Snowman Cheese Ball

Prep time:
Total time:
Serves: 15
Ingredients
  • 2 8 oz cream cheese
  • 1/2 cup chopped green onions
  • 1/2 cup sliced almonds
  • 4 cups freshly shredded cheddar cheese
  • 1 package of “Bacon Bacon” from Tastefully Simple {This is optional! You may add 1/2 tsp of cayenne pepper as this is what the recipe called for}
  • 1/2 cup of Parmesan cheese for rolling
  • 15 Peppercorns {you may not have to go out and buy these if you have a pepper mill take some out of it!}
  • 1 baby carrot {slice it for a nose}
Instructions
  1. Beat cream cheese, green onions, almonds, cheddar cheese, bacon bacon OR cayenne pepper together.
  2. Divide mixture into 3 balls- one large, one medium, one small.
  3. Roll each ball in Parmesan cheese.
  4. Place peppercorns on as buttons, eyes and smile.
  5. Place a slice of your carrot on for a nose.
  6. Serve with crackers/and veggies!

This method looked “Comfy” so it was the chosen one…I doubled it and changed it around a bit with the ingredients I had on hand. You can do the same! Enjoy!


Signature

Healthier Christmas Treats! {Roomag}


Looks yummy, pretty and a different thing to add into the regular Christmas treats :)

Photo Credit

I know, I know…Christmas may be one of the most difficult times of the year to make healthy choices. Wondering how to accomplish this feat?! Join me over at Candace Cameron Bure’s Roomag where I share my favorite healthier treats for the Holidays!

With recipes like these, you won’t feel left out of the festivities at all! Fill up on the healthier treats first …..then, sneak a cookie. You will be SO glad you didn’t’ do it the other away around the next day 🙂 hehe.

Signature

Edible Christmas Treats!

Ice cream cone Christmas trees

Edible Christmas Trees

My friend Julie made these with her children this week-they looked so cute next to their gingerbread houses! 

Easy No-Bake Gingerbread Houses  -This is how my friend Julie made her houses. I can’t wait to make these with my children this week! Thanks to Martha Stewart for her “comfy” instructions!

Photo: If you want to make a fun treat for Christmas or your child's class...these Nutter Butter Reindeer are super easy!! Just use white frosting in a tube as the "glue" to hold everything on:)

My friend Katina posted this photo to FB today- You know I HAD to scoop it up! Check out how cute these little Rudolphs are! She used Nutter Butters and piped white icing on the top, held pretzels in place for the antlers-chocolate chip eyes-and red skittles for the nose. Katina also made the cutest Rolo Rudolphs last year on the Comfy blog!

What child wouldn’t smile if they saw these adorable snowmen marshmallows staring at them out of their hot cocoa?

Adorable Gum Drop Kissing Balls...these make me smile 🙂


Cookies will look even sweeter on this creative Peppermint Tray! YES, this is made from melted peppermint candies!


Have fun, Ladies!

Don’t worry about the mess- it can get cleaned up! Think about all the fun your children will have with you making sweet, sweet memories.

Signature

EASIEST Peanut Butter Fudge EVER!

I found it! The PERFECT fudge!!!! It’s EASY, has only 4 ingredients, doesn’t require constant stirring…or a candy thermometer….or even a stove! WHA??? That’s right ladies!!! It’s rich, creamy and delicious too. My official “go to” fudge is made in the microwave? Why yes….it is. 

{I know some of you prefer not to use microwaves, that’s ok!}

Microwave butter and peanut butter in a medium bowl for 2 mins.

Stir- it’s melted at this point, but put it back into the microwave for 2 more mins- this gives it a “brown butter” taste and gets it to the right temperature.

Add in vanilla and powdered sugar and stir well- fudge will have a chalky texture.

Place parchment paper into an 8×8 dish and -butter the parchment paper.

Pour fudge into pan.

Refrigerate for at least 2 hours until set and firm. Cut into squares.

Mmmm…..delicious and SO EASY!

I made these for gifts…I added some chopped Reese’s PB cups to the top. The little dishes came from Michael’s craft store- $1 a piece! Adorable!

I wrapped the tops like so..

Placed them into matching plastic bags…they were also $1 for 20.

Wrapped them up with a bow and a plastic butter knife…

Ready to give!

This recipe sure did give me fudge making confidence…I’ve done it too ladies, made fudge that didn’t quite set. It happens! But this recipe is mistake proof- follow the instructions and you will get perfect fudge every time.

***This recipe is from Alton Brown– again, LOVE his recipes!***


EASIEST Peanut Butter Fudge EVER!

Author: Alton Brown
Prep time:
Cook time:
Total time:
Serves: 8-10
Ingredients
  • 2 sticks butter, plus more for greasing pan
  • 1 cup smooth peanut butter
  • 1 teaspoon vanilla extract
  • 1 pound powdered sugar
Instructions
  1. Combine the butter and peanut butter in a microwavable bowl. Cover with a paper towel and Microwave for 2 minutes on high.
  2. Stir and microwave on high for 2 more minutes.
  3. Add vanilla and powdered sugar to the peanut butter mixture and stir to combine. The mixture will become firm.
  4. Spread into an 8 by 8-inch pan lined with buttered parchment paper.
  5. Cover and refrigerate for at least 2 hours.
  6. Cut into cubes.
Signature

A little birdy…

“For it is God who works in you to will and to act according to his good purpose.”

~Philippians 2:13

Last night, while I was at a Christmas ornament exchange, I got to talk to this sweet sister in Christ, Carol, about a non-profit ministry her and her husband started this year. It’s called A Little Birdy...

“What breaks your heart?”

A family you know who will not have enough groceries this week?

A child who’s terminally ill?

A working man who’s car recently broke down and does not have the money to fix it?

Whatever the situation, this website was designed for those who see or have needs to be a “birdy” and let the site know by filling out an online application. The story will be posted, then advertised by social media to those who may have the means to fill that need…. 90% of the money donated is given to the person in need {the 10% is used to keep the site running}. That is a big deal to me...

A video of a recent blessing….


If you know someone who has a need…this is a great resource. Please let them know!

Or…If you feel led to filling one of the needs listed on this website…God Bless YOU!

I was so touched by Carol last night, that I had to take an opportunity to share this on the Comfy blog. The look she had on her face when she shared how much money has come in to help those in need was the best part of my night…God’s work never ceases to amaze me. THIS is such a great example of faith and action!!!

God Bless you Carol and your ministry!!!

You can like A Little Birdy on Facebook too! You never know when you can be a little birdy or perhaps feel led to fill a need that will change someone’s life!


Signature

Loaded Italian Rice- A Quick GF Meal Idea!

A fellow mom and I were chatting at birthday party not to long ago and would you believe she was also a fellow glutenous minimus warrior!? lol!

So, we did what all glutenous minimus people do and talked about all the foods we COULD eat, ha!

She was so sweet to share this easy idea-I’ve made it a ton of times! It’s great for those busy weeknights. Enjoy!

*Kid friendly! Wohoo!

Loaded Italian Rice- A Quick GF Meal Idea!

Prep time:
Cook time:
Total time:
Serves: 4-6
Ingredients
  • Brown Rice {per package instructions}
  • 1 jar of marinara {I recommend Newman’s Own- or thaw out frozen homemade sauce}
  • 1.5 lbs browned and drained lean ground beef
  • 1 cup freshly shredded mozzarella cheese
  • Italian spices
  • Parmesan cheese for dusting
Instructions
  1. Cook rice per package instructions.
  2. Place 1 cup of cooked rice in an individual serving bowl.
  3. Pour warmed marinara over top.
  4. Add browned and drained beef
  5. Cheeses and spices to the top!
Notes

You can add ANY ingredients to the top of your dish…try veggies, and/or different kinds of meats/cheeses! Make it your own and enjoy!

Signature

Rhodes Rolls

I get asked all the time for my “refrigerator roll” recipe. Well, Ladies- I hope I’m not disappointing you, but I use Rhodes dough! I tend to spend most of my time on the main meal I’m making and less time on salads and rolls. Please don’t under estimate how delicious these are though…I honestly can’t make them from scratch any better than they taste!

Rhodes freezes individual dough balls {I actually use 2 dough balls per roll}. A bag like this can be found in your grocer’s freezer… It’s nice because you can use as many or as few as you like and have freshly baked rolls at any time!

Spray tins with Pam and place 2 rolls in each tin like so. Spray the tops of rolls.

Cover.

Refrigerate overnight.

If rolls have not risen enough when you’re ready to bake…let them sit out on the counter covered in plastic wrap for another hour-they will rise.


Bake in a 350 oven for 15 mins or until golden brown. Ahhh…. one of my favorite {glutenous maximus} smells. These rolls are simple to open … dot with real butter and jelly and enjoy! MMMmmmmm!!!!!

Rhodes Rolls

Prep time:
Cook time:
Total time:
Serves: 12
Ingredients
  • Rhodes frozen roll dough
  • muffin tin
  • Pam spray
Instructions
  1. Spray a muffin tin with Pam.
  2. Take 24 rolls out of bag of dough. Place 2 balls in each muffin tin.
  3. Spray tops with Pam, cover with plastic wrap and refrigerate overnight.
  4. If dough hasn’t risen enough when you’re ready to bake, let covered rolls sit out on counter for an extra hour.
  5. Preheat oven to 350 and bake for 15 mins until golden brown.


Signature

Classic Christmas Cookie Recipes @ The Better Mom!


One of the reasons I have this blog is for my children and their future spouses. I want to leave a legacy of homemaking, cooking, and sweet memories of us together. Oh, I hope they’ll remember the times we made these cookies during the Christmas season… and someday they’ll be able to make them with their children and grandchildren…Ahh, how time will fly, I’m sure. 

Light a fire, turn on your christmas lights, grab a glass of milk and come join me over at The Better Mom for these Classic Christmas Cookie recipes that will be sure to put you in the Christmas Spirit.

Signature

{My Favorite} Edible Homemade Gift Ideas for Christmas!


Snowman hot cocoa’s

3 baby food jars cleaned, dried, and filled with peppermints, hot cocoa, and marshmallows. Felt hats, buttons, eyes, mouths and noses. Fabric scarves.

I don’t know about you…but I feel blessed more than words can say. ALL of my “needs” are taken care of. Truly- I do not “need” anything for Christmas. I have my faith, health, a home, a swagger wagon, 3 beautiful children, a husband who adores me, awesome friends….I have more than I deserve. Sure, I have major challenges and am often times in the midst of some sort of storm-but honestly, my Faith anchors me and reminds me how much I have in store….that’s the big picture…that’s THE gift, rather…HE is the gift! 

I have a hunch a lot of people reading feel this way- isn’t that something.

Don’t we sometimes get caught up in it all? The shopping, the money, the hoopla and jazz of it?Why?

How do you feel about making a homemade gift? How do you feel about receiving a homemade gift? Are our hearts and minds set on material things? Do we miss out on what is really important…Loving God and loving others {Luke 10:27}?

So many of us feel like giving homemade gifts aren’t “enough”…but once you set your eyes on these adorable mini masterpieces, you may change your mind! What sweet, and thoughtful gifts these are!

***ALL of these are naturally Gluten FREE!***

Christmas Cookie Dough. All ready to go in the freezer.

Christmas Cookie Dough- To GO!

Think Garnish has a lot of great packaging ideas! Simply make a batch of perfect chocolate chip cookie dough and garnish it like so! They will have freshly home baked cookies whenever they wish! Ahhhdorable.

hostess gift: salsa! printables

Feliz Navidad!

Not a baker? No worries! Make homemade salsa–  Certain grocery stores also sell the most adorable red and green chips this time of year. Super cute!

Bake Brownies Right In The Cookie Cutters, Decorate And Give Away As Gifts, Sweet Christmas Gift Idea. Great Idea For Bake Sale.

Sweet Tooth Ornaments! 

Bake brownies or pour fudge right into inexpensive cookie cutters {do not remove, the cookie cutter is part of the gift} Decorate with candies. Finish by wrapping in a small plastic bag {Jo-anns has these} and garnish with a bow!

homemade christmas gifts - Google Search 

Sweet Treats

Who doesn’t like Puppy Chow?!!! Add some green and red M&Ms for a festive twist! Fill up mini milk jars {you can also clean and reuse Starbucks glass containers}, add some flare and a tag- Voila!

Have FUN!!! 

Signature

Homemade Cinnamon Rolls -A Christmas Morning Tradition

Ohhhh Dear…would you look at this. THIS is pure torture for a gluten-free gal. I just can’t think of anything I would rather sink my teeth in, Ladies! Ha! It’s the yeasty, gooey, warm, cream cheesy, cinnamony combination that can send a GF girl like me over the edge…lol. 

On Facebook this week, I asked you to share some of your family Christmas traditions. What a great responses you gave! I’m going to have to steal some of those ideas!  These cinnamon rolls have been on the menu since as long as I can remember. In fact, my mom used to make cinnamon rolls on Christmas morning when I was a little girl.

So, even though I cannot partake in the “eating of the rolls” I still enjoy making them for my family…a very special treat for the special people in my life. 

Don’t be intimidated -these are not hard to make! By preparing the dough the night before and sticking them in the refrigerator saves tons of time in the morning. Just pop em in the oven and voila! Freshly baked cinnamon rolls!

This recipe comes from one of my favorite Chefs…Alton Brown… Love his cooking.  

4 large egg yolks and 1 large whole egg….room temperature. I placed cold eggs in a bowl of luke warm water to get them to room temp. 

Beat together sugar, butter, and “buttermilk” {I used regular milk and added 1/2 tsp of white vinegar}

Add 1 package of instant dry yeast and salt. Oh, would you look at that…gluten free. Bahaaa!!!!!! 

Also add in 2 cups of flour and beat until combined. 

Add all but 3/4 cup of the remaining flour and knead. You can use a mixer attachment or your good ole fashioned hands on a floured surface. Just push forward and roll back until combined.

Roll dough into a ball and place in an oiled bowl. Oil the top of the dough and cover with plastic wrap and let sit to rise for 2 hours. It will double in size.

On a floured work surface, roll out dough into a horizontal rectangle. Make your cinnamon filling but combining brown sugar, cinnamon and salt in a medium bowl. Brush dough with butter everywhere but the outer edges. Sprinkle filling onto of dough.  

Flour your hands and slowly roll up into a cylinder. Even thicker parts by squeezing with your hands.

Slice with a serrated knife into 1 1/2 inch rolls. 

Place cut side down in a buttered 9×13. Cover and refrigerate overnight.

Remove rolls from the refrigerator and place in your oven {don’t turn your oven on}. Place a bowl of boiling water on the rack below. Close the door and let those rolls rise for 30 mins. Remove the rolls and the bowl of water. Pre-heat oven to 350. Bake for 30 mins until golden. Ahhhh…. 

Start making your frosting by combining cream cheese, milk, and powdered sugar. Beat well until nice and creamy. Guess what? I can eat frosting, it’s gluten free….If I remember correctly, I think I fought a child to lick one of those beaters! hahaha…

Spoon on frosting when the rolls are still nice and hot. 

Then it melts…perfectly…over the rolls… 

Enjoy with your families this Christmas morning and for many Christmas mornings to come…

{My dining room table adorned with Easy Ham and Cheesy Quiche, Soft Sugar Cookies, Linzers, Cut outs, Cracker Toffee, Sausage Gravy over Biscuits, hashbowns, bacon, and fruit salad.


Homemade Cinnamon Rolls

Author: Alton Brown
Prep time:
Cook time:
Total time:
Serves: 12
Ingredients
  • Dough:
  • 4 large egg yolks, room temperature
  • 1 large whole egg, room temperature
  • 1/4 cup sugar
  • 6 Tbsp butter, melted
  • 3/4 cup buttermilk, room temperature {you can also use regular milk and add 1/2 tsp of vinegar OR lemon juice to your milk}
  • 4 cups all-purpose flour,plus additional for dusting
  • 1 package instant dry yeast, approximately 2 1/4 teaspoons
  • 1 1/4 teaspoons salt
  • Vegetable oil or cooking spray
  • Filling:
  • 1 cup packed light brown sugar, approximately
  • 1 tablespoon ground cinnamon
  • Pinch salt
  • 1 1/2 Tbsp unsalted butter, melted
  • Icing:
  • 1/4 cup cream cheese, softened
  • 3 tablespoons milk
  • 1 1/2 cups powdered sugar
Instructions
  1. For the dough: Beat together the egg yolks, whole egg, sugar, butter, and buttermilk.
  2. Add approximately 2 cups of the flour along with the yeast and salt; beat until moistened and combined.
  3. Add all but 3/4 cup of the remaining flour and knead on low speed for 5 minutes-you can do this with your hands or if you are using a stand up mixer, change to a dough hook.
  4. Knead on low speed 5 minutes more or until the dough clears the sides of the bowl. Turn the dough out onto a lightly floured work surface; knead by hand about 30 seconds.
  5. Lightly oil a large bowl.
  6. Transfer the dough to the bowl, lightly oil the top of the dough, cover and let double in volume, 2 to 2 1/2 hours.
  7. Combine the brown sugar, cinnamon and salt in a medium bowl.
  8. Mix until well incorporated. Set aside until ready to use.
  9. Butter a 9 by 13-inch glass baking dish.
  10. Turn the dough out onto a lightly floured work surface.
  11. Gently shape the dough into a rectangle with the long side nearest you.
  12. Roll into an 18 by 12-inch rectangle.
  13. Brush the dough with the 3/4-ounce of melted butter, leaving 1/2-inch border along the top edge.
  14. Sprinkle the filling mixture over the dough, leaving a 3/4-inch border along the top edge; gently press the filling into the dough.
  15. Beginning with the long edge nearest you, roll the dough into a tight cylinder.
  16. Firmly pinch the seam to seal and roll the cylinder seam side down. Very gently squeeze the cylinder to create even thickness.
  17. Using a serrated knife, slice the cylinder into 1 1/2-inch rolls; yielding 12 rolls. Arrange rolls cut side down in the baking dish; cover tightly with plastic wrap and store in the refrigerator overnight or up to 16 hours.
  18. Remove the rolls from the refrigerator and place in an oven that is turned off.
  19. Fill a shallow pan or bowl 2/3-full of boiling water and set on the rack below the rolls. Close the oven door and let the rolls rise until they look slightly puffy; approximately 30 minutes.
  20. Remove the rolls and the shallow pan of water from the oven.
  21. Preheat the oven to 350 degrees F.
  22. When the oven is ready, place the rolls on the middle rack and bake until golden brown, or until the internal temperature reaches 190 degrees F on an instant-read thermometer, approximately 30 minutes.
  23. While the rolls are cooling slightly, make the icing by whisking the cream cheese in the bowl of a stand mixer until creamy.
  24. Add the milk and whisk until combined.
  25. Sift in the powdered sugar, and whisk until smooth.
  26. Spread over the rolls and serve immediately.
Signature

Adorable Snowman Cupcakes

To think with just a few ingredients you can turn ordinary cupcakes into….drum roll please….the most adorable little snowman cupcakes you ever did see! I had such a fun time making these with my children’s classmates. These would make adorable gifts in tins, a family craft, or as pictured~ for a child’s class Christmas party.

**Inspiration from Taste of Home** I revised how to make the top hat to make it easier for little hands.

My little girl…she loves crafts!

What a blessing it was to spend this time with her and her classmates.

So sweet!


Here are the simple instructions…


Signature

Beautiful Christmas Truffles {{Easy}}

These are incredibly easy, yet elegant treats to make for the holidays. If you are not a baker -these are perfect. If you are a baker- add them to your cookie tray for a chocolaty treat. You are going to love these melt-in-your mouth beauties!

I made these very truffles for my husband’s clients.  

Featured on Women Living Well.

Heat cream and butter on medium high heat  while stirring. Do this until until slightly boiling. Let simmer for 2 mins.

Remove pan from heat and add vanilla, candy bars and semisweet chocolate.

Stir until smooth. Then, place plastic wrap on top and refrigerate 4 hours or over night.

The chocolate hardens, but is still soft because of the butter and cream.

Roll about a tsp of chocolate into a ball with your hands. Then, roll again in chopped almonds.


Place in small paper cups. I purchased these ones from Jo-Ann fabrics, they were “Martha Stewart” brand in teal and a beautiful red color. I  used teal here to match the colors of our business for gift giving to clients.

Here they are on a cookie tray..YUM! These are always the first ones gone, lol! (and they are the easiest to make- go figure!)

This is one of the boxes I used to package the truffles and cookies in for our clients- The box was purchased at Marcs for 99 cents, the ornament was also purchased at Marcs (50 cents) toile was purchased at Jo-Anns -whala! Fancy yet affordable! I like those qualities! lol.

Marcs did not have enough of those beautiful boxes, so I bought some additional paper boxes at Jo-ann’s – I purchased some paper doilies to make the window look more like a snowflake and added toile and a some flare (that is probably for a wreath?) but it looked elegant and again…was affordable.

Christmas Truffles

Prep time:
Cook time:
Total time:
Serves: 30
Ingredients
  • 3/4 cup heaving whipping cream
  • 1 Tbsp butter
  • 1/2 tsp vanilla
  • 6 Hershey’s milk chocolate candy bars (broken)
  • 6 oz Ghiradelli semi-sweet chocolate chips
  • 1 cup processed almonds
  • Tins and flare (optional)
Instructions
  1. In a medium saucepan constantly stir cream and butter over medium high heat.
  2. Let simmer for 2 mins then take off of burner.
  3. Add vanilla, candy bars, and semisweet chocolate and stir until smooth.
  4. Place plastic wrap on top of chocolate’s surface and refrigerate 4 hours or over night.
  5. When chocolate has hardened roll by the teaspoon into small balls and roll into processed almonds.
  6. Place in small paper cups if desired.
Notes

These make beautiful Christmas gifts!


Signature