Search Results for: rolls

Rhodes Rolls

I get asked all the time for my “refrigerator roll” recipe. Well, Ladies- I hope I’m not disappointing you, but I use Rhodes dough! I tend to spend most of my time on the main meal I’m making and less time on salads and rolls. Please don’t under estimate how delicious these are though…I honestly can’t make them from scratch any better than they taste!

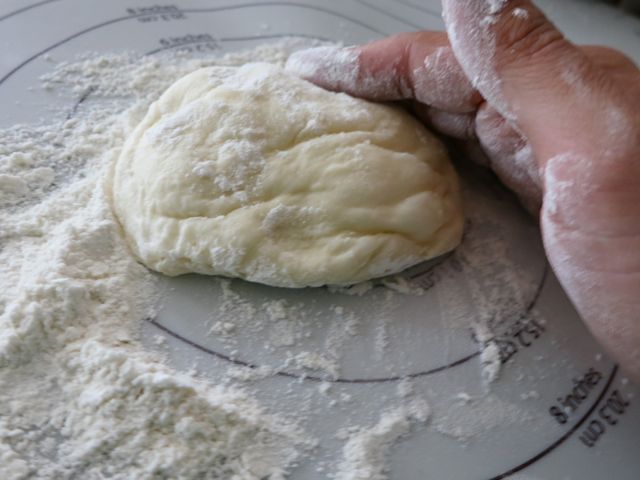
Rhodes freezes individual dough balls {I actually use 2 dough balls per roll}. A bag like this can be found in your grocer’s freezer… It’s nice because you can use as many or as few as you like and have freshly baked rolls at any time!

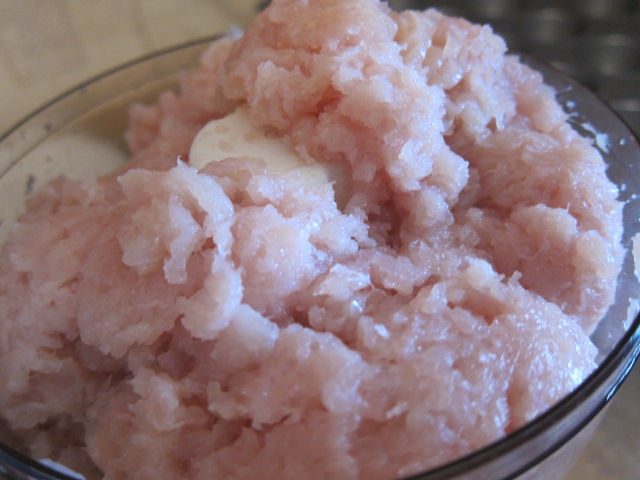
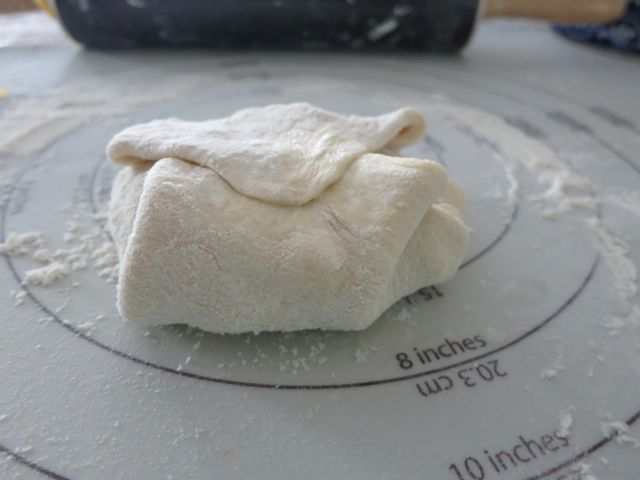
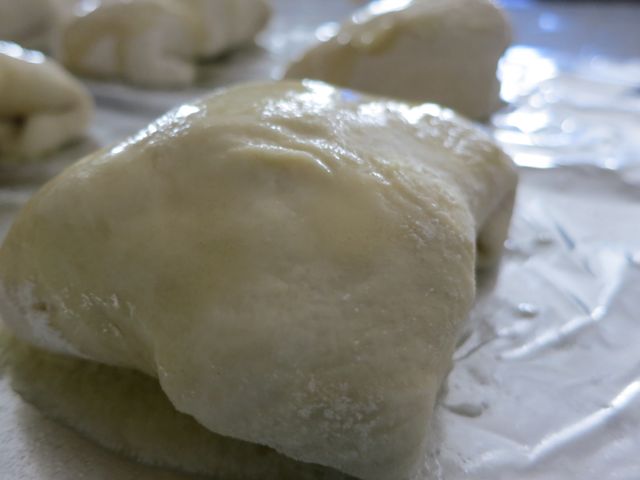
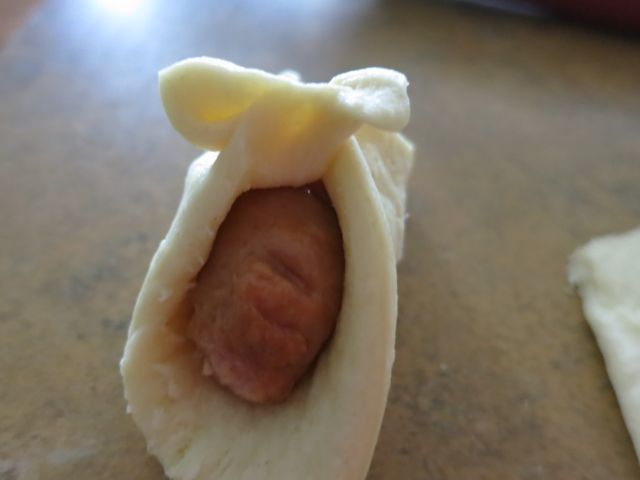
Spray tins with Pam and place 2 rolls in each tin like so. Spray the tops of rolls.
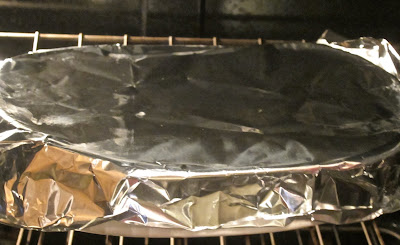
Cover.

Refrigerate overnight.

If rolls have not risen enough when you’re ready to bake…let them sit out on the counter covered in plastic wrap for another hour-they will rise.


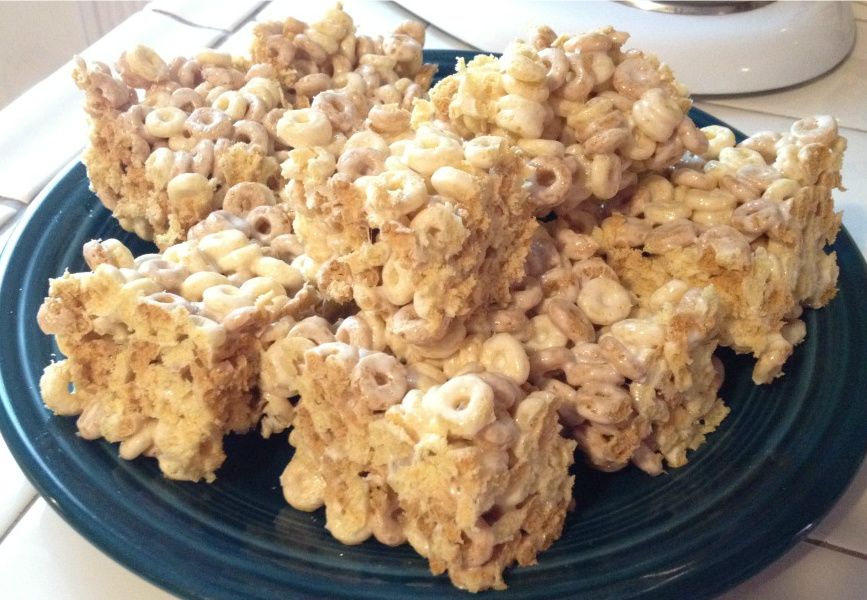
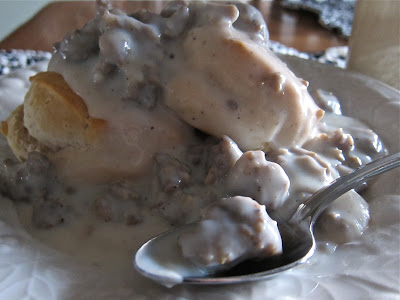
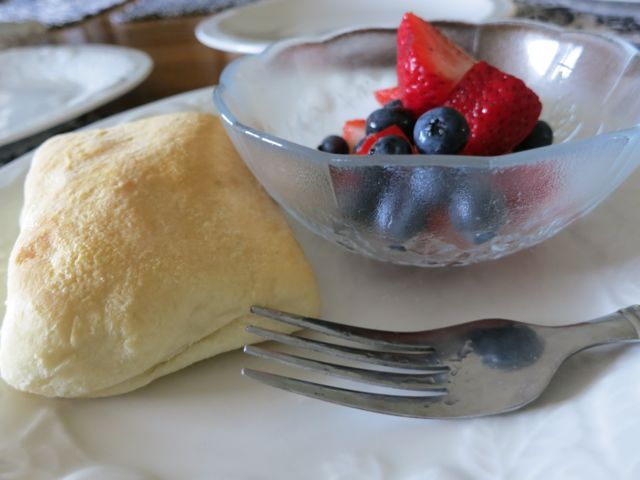
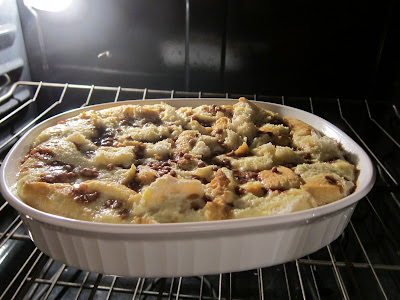
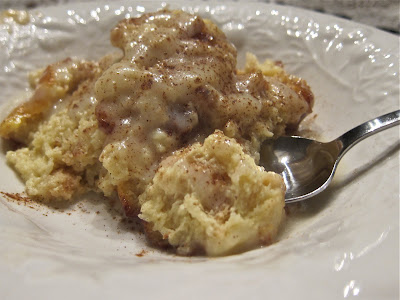
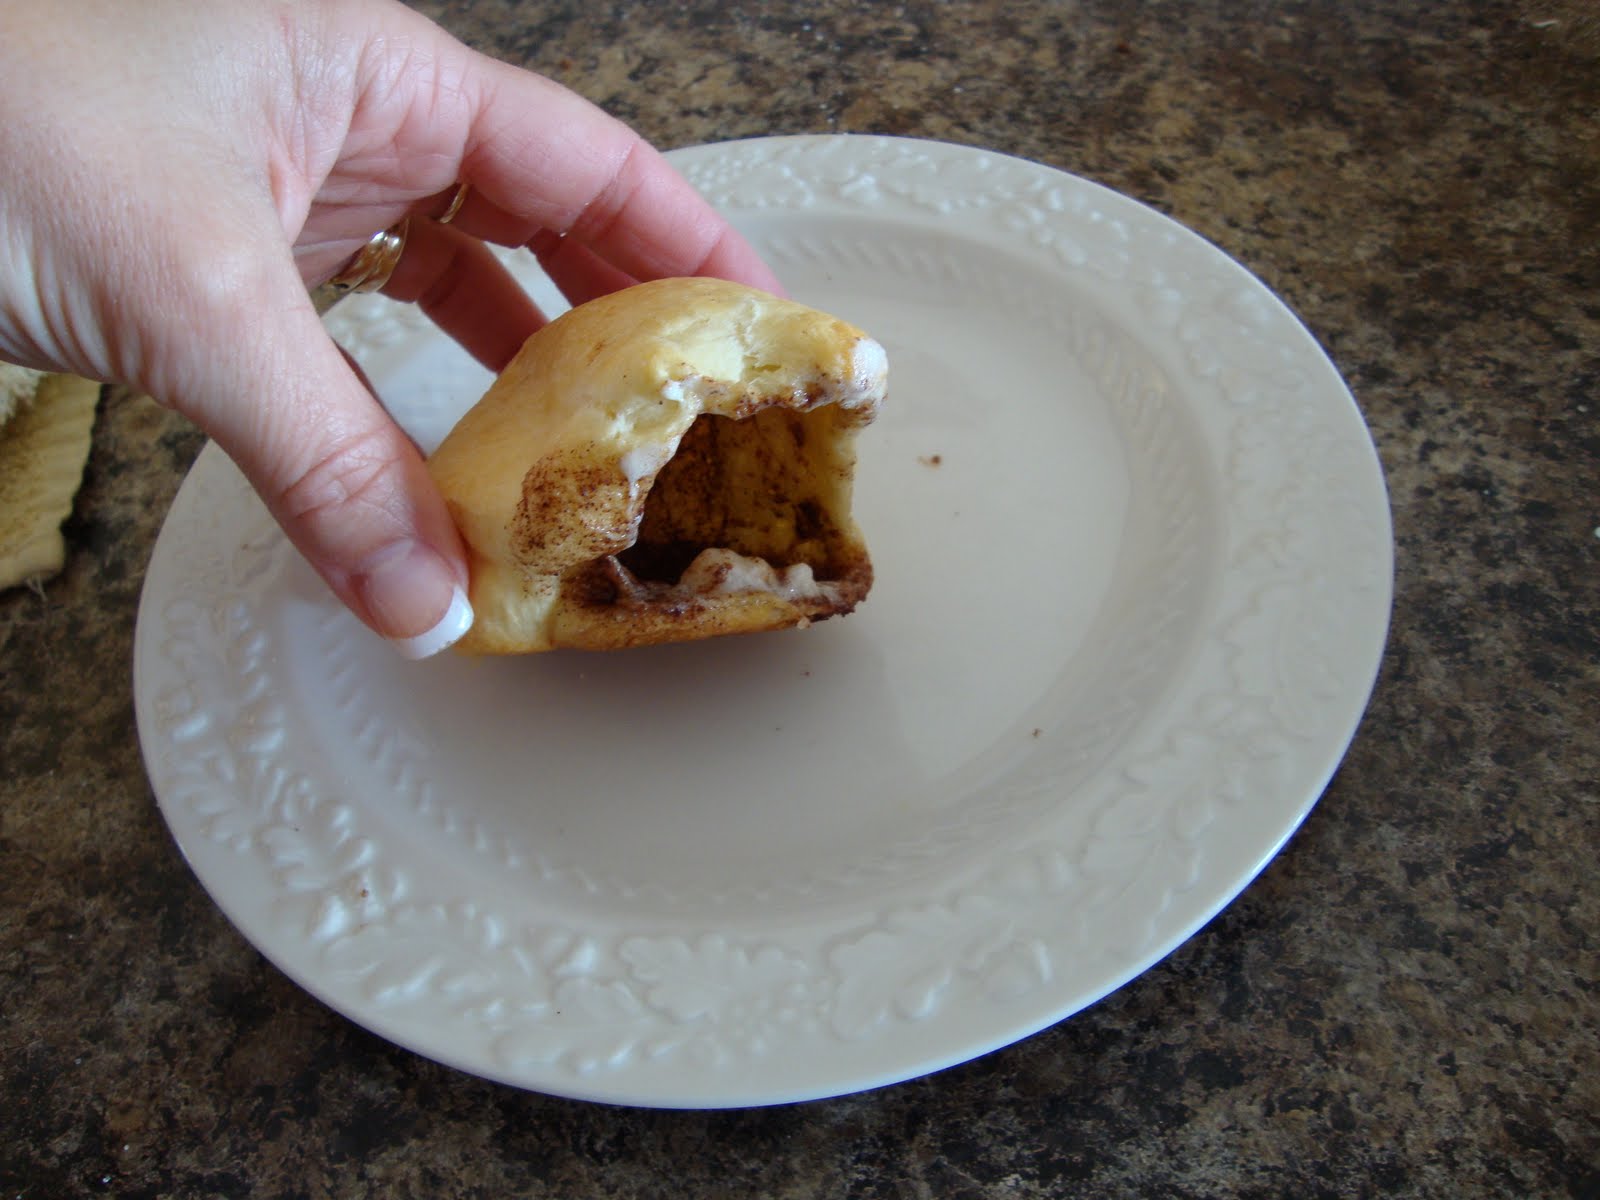
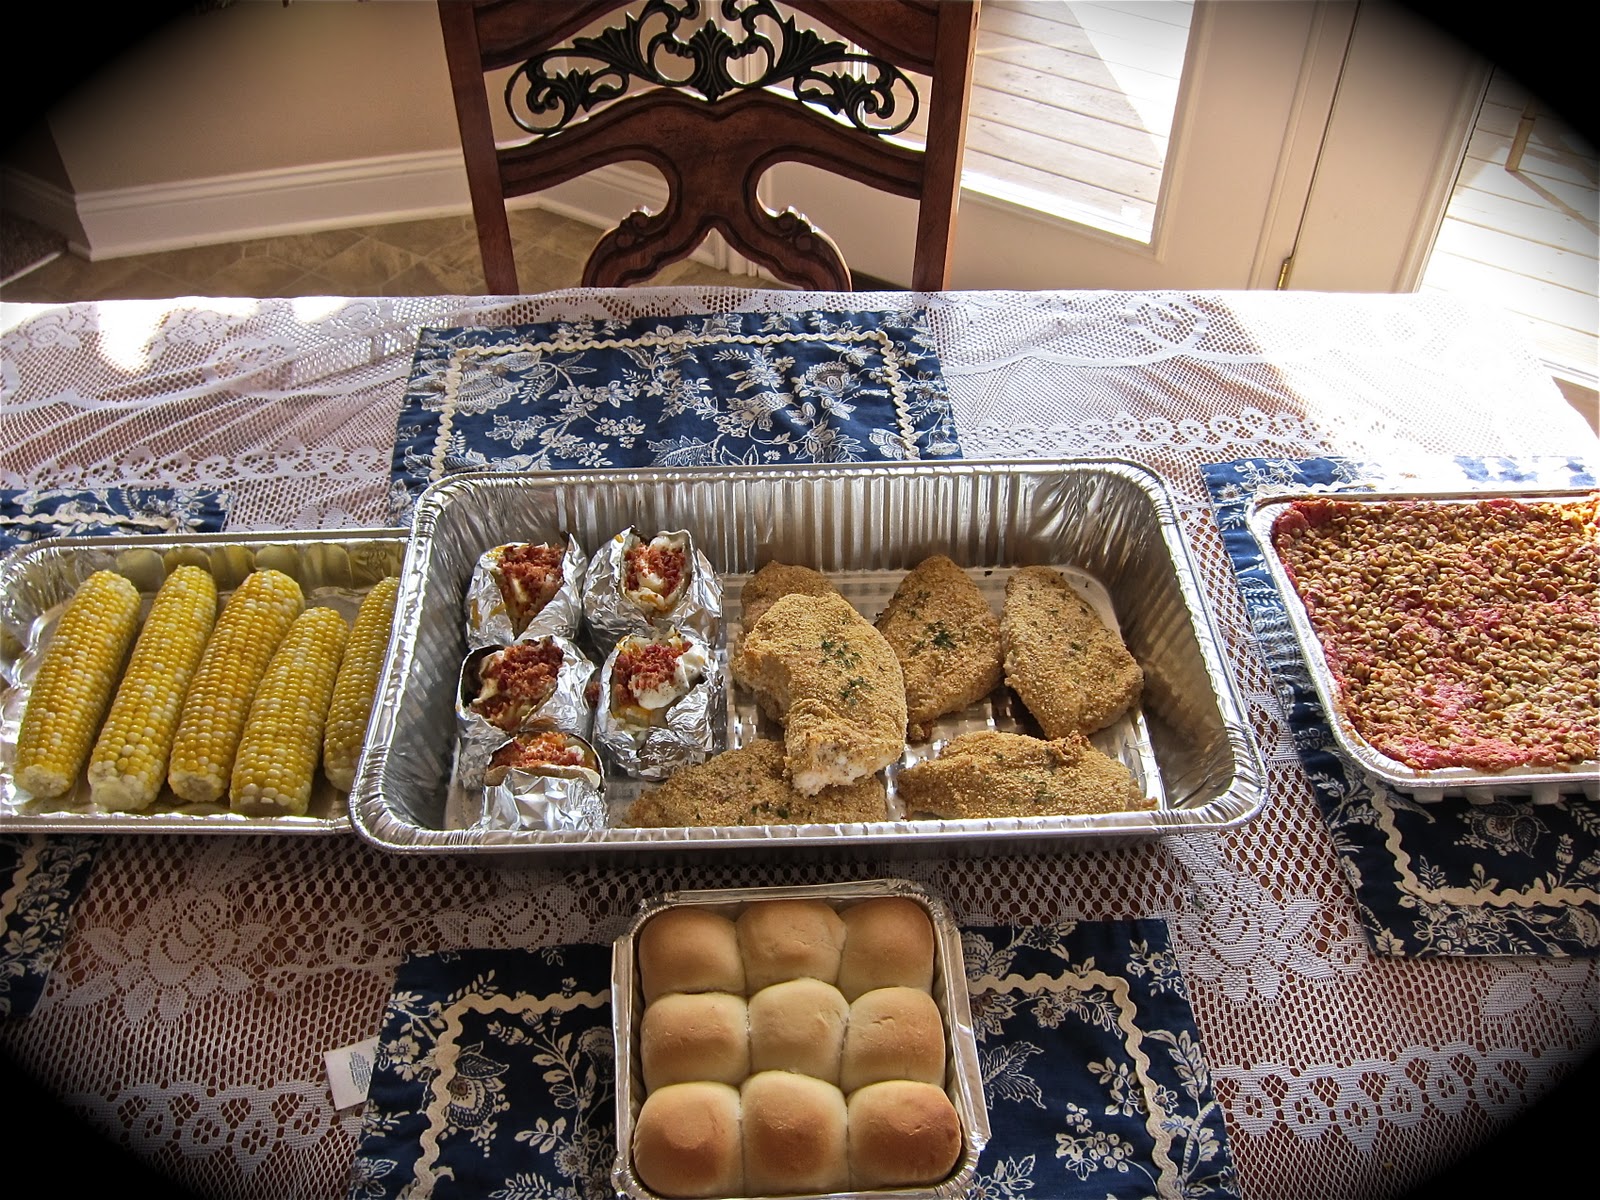
Bake in a 350 oven for 15 mins or until golden brown. Ahhh…. one of my favorite {glutenous maximus} smells. These rolls are simple to open … dot with real butter and jelly and enjoy! MMMmmmmm!!!!!

Rhodes Rolls

Prep time:
Cook time:
Total time:
Serves: 12
Ingredients
  • Rhodes frozen roll dough
  • muffin tin
  • Pam spray
Instructions
  1. Spray a muffin tin with Pam.
  2. Take 24 rolls out of bag of dough. Place 2 balls in each muffin tin.
  3. Spray tops with Pam, cover with plastic wrap and refrigerate overnight.
  4. If dough hasn’t risen enough when you’re ready to bake, let covered rolls sit out on counter for an extra hour.
  5. Preheat oven to 350 and bake for 15 mins until golden brown.


Signature

Homemade Cinnamon Rolls -A Christmas Morning Tradition

Ohhhh Dear…would you look at this. THIS is pure torture for a gluten-free gal. I just can’t think of anything I would rather sink my teeth in, Ladies! Ha! It’s the yeasty, gooey, warm, cream cheesy, cinnamony combination that can send a GF girl like me over the edge…lol. 

On Facebook this week, I asked you to share some of your family Christmas traditions. What a great responses you gave! I’m going to have to steal some of those ideas!  These cinnamon rolls have been on the menu since as long as I can remember. In fact, my mom used to make cinnamon rolls on Christmas morning when I was a little girl.

So, even though I cannot partake in the “eating of the rolls” I still enjoy making them for my family…a very special treat for the special people in my life. 

Don’t be intimidated -these are not hard to make! By preparing the dough the night before and sticking them in the refrigerator saves tons of time in the morning. Just pop em in the oven and voila! Freshly baked cinnamon rolls!

This recipe comes from one of my favorite Chefs…Alton Brown… Love his cooking.  

4 large egg yolks and 1 large whole egg….room temperature. I placed cold eggs in a bowl of luke warm water to get them to room temp. 

Beat together sugar, butter, and “buttermilk” {I used regular milk and added 1/2 tsp of white vinegar}

Add 1 package of instant dry yeast and salt. Oh, would you look at that…gluten free. Bahaaa!!!!!! 

Also add in 2 cups of flour and beat until combined. 

Add all but 3/4 cup of the remaining flour and knead. You can use a mixer attachment or your good ole fashioned hands on a floured surface. Just push forward and roll back until combined.

Roll dough into a ball and place in an oiled bowl. Oil the top of the dough and cover with plastic wrap and let sit to rise for 2 hours. It will double in size.

On a floured work surface, roll out dough into a horizontal rectangle. Make your cinnamon filling but combining brown sugar, cinnamon and salt in a medium bowl. Brush dough with butter everywhere but the outer edges. Sprinkle filling onto of dough.  

Flour your hands and slowly roll up into a cylinder. Even thicker parts by squeezing with your hands.

Slice with a serrated knife into 1 1/2 inch rolls. 

Place cut side down in a buttered 9×13. Cover and refrigerate overnight.

Remove rolls from the refrigerator and place in your oven {don’t turn your oven on}. Place a bowl of boiling water on the rack below. Close the door and let those rolls rise for 30 mins. Remove the rolls and the bowl of water. Pre-heat oven to 350. Bake for 30 mins until golden. Ahhhh…. 

Start making your frosting by combining cream cheese, milk, and powdered sugar. Beat well until nice and creamy. Guess what? I can eat frosting, it’s gluten free….If I remember correctly, I think I fought a child to lick one of those beaters! hahaha…

Spoon on frosting when the rolls are still nice and hot. 

Then it melts…perfectly…over the rolls… 

Enjoy with your families this Christmas morning and for many Christmas mornings to come…

{My dining room table adorned with Easy Ham and Cheesy Quiche, Soft Sugar Cookies, Linzers, Cut outs, Cracker Toffee, Sausage Gravy over Biscuits, hashbowns, bacon, and fruit salad.


Homemade Cinnamon Rolls

Author: Alton Brown
Prep time:
Cook time:
Total time:
Serves: 12
Ingredients
  • Dough:
  • 4 large egg yolks, room temperature
  • 1 large whole egg, room temperature
  • 1/4 cup sugar
  • 6 Tbsp butter, melted
  • 3/4 cup buttermilk, room temperature {you can also use regular milk and add 1/2 tsp of vinegar OR lemon juice to your milk}
  • 4 cups all-purpose flour,plus additional for dusting
  • 1 package instant dry yeast, approximately 2 1/4 teaspoons
  • 1 1/4 teaspoons salt
  • Vegetable oil or cooking spray
  • Filling:
  • 1 cup packed light brown sugar, approximately
  • 1 tablespoon ground cinnamon
  • Pinch salt
  • 1 1/2 Tbsp unsalted butter, melted
  • Icing:
  • 1/4 cup cream cheese, softened
  • 3 tablespoons milk
  • 1 1/2 cups powdered sugar
Instructions
  1. For the dough: Beat together the egg yolks, whole egg, sugar, butter, and buttermilk.
  2. Add approximately 2 cups of the flour along with the yeast and salt; beat until moistened and combined.
  3. Add all but 3/4 cup of the remaining flour and knead on low speed for 5 minutes-you can do this with your hands or if you are using a stand up mixer, change to a dough hook.
  4. Knead on low speed 5 minutes more or until the dough clears the sides of the bowl. Turn the dough out onto a lightly floured work surface; knead by hand about 30 seconds.
  5. Lightly oil a large bowl.
  6. Transfer the dough to the bowl, lightly oil the top of the dough, cover and let double in volume, 2 to 2 1/2 hours.
  7. Combine the brown sugar, cinnamon and salt in a medium bowl.
  8. Mix until well incorporated. Set aside until ready to use.
  9. Butter a 9 by 13-inch glass baking dish.
  10. Turn the dough out onto a lightly floured work surface.
  11. Gently shape the dough into a rectangle with the long side nearest you.
  12. Roll into an 18 by 12-inch rectangle.
  13. Brush the dough with the 3/4-ounce of melted butter, leaving 1/2-inch border along the top edge.
  14. Sprinkle the filling mixture over the dough, leaving a 3/4-inch border along the top edge; gently press the filling into the dough.
  15. Beginning with the long edge nearest you, roll the dough into a tight cylinder.
  16. Firmly pinch the seam to seal and roll the cylinder seam side down. Very gently squeeze the cylinder to create even thickness.
  17. Using a serrated knife, slice the cylinder into 1 1/2-inch rolls; yielding 12 rolls. Arrange rolls cut side down in the baking dish; cover tightly with plastic wrap and store in the refrigerator overnight or up to 16 hours.
  18. Remove the rolls from the refrigerator and place in an oven that is turned off.
  19. Fill a shallow pan or bowl 2/3-full of boiling water and set on the rack below the rolls. Close the oven door and let the rolls rise until they look slightly puffy; approximately 30 minutes.
  20. Remove the rolls and the shallow pan of water from the oven.
  21. Preheat the oven to 350 degrees F.
  22. When the oven is ready, place the rolls on the middle rack and bake until golden brown, or until the internal temperature reaches 190 degrees F on an instant-read thermometer, approximately 30 minutes.
  23. While the rolls are cooling slightly, make the icing by whisking the cream cheese in the bowl of a stand mixer until creamy.
  24. Add the milk and whisk until combined.
  25. Sift in the powdered sugar, and whisk until smooth.
  26. Spread over the rolls and serve immediately.
Signature

Feasting in Fellowship Friday- Resurrection Rolls (link up!)

Happy Friday Ladies!

My friend Courtney from Women Living Well is baking up some awesome Easter treats for us! Please come take a look at her Resurrections Rolls…what a great recipe to make with the children and at the same time teach them all about the true meaning of Easter.

These are so simple and look delicious!

Be sure to *pin* this one on your Easter Recipe Board! 

DSC01407.JPG.jpg
Top 3 Picks of the Week! 

South of the Border Breakfast

Made By: Inspired By Family

Cheerio Treats!

Made By: Merry, Married, Mary Mom

Photobucket

Butterfly Cupcakes

Made By: Baking {and cooking} with Giggle Girl

It’s a Feasting in Fellowship Friday Link up! Please link up as many posts as you wish! All I ask is that you place my button (located on my sidebar). Posts may be recipe, christian or holiday in nature. Thanks so much!!

Signature

EASY Pecan Rolls with Warm Caramel

A few weeks ago my very dear friend, Julie gave me a bag of fresh pecans still in their shells. A family friend sends them each year to Julie’s parents-Her dad gave some to her with one request: “Give some of these to that friend Janelle of yours and if she happens to make something gooey, save a piece for me”. I was SO tickled! We all live on the same street, so it would be easy for me to walk down a little treat. So, one evening last week I broke some of these bad boys open and gave this recipe a whirl! Ohhh…did they look and smell SO good. Guess what? He got the entire batch-not just a piece….that is if those grandkids of his didn’t get to them first!

In a small bowl combine brown sugar, melted butter, and corn syrup.

Shelling pecans

Chop pecans and place in a bowl mixed with sugar and cinnamon.

Unroll crescent rolls like so

Pinch perforations together to seal and roll.

Sprinkle with sugar, cinnamon, and pecans. Roll up (this is super simple)

You will end up with a long cylinder ready to slice!

Place each pecan roll cut side down in an 8×8 pan. Bake at 375 for appx 15 mins until lightly golden.

When done, turn pecan rolls upside down and they will fall out of the pan with a caramel drizzle on top. Mmmmmm……


EASY Pecan Rolls with Warm Caramel
Prep time: 15 mins
Cook time: 15 mins
Total time: 30 mins
Serves: 10
Ingredients
  • 1/2 cup packed brown sugar
  • 1/2 cup butter, softened
  • 1/4 cup corn syrup
  • 1 8 oz tube Pillsbury crescent rolls (Grands)
  • 2/3 cup chopped pecans
  • 1/4 cup sugar
  • 1 teaspoon ground cinnamon
Instructions
  1. In a small bowl combine brown sugar, butter and corn syrup- pour into a buttered 8×8 glass pan.
  2. In another small bowl combine sugar, cinnamon and pecans
  3. Lay out crescent roll in a rectangle (you will see triangular seams)
  4. Pinch seams together and roll out into a workable rectangle
  5. Sprinkle with pecans, sugar and cinnamon
  6. Roll up into a long cylinder
  7. Slice into 10 rolls and place cut side down into prepared pan.
  8. Bake in a 375 oven for appx 15 mins or until golden brown.
  9. Turn upside down onto a plate and serve hot! YUM!


Signature

Meal Ministry Monday Welcomes Mem! (Delicious Thai Spring Rolls)

Mem and me at her house for lunch after our ladies bible study
It is an absolute joy for me to introduce Mem Luton…my sister-in-Christ, valued friend, heart-felt bible study leader, encourager, and yes…fellow “foodie” (this girl can cook Thai food like no one else!). Mem is pure at heart, shares God’s love with everyone she meets, radiates joy, has a passion for life, and has the kindest smile. Her testimony is one of the most unique testimonies I have ever heard. When I ever feel “not prepared”, “not good enough” or insecure about anything I try to accomplish in my life, I think of Mem. I am reminded of all of the obstacles she has had to overcome living in a “foreign” country, how much she puts herself out there for the Lord dispite language barriers, how she had to get used to a completely different culture, and how she has had to lean on God for strength in so many ways. Did you catch that she is my bible study leader? Yes….incredible for someone who has only lived in the United States for 10 years and was born Buddhist. God is that good. I am so blessed to have this sweet woman in my life…I could go on for days about how much I love her but will let her take it from here…
She is “Comfy in her Kitchen!”
leading bible study at our church; “Stepping Up” by Beth Moore. 
Mem cooked a delicious Thai meal this year for our
 bible study over at Courtney’s house (www.womenlivingwell.org)
PERSONAL TESTIMONY
By: Mem Luton
“And whatsoever you do, do it heartily as unto the Lord and not unto men.”—Col. 3:23

Cooking is like an art for me. Although there’s a lot of hard work involved, it’s more than just rewarding, especially when I see people enjoying what I’ve prepared and wanting more. I never dreamed when I came to America ten years ago that I would be as heavily involved in cooking Thai food as I am now, nor that there would be as many people who like my cooking as has turned out to be the case. I began learning to cook “American style” after I got married, but experimented with new recipes I was coming up with for Thai food at the same time. (Fortunately, I have a family here who are always eager to be my willing guinea pigs). This is one of the reasons why it has been such a delight to know Janelle Nehrenz, with whom I have so much in common. She not only loves the Lord, but also enjoys cooking as much as I do. As a full-time housewife and a stay-at-home mother of four, I experience a great deal of fulfillment and satisfaction in life. Nevertheless, I have also found it very fulfilling to have people over for dinner and to minister to others out of my home.

I enjoy cooking, not only for my family, but also for my friends at church and at the school where my children attend. Since I became an American citizen, one of the things that I have come to love about this country is the fact that here I am free to still be who I am while being an American at the same time. Consequently, while being fiercely loyal to the United States and the American flag, I enjoy introducing people to what is best from my former life in Thailand as well. Most important of all, it has been my desire to model the new life I now have in Jesus Christ ever since the day I surrendered my life to Him before I left Thailand. Considering my Buddhist background, however, people often find it surprising to learn just how I became a Christian in the first place.

I was born the youngest of 7 children in a strong Buddhist family in southern Thailand. My father was the second richest man in the area, but I never saw those riches. By the time I was born, my father had lost everything. He and mother were separated before I was born, so one of my greatest desires was for a loving father and a happy family.

I almost died at birth because there was no doctor. My father just happened to be home that day and delivered me despite having no experience. When the local midwife discovered how badly he had performed the delivery, she said that both my mother and I were lucky to be alive. That would not be the only time I almost died.

Soon after I was born we lost our house, and my mother and I moved in with my grandmother who lived deep in the jungles of southern Thailand. We had no electricity or running water, and lived in very primitive conditions, but it was a lot of fun for me. I loved seeing the elephants, watching the monkeys in the trees, and being able to swim in the nearby river, but I always had to watch out for alligators. One time when I was 4, I was bitten by a cobra while walking through the jungle. My leg began swelling greatly and I began to fall into the “death sleep.” My brother ran as fast as he could with me in his arms to a village to get help but was told there was not much hope. Cobra bites are usually fatal, but somehow I recovered instantly. Some people said it was a miracle.

My great-grandmother belonged to royalty, but fell from grace when she married a commoner. Her daughter (my grandmother) continued to teach us to speak the cultured Thai dialect anyway, even though we were poor. She always took me to the temple and taught me in the ways of Buddha—that good deeds were important to atone for past sins and go to heaven. One day in the temple I saw several pictures of hell showing lost souls suffering in the fire and being tortured by demons. I was so terrified that I devoted myself to doing good deeds and being a good person so that I would not go there when I died.

When I was eight, my grandmother died. She had a servant’s heart, was deeply loved by all who knew her, and was very devoted to Buddha. Her funeral was very sad for me, because I had no way to know if she was in heaven. To add to our grief, someone cheated my mother out of the property my grandmother planned to give her. My father had left us nothing, and my grandmother’s death now left us penniless. Most of my brothers and sisters had moved to Bangkok to find work, so my mother and I moved there too.

In Bangkok, I determined to do my best in school so that I might somehow regain the riches and prestige that had once belonged to my family. I let people see only the bright side of my past and tried to hide our poverty. As a result, I became very skilled at lying, and would fight anyone who provoked me. I boasted about how rich my father was and about my great-grandmother’s famous royal name of “Nahtnakorn.”

I also became a thief. If there was something pretty in a store, “I came; I saw; I took.” I first stole a toy ring, but my conscience bothered me because of what my grandmother taught me. After a few days, however, my guilt feelings faded, and the next time I stole something, it was easier. One time I stole a pair of shoes in a Buddhist temple, but those pictures I had seen of people burning in hell so bothered me that I returned them. From then on I only stole “little” things—like money out of pay telephones. My soul felt unclean. I was happy-looking on the outside, but very unhappy on the inside. I had no assurance that I would ever go to heaven, because I just could not become the kind of “good person” that deserved to go there. Thai people believe that babies are born clean and develop bad behavior only because of outside influence. But no one had ever taught me to lie or steal. Yet these had become regular habits. I wondered if I could ever earn my way to heaven. Just how many good deeds would it take to atone for my sins?

Praying to Buddha brought no satisfaction for me, because our prayers were not even in the Thai language. I wondered, “If Buddha is God, why is he dead and if his idol is alive, why can’t he eat the food we place before him?” We continued making offerings to idols, but were terrified of demons and erected a spirit house for them to live in. We burned incense daily, but nothing seemed to take away our fear of them. I will only say that my family’s experience with demonic spirits has been real and terrifying.

To satisfy them once, my mother gave me away to her sister who was a practicing medium and conducted séances. I had become very sick, and my mother believed that the spirits wanted her to give me to my aunt to raise. It was only when I suddenly recovered that my mother changed her mind and took me back. God had miraculously showed up to save my life again—this time from a life in the occult. Little did I know at the time that on the other side of the world a woman was praying for me every day for 50 years—even before I was born—that God would protect me and that I would be saved. I would not discover this until many years later after I got married. 
This woman was Edna Luton, my mother-in-law.

My oldest sister was largely responsible for providing for the family. In the absence of a father, she imposed discipline, which we hated. We feared her and called her the “black witch.” Therefore, I was surprised when I came home one day and saw her showing love and telling the family about Jesus. An American missionary had told her about Jesus, and now she was telling us about Him. She said that, according to the Bible, “all have sinned and fall short of the glory of God,” but that God loved me, sent His perfect son to die on the cross for me, and wanted to become my Heavenly Father. Not having even seen my earthly father more than twice in my life, these words flooded my soul with hope and joy. She shared John 3:16 with me and told how Jesus paid my sin’s penalty and that I could invite Him into my heart through prayer. Without hesitation, I eagerly prayed asking Jesus to come into my life, forgive me, and give me eternal life. I had no reservation about leaving Buddhism to become a Christian or, as the Bible says, a child of God. And, best of all, it was all free!—not something I had to earn or work for. I knew then that I wanted to be a missionary and tell others about Jesus.

Unfortunately, I had little follow-up or discipleship for two years until I was 14 years old when an American school teacher was invited to help with the ministry. He not only taught us the importance of Lordship, but he showed us how to memorize and meditate on God’s Word, how to have a daily quiet time, and how to put the Word into practice. He continues today helping me grow as a Christian. He’s my husband—Bryan Luton.

Living the Christian life was fun for me. I was taken out of school to live in the ministry center, which my sister and brother-in-law had set up in our house, and I was constantly surrounded by short term missionaries from America who came to help with the ministry. When my brother-in-law and sister moved back to America, however, I felt devastated and alone. I was about to learn two very painful lessons—that we must walk by faith, not by sight, and that my worst enemy was my own pride, which resisted God’s grace.

Feeling very alone now, I decided to go back to school and complete my high school education. I began making many friends among unbelievers and, although I knew better, I began dating an unbeliever, thinking that I could win him to the Lord. I neglected God’s Word, because it was too convicting, and I stopped going to church. Instead of influencing my friends for Christ, they were influencing me. I was letting go of God, but God did not let go of me. Time after time, God protected me from destructive temptations because of His mercy and the prayers of His people.

Longing for the fellowship that I had once enjoyed with the Lord, I accepted an offer to enroll in a Bible training college. God “showed up” again and provided my expenses. I now spent most of my time in God’s Word. Verses I had memorized years earlier ministered to me again with a new freshness, especially Romans 8. Reading, meditating and applying this chapter marked the turning point in my Christian life: There is therefore now no condemnation to them that are in Christ Jesus who walk not after the flesh but after the Spirit. I prayed a prayer of genuine repentance, and the joy of my salvation returned. I set Jesus apart as Lord of my life, and this time surrendered ownership rights of my life to Him. I began making restitution to those from whom I had stolen, and I began confessing and asking forgiveness of those to whom I had told lies. This also meant forgiving those who had wronged me, even if they don’t apologize. I was learning to be a doer of the word, not a forgetful hearer, and to walk by faith, not by sight.

I am far from what I once was, but I am also far from what I hope some day to be. God continues to expose my areas of weakness (and often uses my own children to do so). But because of the assurance I have from God’s Word, I have no fear of where I will spend eternity when I die. I have something now I always wanted but never had—a Father—a loving “Heavenly Father,” who is more than any earthly father could ever be. It’s also no longer important to me that my earthly father was rich, because my Heavenly Father has given me riches in Christ. It’s no longer important to me that my great-grandmother had belonged to royalty, because I am a child of the King of Kings. And I also have the joy of a stable family, not just my husband and children, but the family of God. I am crucified with Christ, nevertheless I live. Yet not I, but Christ lives in me.—Gal. 2:20

Mem has been so kind to share with us her very own Spring Roll recipe! You will never taste Spring Rolls better than these. I have to tell you Ladies this (I am giggling)…I was at the grocery store today and I brought with me Mem’s recipe. I was a little bewildered at some of the ingredients so I called her. She said “Janelle, why don’t you let me bring the ingredients over to your house…better yet, why don’t you let me stay and help you make them!?”So, sure enough an hour later we were at my house making this delicious recipe together! What sweet fellowship…I am one lucky girl to have such kind people in my life. So, here we are…


Mem’s Thai Spring Roll Recipe Adventure


Spring Roll wrappers are a bit thinner than wonton/egg roll wrappers- 
but you mayuse whatever you are able to find, Mem suggests this kind.

This is a sweet and sour dipping sauce -Mem pours it in a serving
 dish and adds a squeeze of lime juice to it…She purchases this at 
“World Market”If you cannot find this particular brand, you may use any 
sweet and sour sauce.

These are “bean threads” that Mem purchases at an Asian store.
 You may use rice noodles or bean spouts if you wish.

In a food processor, chop raw chicken- isn’t that interesting? I love it!

This is what it looks like…
Then she adds about a Tablespoon of soy sauce and 1 tsp of cajun 
powder to the chicken and lets it marinate while she prepares the other parts
 of the recipe

Just a simple Cajun seasoning you find anywhere

boil the noodles (or bean threads) until tender- this does not 
take long!

Mem with my daughter. They have a special bond 
(and both appreciate pretty shoes! lol).

chop carrots and green onion

Add about a Tablespoon of the green onion mixture to the chicken 
and mix it up

Then, in a wok heated on medium high with peanut oil add the 
chicken and the carrots, onions, and pre-chopped cabbage. Press down 
on the chicken with a spatula and stir…continue this pattern until cooked through.
Let the water out of the boiling noodles

Then add the noodles and additional Tbsp of soy sauce to the chicken mixture and 
stir well.

Take the Spring Roll wrappers out of the package and wet slightly
 with water

A quick video on how to roll up the Spring Rolls…

Cover in a damp cloth 

Roll em up! 
In the same wok (but cleaned out of course), I heat more peanut oil (appx 2 cups) on med-high to high heat and fry the Spring Rolls for about 1 1/2 mins per side until lightly golden. Then, place on a paper towel in a colander and let them dry before serving on serving dish.


Whala! Serve with a side of delicious sweet and sour dipping sauce.

You may also cut them at an angle for a smaller bite-sized portion

Mem’s Thai Spring Roll Recipe
(makes 24)

1 package of spring roll wraps
2 chicken breasts (processed/chopped raw)
1/2 cup diced carrots
1/2 cup pre-chopped cabbage (slaw)
1/4 cup chopped green onions
1 (2 oz) package of glass noodles (bean threads)
1 tsp cajun seasoning (or just cayenne)
2 Tbsp soy (separated)
2 1/4 cups peanut oil (1/4 cup to stir fry chicken; 2 cups to fry spring rolls)
(sweet and sour sauce/ juice of 1/2 a lime- for dipping)

Boil water in a small saucepan; add noodles, cook until tender, drain and cut up into 2 inch pieces. Chop carrots and green onions; set aside. Rinse raw chicken and place in food processor-chop well. Open processor and add 1 Tbsp of soy sauce, 1 tsp cajun seasoning, and 1 Tbsp of chopped carrots and green onions to raw chicken, stir. Heat wok and 1/4 cup oil on med-high. When hot, stir fry chicken, and all of the carrots, green onions and add additional Tbsp of soy sauce together. Press down on chicken with spatula, then stir…continue this motion until cooked through. Add noodles and stir.

Rolling
(see youtube video above)
Take spring roll pastry out of package sprinkle with water. Wet dish cloth with water and wrap pastry in it. Carefully peel one pastry at a time. Lay out one pastry and place a heaping tsp of chicken mixture at the bottom corner. Roll bottom corner over chicken mixture. Roll the right corner in, then left corner in, then roll up into finished. Do this until ingredients are gone.

Frying

Heat 2 cups oil in wok (or fry daddy) and place 4-6 spring rolls in at a time. Fry for appx 1 1/2 mins per side then flip over. Fry until lightly golden. Place paper towels in a colander, drain, and serve on serving platter.

Sauce

Mem suggests purchasing Mae Ploy sweet chili sauce from “World Market”, however any sweet and sour will do. She squeezes the juice of 1/2 a lime into about 1 cup of sauce.


Thank you Mem for sharing your testimony and delicious recipe with all of us! 
Love to you,
Janelle 


Questions for Mem? Please e-mail me at JMNehrenz@me.com and I will forward them to her! She is praying for you and is willing to help through her testimony! 

Please e-mail me at JMNehrenz@me.com to be a guest blogger on Meal Ministry Mondays. I would love to show off your love for the Lord and His people! 


I am participating at Living Well Wednesdays!
For more inspiring stories please click on the button below.


I am participating in Titus Tuesdays and 2 Tasty Tuesdays- Please check these wonderful sites out for more delicious recipes from fellow bloggers! YUM!

Beauty and Bedlam

Signature

3 Perspectives On Change.


There are only a few certainties in life, but one thing is for sure…change is gonna come. Depending on our history, the types of changes we encounter, and our perspective, we can determine what we make of change.

Here are three perspectives on change…

1. For some, change is frightening, uncomfortable, and something to avoid.

Change means bad.

Perhaps an unexpected event happened and life as she thought she knew of it, was all of a sudden not so. This association with change can stick in our mental weaving if we allow it.

Perhaps he had to move all the time as a child… his home went into foreclosure each time dad lost a job. Moving equals scary now.

Or, he got let go from a job and now any change to employment triggers anxiety. Change means he isn’t good enough.

Maybe she found out she’s pregnant and although she’s overjoyed at the thought of this, shadow memories of a miscarriage remind her of her bodily changes and it’s painful beyond description. Pregnancy changes equal anguish.

“Please, lord …no more change, she says here. It’s just not what I need or want …”

“For God hath not given us the spirit of fear; but of power, and of love, and of a sound mind.”

– 2 Timothy 1:7

2. Some accept change because they know it’s inevitable and it gives them opportunities to grow.

It’s neither good nor bad- it just is what it is. There’s a healthy normalization assigned to the experience.

Change means what it means and it’s acceptable.

This is when she gets married and her heart breaks and rejoices at the same time. She leaves the comfort of her family of origin and onto the new life ahead.

He graduates college and misses “his people”, but he lands a job he worked hard to get.

She has a baby and life changes dramatically – little sleep, new worries, but oh, how precious. She can’t imagine life without her bundle of joy.

This is rational and good. Come what may. I’ve got this. God’s got my back. Bring it.

Bitter sweetness.

In a perfect world. We’d live here. There’s a healthy give and takeaway. 

“There is a time for everything and a season for every activity under the heavens.”

– Ecclesiastes 3:1


3. Others beg for change. This is where daily life is physically and emotionally painful. This is when living in each second gets us through to the next.

These are my people. This is my tribe.

I’ve had all three perspectives, but I can identify the most right here. And Lord, don’t you let me forget it.

Change is a beggar’s prayer.

Friends, I get it…

Words can say, “it won’t always be this way.” But it feels like there’s no way out.

“No temptation has overtaken you except what is common to mankind. And God is faithful; he will not let you be tempted beyond what you can bear. But when you are tempted, he will also provide a way out so that you can endure it.”

-1 Cor 10:13

Someone whispers to her (with a concerned look) the old faithful, “ This too shall pass.” She rolls her eyes and thinks of the sheer length, magnitude, and muddy perspective of her trials. “God doesn’t see me and neither does anyone else.” She might say to herself. She might even get angry and find her own way to cope. Her pain seemingly costs more. One moment of “happiness” to escape the feeling of emptiness and pain is what she might barter. She’s human, isn’t she…

This is where cruelty of life can linger.

Where parents see their children suffering of illnesses in longevity with little hope of earthly healing.

Where a husband watches his young wife die of cancer when he imagined he’d be sitting with his arm around her in the church pew on a Sunday morning.

Where a child is sexually abused by a relative and she cannot comprehend why this is happening and why no one is stopping it.

This pain exists, friends. If we haven’t been through it, praise God. But we need to know it exists. We don’t have to go far to find someone in this kind of pain…

This is where we beg and plead for God to make a change.

“The LORD is close to the brokenhearted; he rescues those whose spirits are crushed.”

-Psalm 34:18


Change. It’s circumstantial and different for all of us. But, it will come.

And out of the few certainties we have in life, one is particularly worth highlighting. Jesus doesn’t change.

I know it can feel like a kick in the gut to read this. How cliche of a Christian to throw that out there, right?

Once we put our faith and trust in the gospel of Jesus Christ, we are saved and sealed. NOTHING can change that.

His perspective on change is something we cannot even grasp because He sees into eternity. He knows the truth about where we our saved souls will be! But, He also cares for what we are going through in the present and realizes our limitations to fully comprehend what He does.

Don’t loose hope, Dear One. You will get through this and it will be through the recourse of change. Come what may, let God be your anchor and stability through it all.

“Jesus Christ is the same yesterday and today, yes and forever.”

-Hebrews 13:8

“This hope we have as an anchor of the soul, a hope both sure and steadfast and one which enters within the veil.”

– Hebrews 6:19
Signature

When Christmas Just Isn’t the Same…


For many of us the Christmas season means tradition. There is a reliable and familiar beauty when we do the same thing every year…a sort of idealized nostalgia happens.

It could be taking a day to bake Christmas cookies with the ladies and little ones, hosting the annual white elephant party, volunteering at the local shelter, opening up family pajamas Christmas Eve night, or waking up to homemade cinnamon rolls on Christmas morning. These things we do can bring us great comfort and joy. We look forward to them and they can be oh, so good… You know I promote this kind of thing.

However, just like the seasons change… our children grow, people move away, relationships fracture, expectations aren’t met, a loved one dies, and our hearts can break. It’s during these moments that absence can be the biggest presence. Our focus can be on what has changed, rather than what has stayed the same… and sometimes these good things (and even people), can become idols. Oh, can I say ouch. 

What do we do in times like these?

Jesus Christ is the same yesterday and today and forever. Do not be carried away by all kinds of strange teachings, for it is good for the heart to be strengthened by grace and not be ceremonial foods, which are of no value to those devoted to them. -Hebrews 13:8-9

We must come to the radical acceptance that change will occur here on earth. We must also wrap up in a blanket of grace knowing that Jesus will always be the same. Our hearts are to be strengthened by Him, not by any of our traditions. Please hear me that I love traditions, but if our strength is centered in them, we will likely stumble and be sorely disappointed a time or two in life.

Acceptance.

Isn’t that a good word? This literally gives us permission to let go of some things, doesn’t it? It’s in this word we can find joy and a break away from denial and wishful thinking.

Exhale…

When I read the passage above, it gives me peace because I have not baked a single Christmas cookie this year. I’m so serious. Don’t shame me (I’m smiling). That ceremonial food was giving me a false guilt that I wasn’t meant to carry. In reality, this year it would have caused me more stress than joy …it’s happenstance where I am in my juggle of life as a wife, therapist and mom. But, with an extended family full of cooks and bakers, I knew in my left brain there would be plenty of cookies at events. So, the time I would normally take with my girls to do this, we wrapped presents together.

Did my right brain beat me up?

Yep.

“This isn’t who you are, Janelle.”

Says who? Says everyone else or says you?

Ahhhh, faghetta ’bout it.  Jesus isn’t moved by me not making cookies this year.”

Then I gave acceptance a side armed hug and we purchased Pillsbury cinnamon rolls for Christmas morning.

This is a small potatoes example to change in my life and I am certain in many of yours…I’ve had good change and not so good change, but amidst it all I needed grace to keep me moving.

Grace…uncanny forgiveness. For the things, people, gifts, invitations or cards that didn’t come our way this year. For the unmet expectations, hurts, or uncertainties. With grace we can and will get through all of this and experience joy admidst it all because we are strengthed by someone who is our constant.

I pray this reaches those who need it most this holiday season.

He’s got this… you are still His and always will be. Change will happen, it’s promised. But there are things amidst change that do stay the same. He is one of them.

Let us accept the things we cannot change and do the best we can with the things we can. And for crying in the mud, please bring on the self-depreciating sense of humor we need when we don’t meet our own silly expectations. Our imperfections make Him stand out even more…

Today, I am encouraging you to celebrate each Christmas in itself by making it it’s very own each year. There is beauty in this as well as we remember why (and Who) we are celebrating.

Love, love, love going out to you!

Signature

EASY Apple Dumplings

One of my favorite recipes of all times. You would never believe the secret ingredient …once you try this recipe, it will be your “go to” for quick and easy desserts. I love, love, love these. Serve them warm and a la mode. Trust me, you’ll be asked for the recipe over and over. Enjoy…


Peel, core and slice 3 Granny Smith apples (that is all you will need, honest).

Place one slice of apple onto one triangle of crescent roll. Start at the wide bottom side and roll up a bit, tuck in sides , then continue rolling.

Place in a buttered 9×13 pan

In a medium sauce pan add 1 cup butter, 1/2 cup white sugar, 1 cup brown sugar, and 1 tsp vanilla. Heat on medium high heat until boiling.

Pour sauce over apple dumpling then add Mountain Dew to the sides.

Sprinkle cinnamon on top. Bake uncovered in a 350 oven for appx 35 mins.

Here they are fresh and piping hot out of the oven. Serve with vanilla ice cream. This recipe makes a GREAT conversation piece…ask everyone to guess the *secret ingredient…they never will, hehe.

EASY Apple Dumplings
Prep time: 20 mins
Cook time: 35 mins
Total time: 55 mins
Serves: 12
Ingredients
  • 3 large Granny Smith Apples, peeled, cored, and sliced
  • 2 (10 oz) cans pillsbury refrigerated crescent rolls (I used Grands)
  • 1 cup butter
  • 1 cup brown sugar
  • 1/2 cup white sugar
  • 1 tsp vanilla
  • 1 tsp cinnamon (for spinkling)
  • 1 (12 oz ) can of Mountain Dew
Instructions
  1. Preheat oven to 350
  2. Butter a 9×13 dish and set aside
  3. Peel, core and slice apples
  4. Unroll crescent rolls
  5. Take one crescent roll and place one piece of apple at the bottom of the triangle- roll up enclosing the sides. Make sure the apple is completely sealed and enclosed.
  6. Continue doing this – if your apple slices are small, put a couple in.
  7. Place your dumplings into your 9×13
  8. Make your sauce by combining butter, sugars, and vanilla in a saucepan on medium high heat- bring to a slight boil.
  9. Pour sauce over dumplings.
  10. Add Mountain Dew to the sides.
  11. Sprinkle with cinnamon
  12. Bake uncovered for 35 mins.
  13. Serve with vanilla ice cream!


Signature

Christmas Breakfast

Hi Ladies! I wanted to share with you one of my favorite meals of the year~Christmas Breakfast. I wake up early to start the cooking, but it isn’t long before I hear the pitter patter of footsteps down the stairs! This has been a tradition in our family for 12 years…and our parents always join us as well. A blessed morning, indeed.


I will set the table on Christmas Even, so that is ready for everyone in the morning.

I will get up around 6 am to start breakfast. These Cinnamon Rolls have been a tradition ever since I was a child.  I can already imagine it now- My children waking up to all the excitement AND the smell of these! Memories in the making!

I will make freshly squeezed orange juice (not because I am picky- I just have a TON of oranges from the fruit and nut sale at the school, lol)

I’ll make a  Chef Mickey’s Breakfast Pizza for the kidos.


Mixed Berries-(because there is less prep work than a fruit salad and it looks beautiful and tastes delicious!)

Sausage Gravy Over Biscuits – I simply double the batch and place it on low in the crock pot with biscuits in a bread basket.


And of course…2 Easy Ham and Cheesy Quiches


I will also lay these delicious homemade soft sugar cookies with frosting out on a tray for after breakfast with coffee. This is a very special recipe in our family! I love this time of Christmas morning…where my family-parents and grandparents-watch the children play with their toys.

I pray this post gives you inspiration for YOUR Christmas breakfasts! Blessings upon all of you sweet wives and moms that serve your families…these “little” things are actually pretty big.

Signature

Ice Cream Ministry


IMG_3021
Every time we would go over to “Grandma Puppies” house, she would make sure to make the kids an ice cream cone…that was the first thing they would say as they’d run through her doors. “Grandma! Can we have an ice cream cone?!” She’d smile real big, laugh and say, ” Ohhh alright let’s go upstairs and you know the drill.” And they did. They would climb up the counter to get the sprinkles on the top shelf, then reach up into the freezer and get all three flavors out {she always bought them their individual favorites}, then they would open up the refrigerator to get out the whipped cream, syrup, and the cherries. The only things grandma would get were the cones and the “surprise” that went at the bottom. That surprise was a big deal….would it be a gum ball? M & M’s? Hmmmm…..you’d have to eat the whole ice cream cone to find out.

IMG_3019
In this photo, my dear mother-in-law would pass away in just 4 months from stage 4 breast cancer -a battle she fought for 6 years. It was extremely painful for her to walk and she needed assistance to get up the stairs – but it didn’t matter to her. She would have ran a marathon if it meant putting a smile on her grandchildren’s faces.

IMG_3020
She was pretty good at putting smiles on their faces….

IMG_3021

IMG_3878
So, I write this with tears streaming down my face…
Fast forward 4 months and we all staying at a beautiful and loving hospice facility. She was in one room, we were in a suite down the hall. What rolls up? These amazing volunteers with an ice cream buffet. Our kids RAN into grandma’s room to tell them the great news. It was so special….words can’t even describe how special. Once again, ice cream placed a smile on our little girl’s face even amidst tragedy.

IMG_3879

These sweet people thought of everything and were so full of joy to give. They told me they did this every Tuesday for the guests and their families.

What a ministry….ice cream.

Signature

{Rhodes} Chicken Philly Stromboli

IMG_3462

Hi Ladies! This recipe is one of my husband’s favorites. I don’t know if it’s the pipping hot Rhode’s bread, the creamy melted swiss, or the tender chicken that makes this a winning recipe. You be the judge. But, trust me on this one- it’s delicious! 

IMG_3449
Dice red and green peppers and onions. 

IMG_3450

My favorite brand of swiss is Guggisberg. I don’t know what they do differently, but there is a tremendous difference compared to other swiss cheeses.

IMG_3453
As you may know, I am a fan of shredding my own cheese. It does make a difference! Bagged cheeses have additives in them such as flour and saw dust (yep, not kidding).

IMG_3451
Let your dough rise according to package directions. 

IMG_3454
Cook your marinated chicken like so. 

IMG_3456
Roll out your dough like so…. 

IMG_3457
Add ingredients.

IMG_3458

Carefully close up and brush with egg whites. Lay Stromboli on a lined baking sheet and place in a 350 oven for approximately 20 mins or until lightly browned.

IMG_3460

{Rhodes} Chicken Philly Stromboli
Author: Janelle Nehrenz
Prep time:
Cook time:
Total time:
Serves: 6
Ingredients
  • 1 loaf of Frozen Rhodes Bread.
  • 4 Chicken breasts diced and marinated in Ranch dressing.
  • 1/4 cup each (diced) red pepper, green pepper, and onions.
  • 2 cups of shredded swiss cheese.
  • Egg white for brushing.
Instructions
  1. Thaw and let bread rise (ahead of time) according to package directions.
  2. Pre-heat oven to 350.
  3. Cook diced chicken in a large pan or wok.
  4. Roll out dough into an oblong shape on a floured surface.
  5. Add veggies, cooked chicken and swiss cheese.
  6. Seal dough and brush with egg whites.
  7. Transfer Stromboli to a covered baking sheet and bake for 20 mins or until lightly browned.


Mmmmm……

 
This post was sponsored by Rhodes Bread, one of my favorite baking products. For more delicious recipes, you simply must visit their website and blog (I’m there today!) . It’s amazing how many things you can make with their products. 

Like them on Facebook and Twitter, or follow them on Pinterest for updates, ideas, and potential coupons! 

I’ve showcased Rhodes rolls, Hot Crossed Buns, French Toast, and Easy Cheesy Calzones

What have YOU made using Rhodes Bread?! 

Signature

First Fitness and a Special Recipe (Taco Ring) !

7167886253                                                                                   Photo Credit

Hi Ladies! I have a special guest with me today. Allow me to introduce to you Sheran Newell from First Fitness. Sheran is a Christian, a wife of 15 years and a mother to 2 beautiful girls. She loves spending time with her family, reading, and staying fit!

Sheran is a lot like me- she’s a girl of moderation. She may splurge here and there, but she also makes sure to balance her life with healthy choices and exercise.

images

Sharen says:

“Although I try really hard, I don’t always eat the way I know I should. Before I joined with First Fitness, I purchased them from my family from my Sister-in-Law. I quickly realized the difference in the way we felt and the energy we had….I was sold and knew I had be a part of this amazing company

There are so many products First Fitness supplies that help with general nutrition and physical comfort. Not to mention weight loss, herbal cleansing, sports nutrition, skin care and body care!

If you know someone who has a baby with colic then Biomega is the answer. It’s a delicious whole leaf Aloe Vera drink that contains over 120 vitamins, minerals, amino acids, enzymes, phytonutrients, and antioxidants that supports good digestive health and whole body wellness. I give my children Biomega for all the vitamins in it and it actually taste awesome… I have to keep my kids out of it!

I personally love the Women’s First Essential Vitamins, they are an advanced multi-vitamin and mineral complex for women with specially targeted nutrition supporting the female reproductive system. They get me through the day without being tired and make me feel great!

My husband just started back to the gym and is on the Men’s First Essentials. This is an advanced multi-vitamin and mineral complex for men, with specially targeted nutrition supporting prostate and testosterone levels.  He has been able to get through his day without being so exhausted. *Did you know that many young men suffer with low-testosterone and don’t know it? 

Are you also on a journey to living a healthier and happier life?  If so, please contact me. Additionally, if you’re interested in making more money for your family this has been a huge blessing for me personally and I know it can be for you too.

Now, Janelle asked me to share a recipe and as I said- I mentioned that I don’t always eat the healthiest choices. But, that’s ok in moderation, right Girls? This comes from Pampered Chef and has been a hit for years in my home. When I take it to church for small meetings everyone loves it and asks for the recipe! They can’t believe how simple it is. It’s the ever famous….”Taco Ring“! Enjoy!”

I’m sharing the original recipe, but over at The Taste Place, you can get a lighter version and photos on how to make it!”

7167886253

Thank you so much Sharen…I love the information you gave to all of us. My little guy suffers from a stomach emptying delay, I may have to try Biomega for his reflux. Thank you again, so much!!! This recipe looks like a WINNER!!! Mmmmmm…. I WILL be making this soon!!!

Author: Janelle Nehrenz
Prep time:
Cook time:
Total time:
Serves: 6
Ingredients
  • 1 lb lean ground beef
  • 1 (1 1/4 ounce) package taco seasoning mix
  • 1 cup shredded cheddar cheese (4 ounces)
  • 2 tablespoons water
  • 2 (8 ounce) packages refrigerated crescent dinner rolls
  • 1 medium bell pepper
  • 1 cup salsa
  • 3 cups Lettuce, shredded
  • 1 medium tomato
  • 1/4 cup onion, chopped (optional)
  • 1/2 cup pitted ripe black olives (optional)
  • sour cream (optional)
Instructions
  1. Preheat oven to 375°F
  2. Cook ground beef in large skillet over medium heat 7-9 minutes or until beef is no longer pink; drain.
  3. Remove pan from heat.
  4. Stir in taco seasoning mix, cheese and water.
  5. Unroll crescent dough; separate into triangles.
  6. Arrange triangles in a circle on Classic Round Pizza Stone with wide ends overlapping in center and points toward outside. (There should be a 5 inch diameter opening in center.)
  7. I use my Pampered Chef pizza stone, but any flat round pan should work–perhaps even a pizza sheet, but I’d spray it with Pam before adding the crescent rolls.
  8. Scoop meat mixture evenly onto widest end of each triangles up over filling and tuck under wide ends of dough at center of ring. (Filling will not be completely covered).
  9. Bake at 20-25 minutes or until golden brown.
  10. Shred lettuce and chop tomato, onion, olives, and bell pepper (if desired).
  11. Add your toppings to top of ring and finish with more shredded cheese and sour cream.

Signature

EASY Breakfast Pockets (Freezable!)

IMG_2813

Mmmm…these breakfast pockets are absolutely delicious. My children LOVE them. Best yet, you can eat them piping hot out of the oven, then freeze the rest overs to bake in the oven for a later time. Enjoy!

IMG_2792

Place 8 frozen Rhodes large dinner rolls in a prepared 9×13 pan. Spray the tops with Pam and cover with plastic wrap. Let rise for 4-6 hours until  frozen dough looks like so…

IMG_2794

Start making your filing…I chose cheese, eggs and bacon. You can put anything you like in these little pockets- eggs, ham and swiss…veggies, anything goes!

IMG_2797

For 8 pockets I used 4 eggs to scramble. I simply add 1 Tbsp of water, whisk together with a whisk or fork.

IMG_2799

Add 1 Tbsp of butter to a pan, on med/high heat scrape continuously with a plastic spatula until they are done. Add some salt and pepper as desired.

IMG_2800

Fry 8 slices of bacon and let drain on paper towels. Crumble.

IMG_2802

Take a roll and on a floured surface roll out as far as it will go in a circle.

IMG_2803

Like so…not to thin, not too thick…

IMG_2804

Add your cheese, eggs and bacon. Any other ingredients are a bonus 😉

IMG_2805

Fold up into a pocket

IMG_2806

Line em up!

IMG_2808

Brush with butter and place on a baking sheet. Bake in a 350 oven for appx 20 mins or until lightly golden in color.

IMG_2811

Serve hot out of the oven with some fresh berries

IMG_2813

Mmmmm…..I do love Rhodes dough, the aroma of it is ahhhhmazing. The mix of the hot bread,  gooey cheese and savory bacon and eggs make this a winner for the entire family. We’ve even had these for dinner!

Again- freeze the leftovers individually for a quick/on the go breakfast! 

EASY Breakfast Pockets (Freezable!)

Prep time:
Cook time:
Total time:
Serves: 8
Ingredients
  • 8 Rhodes frozen large dinner rolls
  • 4 eggs
  • 1 Tbsp water
  • 1 Tbsp butter
  • salt/pepper
  • 1 1/2 cup freshly shredded cheddar cheese
  • 8 slices of bacon; cooked and crumbled
  • Butter for brushing
Instructions
  1. Place 8 frozen rolls in a prepared 9×13 pan, spray tops of rolls with Pam and cover with plastic wrap, let rise for 4-6 hours.
  2. Pre-heat oven to 350 when dough is done rising.
  3. Scramble eggs with water. Add butter to skillet, scramble eggs- add salt and pepper as desired. Set aside.
  4. Roll out each dough ball onto a floured surface into a circle.
  5. Add fillings: eggs, crumbled bacon, cheese.
  6. Make into individual pockets by closing up all sides.
  7. Place every one on a baking sheet and brush with butter.
  8. Bake for appx 20 mins or until lightly browned.

Signature

Piggies in a Blanket


IMG_2890

Looking for an easy appetizer for the (big and little) football fans in your life? Look no further, because these “Piggies in a Blanket” always get a touchdown! I’m so serious when I say -there are NEVER any of these left! lol! Serve with ketchup, mustard, and/ or BBQ sauce…and most of all, a side of fun!

Go Browns! hehe!

IMG_2883

Open crescent rolls and press edges together to make a full rectangle.

IMG_2886

Slice with a pizza cutter into smaller squares like so..

IMG_2888

Place a piggie in the center of each rectangle and bring up the opposite sides, twist and pinch together. Place on a prepared baking sheet and bake in a 375 oven for 12-15 mins until golden brown.

IMG_2890

Dig in!

Piggies in a Blanket

Prep time:
Cook time:
Total time:
Serves: 12-15
Ingredients
  • 1 Package of Lil Smokies
  • 2 (8 oz) cans of crescent rolls
  • Pam (for preparing baking sheet) or you can use parchment paper.
  • Condiments (ketchup, mustard, BBQ sauce, etc)
Instructions
  1. Preheat oven to 375.
  2. Drain lil smokies in a colander.
  3. Open 1 crescent roll container at a time – make a full rectangle out of each by pressing together the perforations.
  4. With a pizza cutter, slice vertically and horizontally to make small squares.
  5. Place a Lil Smokie in the center of each square, pull up opposite corners, twist and pinch.
  6. Pepare a baking sheet, place Lil Smokies on top, bake for 12-15 mins.
  7. Serve with your choice of condiments!

Signature

Meal Ministry Guest Today! Welcome,Suzanne from Blueberry Cottage!


Today’s guest is no stranger to Comfy in the Kitchen…Suzanne from Blueberry Cottage shared with us at the beginning of my blogging journey. She’s been a blessing to have as a fellow blogger, reader and friend. Today she’s giving us a sneak peak into the Meal Ministry she has helped start at her very own church!

If starting a Meal Ministry been on your heart- she has the perfect tips on how to do just that!

Suzanne writes:  

A couple of years ago I started a Wednesday night meal ministry at my church. I had this on my heart for a couple of years before I brought this to the leadership. At our last church there was such a ministry and I served on the team of “chefs”. Cooking once a month was easy, but running the whole ministry was going to be a huge time commitment and I wanted to make sure this is where God wanted me. I had been chatting with one of the deacons wives one Sunday and she had shared they were having a leadership meeting and wanted to know if I had any women’s ministry requests. The Lord prompted me to share my idea for a weekly Wednesday evening supper before service. At the meeting she presented my idea and the Pastor shared he had been praying for a year about such a ministry on Wednesday’s! Needless to say this gave me some serious goosebumps! God was giving his blessing, I had my husband’s blessing and the Pastor was totally on board and ready to give me whatever I needed. When it is God’s timing everything falls into place so easily.

We are now on our second year providing home cooked meals on Wednesday’s and I feel a lot of the kinks have been worked out during the first year. Many people have remarked that this ministry has enabled them to feel more connected to the church and the body of believers. Sunday’s, for a lot of us, can be a bit rushed. We dash from service to Sunday school , or we serve in the nursery, and often times we just don’t have time to chat and get to really know one another. Sitting down to a meal that isn’t rushed and you didn’t have to prepare gives a person time to converse. A lot of folks come right after work. Many that never attended Wednesday evening Bible study are able to come because they have a bit more time in their schedules due to not having to provide a family meal. As I have watched from the serving line I notice people who don’t know each other introduce themselves and have wonderful fellowship time over their meals. There is always lots of laughter and joking around! Teens hang out together and also help me, especially when dessert time comes! There are babies in high chairs and toddlers sneaking under tables. It’s really like having a big familyget together each week.

Like Janelle, my gift has always been hospitality and it always involves food. Being from a large Italian family where you saw all your relatives over meatballs and pasta after church on Sunday, I think has groomed me for this calling. There is no better feeling for me than providing a meal for a new mom, someone who is sick or going through a difficult time, or that person you know just needs a bit of help. We can certainly encourage one another by such gestures. When I am on the receiving end of a meal I feel so blessed and cherished. It is my hope no one reads this and thinks they can’t run something like this, it’s just too much. Well, that may be true for the season of life your in now. Yet, perhaps you could consider cooking once a month or helping with set up or clean up. There are a lot of little jobs and details that need to be attended to. However, if this is your season to just be blessed by such a ministry, then do come to dinner and enjoy yourself. Introduce your family to another and build relationships. Just eat and laugh!

How to start a weekly meal ministry in your church:

• Pray! Make sure you feel this is the Lord’s will not your own or you will burn out.
• If married, make sure your husband is on board. Listen to his wisdom, he knows you best.
• Approach your pastor and leadership and present your idea.
• Assuming you have your pastor’s blessing, develop a questionnaire with questions such as: Would you attend a weekly meal here at church? How often? How much would you be willing to pay per family member for a home cooked meal? Would you be interested in helping in this ministry? Would you cook once a month? Twice a month? Then add your contact info. Do this for one month by adding this paper into the weekly bulletin. Document the results and bring them to the leadership.

A few things to consider:

• Your church must have a kitchen with ovens and adequate refrigeration. You do not need a professional kitchen, although that would be great.
• Which space will you use? Do you have a fellowship hall that can accommodate a large crowd? Are there enough tables and chairs? Do you have serving containers for water, salad, and baskets for rolls.
• Are there serving spoons, tongs, knives and cutting boards?
• You may have to obtain a permit to cook, check with your local board of health.

From your survey determine how many people may show up to start. This will give you an idea of how many servings of food you will need. Our church averages 50-60 each Wednesday. I have a team of 4 chefs (12 different ladies) each Wednesday that cook the main dish only. Each lady cooks between 15-20 servings of her recipe. They bring this already warm to the supper or leave it earlier for me to warm up when I get there, in a disposable foil pan. This cuts down on dishes that need to be done and returned!

What is on the menu?

Each Wednesday has a theme:

The first Wednesday of each month is Italian Night. Each chef cooks whatever they want that is Italian for the amount of people I have specified. I used to assign recipes, but found this too stressful on the chef. Not everyone is proficient in the kitchen and many have their old family standby’s that work just great. So, for example; one gal may bring two lasagnas, another American Chop Suey and then another may bring meatballs and spaghetti. I never know what I am getting so it is always a surprise! I make, at the church, a large salad and provide rolls with butter.

The second Wednesday is Soup du Jour and Sandwiches. Each chef brings a crock pot of her favorite soup or stew. I order a couple of deli platters or sub sandwiches from the market. I provide some lettuce, tomato, mustard and mayo. I also provide the breads or rolls.

The third Wesnesday is Chicken a la Chef. Each chef cooks up her favorite chicken recipe and I also have one woman do a large pan of rice pilaf. I cook baked potatoes, provide salad/dressings and sour cream and butter for the taters.

Fourth Wednesday is Pizza Night! Yes, we order pizzas from the local pizza parlor. We only do plain as I get a large for $5.00. I provide the chips, salad and soda.

What do you usually provide for drinks?

Iced water in pitchers with lemon wedges. This is placed on the table with all the napkins, plates, etc. A separate smaller table holds coffee, stirrers, cream, sugar, etc.

What do kids eat?

I do have a kids table set up with one loaf of wheat bread, peanut butter & jelly and a half gallon of milk. There are smaller plates, cups and napkins. Kind of make your own. Once in awhile I will make hotdogs, but mostly they eat what the adults eat.

What about plates and napkins and all?

Yes, right now we use disposable. I am looking into eco- friendly alternatives, but until I find something, weekly we use what the meals need, this includes dinner plates, soup bowls, napkins, cups, plastic knives, forks, spoons and soup sized spoons. These are all on the same table when the diner walks in. They take what they need and proceed to the serving line.

Who serves?

Often times I will and one or two ladies that have cooked. Depends on the crowd if we need more helpers here.

Who does the shopping for the salad and drinks and other items needed?

The coordinator, that’s me(or you) . Each week I make the salad, shop for rolls and butter, etc. I will often time make any sides I want served.

What’s for dessert?

Ice cream! Yes, each week, in order to keep it very simple, ice cream. One styrofoam cup full of Blue Bunny oreo cookie or vanilla/chocolate swirl. Sometimes an adult will bring a different treat for the adults, but I don’t go crazy here, just keep it simple☺

What do you charge?

We charge $3.00 per person for diners ages 3 and up with a max of $12.00 per family. I have a flyer typed up and it is in a plastic upright holder with a basket in front of it to put the money in. It is an honor system. Also, because this is a ministry, at the bottom of the flyer is a bolded notice that reads: If your unable to pay for your meal this evening please enjoy your dinner compliments of your church family. We never want to deny a meal or fellowship to anyone. This may not be financially possible for all churches, however.

How do you and the chefs get reimbursed?

Most of my chefs do not ask to be reimbursed they view this as a ministry. If they choose to not be reimbursed they and their family eat free that night. If anyone needs reimbursement I take it out of the money collected, if there isn’t enough then the church gives reimbursement. This is also another area that all churches may not be able to accommodate, but I have found our church has really not had to put out a lot for this. The church does provide all paper goods, however.

How about set up and clean up?

I set up the tables and chairs and arrange the condiments, napkins, etc., with the help of my husband, when available, or children. I do have a few teens show up early and pitch in too. I make the sides and put out the rolls, etc. I usually arrive 1.5 hours prior to serving and find this is plenty of time to be prepped and ready.

What time is supper?

We serve from 5:30 pm-6:15 pm. We have a 7pm service and our youth group starts at 6:30 pm so this time frame works well for all as well as clean up.

When do you start and end?

I have found October to be a good month to start and I end in May. There is another woman who keeps the ministry going all through September with weekly barbecues. She sets her ministry up the same way as I do, but it is all grilled items. It’s great and I have a needed break!

Last things….

Each week the church secretary puts the following week’s menu with info in the bulletin. I also type up a schedule with all the dates of the dinners and who is cooking which night for the year. Each chef gets a copy as wells as the church secretary and pastors.

I do jazz up the tables a bit as funds allow. Often I will dress up tables with a seasonal theme such as a jar of candy corn in a glass jar with pumpkin scented candle. I do not use table cloths as our tables are new. However, a placemat is in the center with the centerpiece and S&P, butter or sour cream.

Also, once during the year I have a meeting with all those on my team. It’s important to get new ideas and feedback from everyone involved.

If anyone has questions feel free to ask, I love talking meal ministries☺You can contact me at  Taketimefortea@comcast.net

Thank you SO much Suzanne- your church body is so blessed to have you! I love your themed weeks and ideas on how to keep costs low. Keep cooking for the King!!! 

Signature

Meatball Subs, Mmmm..{and my son’s 1st Meal Ministry!}

 Grandma Ruth’s Meatballs and Sauce, shredded Mozzarella cheese and herbs….all melted together on a fresh Italian Hoagie roll…

I don’t know to many people who could turn down a meatball sub…Today was no exception.

This happens to be one of my son’s favorite sandwiches…While I was cooking and he was doing his homework, he asked if he could bring one to his coach tonight.

Ohhhh, my heart melted faster than mozzarella cheese on a hot meatball. My son had initiated a meal ministry! Wohoo! He really is watching!!!

So, with that…I let him make the sandwich himself. He did a great job and was able to share God’s love with his very own Coach. 

“Enjoy the little things in life, for one day you’ll look back and realize

they were big things.”

~ Robert Brault

When I make meatball subs, I typically put the sauce and meatballs in a crockpot to simmer all day. This is actually a great sandwich for potlucks because it can be self-serve.

Prepping …Here I just gave my son 3 meatballs and some sauce in a bowl, shredded some cheese and put the hoagie under the broiler for 2 minutes.

Ready for assembly!

{With clean hands} Add the meatballs…

A little sauce {not too much or the bread will be soggy!}

Freshly shredded mozzarella cheese…

A pinch of Italian herbs…oregano, basil, thyme, rosemary. Then broil again for 1 more min until cheese is melted.

MMMMmmm……

My son after he delivered his 1st ever Meal Ministry {outside of our home}… to his beloved Coach!

 ” Dear Children, let us not love with words or tongue, but with actions

and in truth.”

~1 John 3:18

His well deserved…after workout meal.


Meatball Subs Mmmm..{and my son’s 1st Meal Ministry!}

Prep time:
Cook time:
Total time:
Serves: 4
Ingredients
  • 12 meatballs in sauce {See Grandma Ruth’s recipes}
  • 4 hoagie rolls
  • 1 cup freshly shredded mozzarella cheese
  • Italian herbs
Instructions
  1. Broil rolls for 2 mins.
  2. Place meatballs with a small amount of sauce onto rolls.
  3. Add cheese and herbs – broil again until cheese is melted.
  4. Prep time below is if you have meatballs and sauce already made up.


Signature

Friday Favorites!

Happy Friday Ladies!

Thank you SO very much for your prayers for my hubby and our family. He is doing great {although he will be doing much better in 3 months when he can walk on his own again}.This is definitely a “season” of life for us, but I am glad I can be here for him {and I’m sure he’s also glad about that, hehehe}.

A Special THANK YOU!

I just wanted to take a moment and say how very grateful I feel to be the recipient of meal ministries this week. First, my mom who made us a delicious spaghetti dinner… my dear friend, mentor and neighbor Julie made us a delicious chicken and gluten free pasta dish, chicken pockets, and strawberry kabobs…My incredibly thoughtful friend Katina brought us delicious Chili, frosted grapes {which I will be posting}, and chocolate chip cookie balls…My sweet friend Melissa brought us some incredibly tasty {and very healing} bone broth and beef soup with rice and veggies and baked oatmeal, and last but not least some great friends who my husband coaches for {our sons are buddies} brought us lasagna and the most ahhhmazing oatmeal chocolate chip cookies.

Thank you all SO SO SO much for sharing God’s love with the Nehrenz family this week!!!!! You don’t know how much it meant to us.  You made a very difficult week much easier…We love you all and are so grateful!!! 

Being on the other end of meal ministry made me realize even more what a blessing it is. 

So, let’s have a look at what we have cooking today….

Courtney from Women Living Well is featuring these delicious and EASY Pecan rolls. Ohhhh you have just got to try these out- perfect for a cool Fall evening or Sunday morning treat before church with the family.

Top 3 Picks!

Oooooo……I LOVE to see what YOU have cookin!!!! You girls are Coooooommmmmmfy! Wohoo!!!  

Double Chocolate Chip Cookies

Made By: Mommy in Suburbia


Crock Pot Apple Butter

Made By: What Joy is Mine


Hummus and Veggie Focaccia Sandwiches

Made By: Simply….this, that and the other.

It’s a Feasting in Fellowship LINK-UP!

Please link up as many recipes, Christian posts, and /or posts of the season. All I ask is that you either place my button {located on my side bar} or link back on your post! I am SO grateful to my linker upers and also to all of you who Pin, Tweet, and FB about Feasting in Fellowship Fridays! Have a blessed weekend!


Signature

Chip Chop Ham Sandwiches {Isaly’s}

Old fashioned deli counter
{old fashioned deli photo credit}

So, we were in Hilton Head vacationing some time ago. Needing groceries, I drove up to Bi-lo {unfamiliar territory} with my list in hand and headed toward the deli. “Can I help you Miss?” The nice lady behind the counter asked. “Sure, I will have a pound of Chip Chop and a pound of Baby Swiss please!” I said cheerfully. “Uhhh…a pound of what?” She asked back with a perplexed look on her face. “Chip chop and swiss please”, I replied in a louder voice {thinking she didn’t hear me}. Oh, she heard me alright…she just didn’t understand a word I was saying. She started cracking up and asked me what on earth “Chip Chop” was?!! To me, she was asking what water was, or what bread was….Chip Chop was…..Chip Chop? How do I explain this?! hahaha. Then it dawned on me…this  term that I have been so accustomed to using my entire life was a regional thing. Not only that, it was a pretty silly sounding and I was throwing around like it was nothing! We had quite a laugh and of course, she threw out “Betcha call it Pop too, hu!?” Yeppers.

Isaly’s , an old fashioned restaurant-convenient store-ice cream parlor, was one of my  hometown’s only restaurants for a very long time..They were and still are well known for their “Chip Chop” ham….it’s a seasoned ham sliced super thin.

Here is a very simple and traditional way to make these sandwiches {mom made them all the time}.The pictures below don’t show actual “chip chop”… to save some fat grams, I ask the deli for a maple ham “chipped”But, if you live in the area, go ahead and try the real deal 🙂

Super simple….I use Hawaiian sweet rolls, Islays BBQ, Chipped ham {or Chip Chop} and baby swiss {or any cheese of your liking- cheddar is great too}

{Woot! I ate mine on an Udi’s gluten free bun! }

Directions…easy peasy! If you don’t have Isalys sold in your area, no worries- you can use your favorite BBQ sauce.  
Add ham and BBQ sauce and heat in a pan. You can also do this in a crock pot and let it sit on warm!
Open up rolls and place cheese and BBQ ham on top and broil quickly.
Add some corn on the cob, a salad and some fresh watermelon and you have yourself a quick fix for a Summer dinner!
Chip Chop Ham Sandwiches {Isaly’s}
Author: Isalys
Prep time: 10 mins
Cook time: 10 mins
Total time: 20 mins
Serves: 6
Ingredients
  • 16 oz jar Isalys BBQ Sauce
  • 1 1/3 lb Chip Chop Ham
  • 12 slider buns
  • 1/2 lb swiss or cheddar cheese
  • {pickles optional}
Instructions
  1. Saute ham with BBQ sauce in a large skillet.
  2. Place cooked ham and cheese onto slider buns-broil quickly.
  3. Serve hot!
Notes

You may also put together ham and BBQ sauce in a crockpot and heat on low for 4 hours- stirring every so often. This is great for after church!

Signature

An Easter Spread

Hi Ladies! I get asked quite a bit how I would create a “spread” for a gathering. Today I want to do just that- here is an example of an “Easter Spread” for your family and friends! Please use this tool to help make your Easter just a little easier. If you are having guests bring a dish (which I am completely fine with!) you can send them on over this way for proven recipes that are sure to please. There is nothing wrong with being specific about what your needs are-your loved ones want to help! Have you ever been to a gathering with 3 dishes of cheesy potatoes and no veggies? I sure have! 

Easy Spinach Dip- 

Have this set out when guests arrive.

Strawberry Spinach Salad with Poppyseed Dressing

I always start off with a salad-this one is one of my favorites. I get asked all the time for the recipe.

Rhodes Dinner Rolls

All you do is thaw, let rise and bake. These are incredibly good- you can make your own from scratch, but why when these are every bit as good! 

An Easter Ham

A Classic.

 Cheesy Potatoes

Another crowd pleaser!

Classic Green Beans

Simple and you can make them ahead of time- just set on low and cover.

Fresh Corn Casserole

(Ree Drummond)

Oh yum. 

Carrot Cake 

(Paula Deen)

My Father-in-Law’s favorite. 

Easter Bunny Cupcakes

What child wouldn’t smile? 

I hope this serves you well – please feel free to add links to your comments of YOUR favorite Easter recipes! I can’t wait to hear all about them 🙂 

Signature

Crescent Chicken

*This is a repost- for some reason the other link is not working- I have received quite a few e-mails about this particular recipe. So sorry- I will be looking into the original link. 


This delicious recipe comes from my Grandma (or “Nana B” as we call her)…I have wonderful memories coming home from college to this delicious home cooked meal. It has become one of my husband’s favorites too. I like serving it along side of mashed potatoes …. the cream of chicken soup serves as a delicious gravy. Enjoy this simple yet delicious meal! 
~Janelle 
Crescent rolls, chopped and cooked chicken (I simply boil chicken breasts and cut), cheddar cheese, cream of chicken soup (milk).
Make soup in a medium saucepan using milk according to directions.  
Lay out one crescent roll at a time and place appx 3-4 bite sized pieces of chicken and appx 1Tbsp of cheese in the center of each triangle. 
Gently roll up
Seal edges by pinching the dough. (You will not get perfection, just make sure the filling cannot leak out)
Place all of your rolls in a 9×13 dish and pour soup mixture over top ( salt and pepper as desired).
Bake at 350 for 30 mins until crescents are golden brown
Serve with mashed potatoes and your choice of veggies! 
A combination of buttery crescent roll, melted cheddar and juicy chicken…Mmmm…
Crescent Chicken
(serves 6-8 rolls)
1 (8 or 6 jumbo count) package refrigerator crescent rolls
2 cups chopped cooked chicken
1 cup shredded cheddar cheese
1 can cream of chicken soup
1 can of milk (using soup can)
Preheat oven to 350
Prepare soup using milk and set aside. Separate crescent rolls. Spoon chicken and cheese onto each crescent; roll and seal to enclose filling. Place in a 9×13 baking dish. Pour soup over rolls. Bake at 350 uncovered for 30 mins.

Anchor Hocking Glass Bake ‘N Take 9 Inch x 13 Inch Dish With Snap On Cover


Prep time: 15 mins
Cook time: 30 mins
Total time: 45 mins
Serves: 6-8
Ingredients
  • 1 (8 or 6 jumbo count) package refrigerator crescent rolls
  • 2 cups chopped cooked chicken
  • 1 cup shredded cheddar cheese
  • 1 can cream of chicken soup
  • 1 can of milk (using soup can)
Instructions
  1. Preheat oven to 350
  2. Prepare soup using milk and set aside.
  3. Separate crescent rolls.
  4. Spoon chicken and cheese onto each crescent; roll and seal to enclose filling.
  5. Place in a 9×13 baking dish. Pour soup over rolls. Bake at 350 uncovered for 30 mins.
 

Signature

Poppyseed Ham and Cheese Sliders

IMG_2946

This recipe is excellent for feeding a crowd, a lazy Sunday, a meal ministry, or for having company over! It can be served as an appetizer, in addition to a brunch, for lunch or for dinner. Delicious and easy….you just can’t ask for more than that! I made these for friend this week and for my step-dad who had surgery. He texted me stating that these were his new favorite sandwiches! (and HE is picky, hehe).

* A special thanks my friend Faith for this yummy recipe that was placed in my mailbox 😉

Make ham and cheese sandwiches with dinner rolls.

In a medium saucepan add 1/2 cup butter, 2 Tbsp mustard (yes, the kind you put on hotdogs), 1 Tbsp Worcestershire, 1 Tbsp poppyseeds, 1/3 cup brown sugar.

Bring to just boiling over medium heat.

Pour sauce ONTOP of sandwiches, cover with foil and bake in a 350 oven for appx 20 mins. YUUUUMMM!!!! A sweet yet buttery flavor will soak into your sandwiches …who doesn’t love sweet and savory? A winner recipe girls! You have to try this one!

Here is the meal I sent home with my mom to my Step-dad (his second knee replacement, owch!) Unbaked ham and cheese sliders with sauce on the side and baking directions, a simple salad (the way he likes it), and unbaked apple dumplings.

Poppyseed Ham and Cheese Sliders
Prep time: 15 mins
Cook time: 20 mins
Total time: 35 mins
Serves: 12
Ingredients
  • 1 lb deli ham thinly sliced
  • 1/2 lb baby swiss cheese
  • 2 pkgs (24 count total) dinner rolls
  • 1/2 cup butter
  • 2 Tbsp prepared mustard
  • 1 Tbsp Worcestershire
  • 1 Tbsp poppy seeds
  • 1/3 cup brown sugar
Instructions
  1. Make sandwiches with rolls, ham and cheese -fill a 9×13 pan with these (you can squeeze them in)
  2. In a medium sauce pan on the stove bring to a soft boil: butter, mustard, worcestershire, poppy seeds, and brown sugar.
  3. Pour sauce over top of sandwiches
  4. Cover with foil and bake at 350 for appx 20 mins

style=”display:inline-block;width:250px;height:250px” data-ad-client=”ca-pub-9840836411947727″ data-ad-slot=”1996367497″>

Signature

Classic Gingerbread Cookies

My Dad’s wife, Bonnie makes delicious Christmas cookies…delicious. She puts so much detail into rolling, making homemade icing, and decorating. In the past years she has sent my children these adorable Gingerbread boys and girls and has even attached ribbon to the tops so we could hang them on our tree! This year, I just had to ask her for her recipe and she gladly obliged! She has been using Paula Deen’s, which was no surprise to me (Paula knows her stuff!) So, here we go with a step-by-step tutorial!

If you are a homeschooler or if your children are off school for Christmas -these cookies are a must to make with them…sweet memories.


Cream together brown sugar and butter with a mixer in a medium mixing bowl.

Add eggs and molasses and blend until just combined.

In another bowl combine flour, ginger, baking soda, cinnamon, nutmeg, and salt.

Add dry ingredients to the wet ingredients and mix until incorporated. Gather up dough in a ball and wrap it in plastic wrap. Stick it in the fridge for 3 hours or until well chilled.

Ready to roll! Because I was making 8 different kinds of cookie dough, I had to put labels on them so I wouldn’t get confused. I made all the doughs up one day -wrapped them and let them chill in the refrigerator over night- the next day I rolled and baked them all.

Place plenty of flour on a hard/flat surface. Take a large handful of dough and form it into a ball-the warmth from your hands will cause it to soften. Flour your rolling pin and place some flour on the top of your dough ball. Roll it out until it’s about 1/4 of an inch thick (I like a thicker cookie). Use a cookie cutter of your choice (I used boys and girls). Gather up scraps into a ball and repeat (you won’t hurt the dough a bit).

Line cookie sheets with parchment paper (I LOVE this stuff!-I buy two rolls during December and use every bit). Bake in a 350 oven for 10 mins. These cookies do not spread much, so you can place them a little closer together than most cookies. Cool on wire racks.

To make the icing: Add confectioners sugar with milk -you may color if you wish with food coloring. Place in a small sandwich bag and clip the end. You may use fancy shmancy decorators and/or decorator throwaways that you can purchase in the baking aisle at the grocery store.

Classic Gingerbread Cookies
Prep time: 30 mins
Cook time: 10 mins
Total time: 40 mins
Serves: 18
Paula Deen’s Recipe (adapted)
Ingredients
  • 3/4 cup packed dark brown sugar
  • 1 stick butter or margarine, softened
  • 2 large eggs
  • 1/4 cup molasses
  • 3 3/4 cups all-purpose flour, plus more for dusting work surface
  • 2 teaspoons ground ginger
  • 1 1/2 teaspoons baking soda
  • 1/2 teaspoon ground cinnamon
  • 1/2 teaspoon freshly grated nutmeg
  • 1/2 teaspoon salt
  • Icing:
  • 1 cup confectioners’ sugar, sifted
  • 1 to 2 tablespoons milk
  • Food coloring, as desired
Instructions
  1. Using an electric mixer at low speed, cream the sugar and butter until thoroughly combined.
  2. Add the eggs and molasses and mix until combined.
  3. Sift together the flour, ginger, baking soda, cinnamon, nutmeg, and salt.
  4. Add the dry ingredients to the butter mixture and combine with a spoon or spatula.
  5. Remove the dough from the bowl and wrap in plastic wrap; place in the refrigerator until firm (I refrigerate over night, but 3 hours would be just fine)
  6. Preheat the oven to 350 degrees F.
  7. Line cookie sheets with parchment paper.
  8. Take about 1/2 cup of dough at a time shape into a ball with your hands-it will soften.
  9. Roll onto a floured board until about 1/4 inch thick.
  10. Cut out with gingerbread boy and girl cookie cutters.
  11. You can re-roll the scraps.
  12. Using a spatula, transfer the cookies from the board to the prepared cookie sheets.
  13. Bake for 10 minutes, until just beginning to brown at the edges. Transfer to wire racks to cool.
  14. To make the icing, combine the confectioners’ sugar and milk
Notes

The recipe above was doubled in photos.


Signature

Rolo Rudolph


Oh Ladies!! You are going to LOVE this one! My friend crafty friend Katina is at it again…today she shares with us how to make this adorable (and edible!) Rudolph. I am buying the ingredients over the weekend to take and make at a craft station at my son’s Christmas party at school…the second graders are going to get the biggest kick out of it!

THANK YOU SO MUCH KATINA! Super cute!


Squirt vanilla icing in between two chocolate sugar wafers

Place 4 toothpicks into the sugar wafers for the legs and cut a tootsie roll into four pieces and place on the ends of the toothpicks to serve as “hooves”

Use a toothpick and make two holes on the side of a Rolo for the pretzels to go in

Break apart a pretzel to make the antlers and the tail.

Place the pretzels in the holes for the antlers and use the icing to dab three dots on the bottom of the Rolo for a face.

Use a red cinnamon decor for Rudolph’s nose (hehe..this is so cute!)

Gently squeeze the black gel icing to finish the eyes.

Use the white icing to secure the tail and head.

Heeeeere’s Rudolph!!!!!

Rolo Rudolph
Recipe Type: Kids desserts
Prep time: 20 mins
Total time: 20 mins
Serves: 1
Ingredients
  • Chocolate sugar wafers
  • Vanilla icing
  • Toothpicks
  • Tootsie Rolls
  • Rolos
  • Pretzels
  • Red cinnamon Decors
  • Black gel icing
Instructions
  1. Squirt vanilla icing between two chocolate sugar wafers
  2. Place four toothpicks into the sugar wafers for legs
  3. Cut a tootsie roll into four pieces and place on the ends of the toothpicks for the hooves
  4. Use a toothpick and make two holes on the side of a Rolo for the pretzels to go into
  5. Break apart a pretzel to make the antlers and a tail
  6. Place the pretzels in teh holes for the antlers and use the icing to dab three circles on the bottom of the Rolo
  7. Use a red cinnamon decor for Rudolph’s nose
  8. Gently squeeze the black gel icing into finish the eyes
  9. Use the white icing to secure the tail and the head
Signature

My Christmas Breakfast/Top 3 and Link UP!

Hi Ladies and a very MERRY Friday to YOU!

Anyone making Christmas cookies to freeze for the Holidays? I sure have been!

I just love this time of year. No matter what happens throughout the year -good or bad- December rolls around and reminds us that Jesus was born to tell us the truth and to die for our sins giving us the gift of salvation. That never changes and is the reason why I can’t help but celebrate!!!!

So -I have my arms stretching out to you- yes you- hugging you and reminding you that  we could loose everything we have, there could be illnesses in our lives, loved ones who have passed this year, and money issues beyond control and still be joyful on Christmas because Jesus is the reason of the Season and always will be.

Speaking of this special day…I want to share with you what I have planned Christmas morning! Come see me at Women Living Well what will be placed on this very table for Christmas breakfast!

Friday’s Top 3 Picks!

 I’m Melting Snowman Cookies
Made By: Our Simple Country Life

snowman1

Jumble Berry Jam

Made By: The Nourishing Home

Want more ideas for gifts in a jar? Visit The Nourishing Home over at The Better Mom! 

Caramel Pecan Cookies

Made By: My Little Alberta Family


It’s a Feasting in Fellowship Friday LINK UP! Please link as many posts as you wish. All I ask is that you place my button (located on the sidebar) onto your post! For the month of December I am welcoming ANY Holiday inspired post..not just recipes! Please pass the word along. Thank you SO very much and may God bless your weekend.


Signature

My Top 13 “Meal Ministry” Meals.

Hi Ladies! I get many sweet e-mails asking me what meals are best for meal ministries. I went through my files and chose the ones I make the most ! I hope this helps give you ideas. Please know that it just warms my heart that so many of you want to start your very own meal ministries! Even if you are simply sending cookies to a neighbor, you are sharing God’s love. You are such blessings- I adore all the photos you send me and stories you share!

This list is in no particular order and the number 13 was not my first choice, but it just worked out that way 😉


 1. Lasagna can be taken in foil containers baked or not baked. This dish is easy to freeze. Make sure to add a bit more sauce so it doesn’t get dry.


2. Chilli can be placed in a large throwaway bowl, refrigerates and freezes well. Be sure to add the fixens on the side and wrap them up! In this case it’s cheese, chives, sour cream and corn bread.

3. Wedding soup is wonderful for a person who is sick, recovering a surgery, or just had a baby.

4. Chocolate Chip Cookies are always a treat to give someone!

5. Beef Stew is a delicious one pot meal to give to someone on a cold winter evening.

6. Chicken n Dumplings, Baked Apples, Green Beans, a roll and salad. A meal I took to a friend who just had surgery.

This is the same meal wrapped up. I added a pudding puff dessert to the side, made sure they had dressing and apple butter for their rolls. It is also a kind gesture to send throwaways so the person who you are cooking for does not have to return plates. If you must give them a plate, let them know to wash it and lay it out on their porch for you to pick up the next day.

7. I LOVE bringing quiche to get togethers and sending them home with people. Quiche makes a wonderful house warming gift.

It also carries well to church..

8. Stuffed Peppers – I made these for my Mother-In-Law’s neighbors.

9. Crescent Chicken, a salad, green beans, mashed redskins, and corn. Along with…

and some brownies with frosting and mini m&m’s for the kidos. The dad of this family just went through major surgery.

10. Turkey Tacos! This was just a meal on the go given to a close friend who is a teacher. I had extra and they had dinner!

11. Calzones are super easy to make and travel well. Simply wrap them up in foil and away you go!

12. Chicken Enchiladas travel well and are Ohhh so tasty. (I would not recommend this for nursing mothers).

13. Pasta E Fagioli is a delicious soup that warms up well and is a meal in itself!

Keep cooking for the King Ladies! Wohoo!!!!

Signature

Lasagna for 50 -Cooking for a CROWD!


This weekend I had the honor of cooking for the new members/ guests at our amazing church. I can’t even explain how much fun it was cooking for a crowd in our church’s new kitchen…plastic gloves, hair nets, disinfectant and all…I had a blast. Here are some photos of the day.

A HUGE Thank you to my friends Christina and Michelle for helping me with food prep and set up! Also, to Alice who runs the kitchen at the church- she is amazing. Thanks to the Stopp family and our church for letting me be part of this ministry!  Also, thank you to those who helped us clean up. 

My van was FILLED with food, drinks, vases…you name it.

Alice and me making a HUGE pot of Grandma Ruth’s Spaghetti Sauce! We also had ground chuck and Italian sausage cooking on the stove top.

2 large salads made with Romaine, tomatoes, olives, croutons, cheese and seasonings. We semi-homemade the dressing with Good Seasons, oil and Red wine vinegar, a little sugar, and parmesan cheese.

This mixer was amazing! It whipped up our Pineapple Fluff in no time at all! (I multiplied this recipe by 3)

Our Cream Puffs/Eclairs – these were purchased, placed in muffin cups and sprinkled with powdered sugar.

3 very large lasagna’s baking in the convection ovens. One was meatless-and was appreciated as some people didn’t eat meat at the event. That is something to always be considerate of when you are cooking for a crowd-meatless items.

GFS Garlic Toast- I was very impressed by this product. SO many people told me they smelled this baking in the oven while service was going on…YUM (not to mention easy)

Lasagna’s done! This also smelled delicious baking …

Our buffet warmer- this was a very convenient way to cart the warm food into the room. We filled it with water, turned it on and placed the pans of lasagna with covers on to keep warm. We also had room for the bread.

Getting ready- We had some “kido” food in case they didn’t want lasagna. Their menu included Peanut butter and Jelly sandwiches, Pumpkin shaped sugar cookies, chips, carrots and veggie dip and juice boxes.

Some easy decorations. We don’t have a ton of time to decorate as the room was being used for first service and lunch started after second service. So we used white paper rolls for table coverings and set out these pretty glass vases with floating flowers. We also had balloons for the main table.

Setting up the main table. Cutlery, salads, extra parm cheese and sauce, pastries and the kido table at the end.

The kido table

Garlic bread and lasagna in the warm buffet.

Kristen and Michelle serving punch. This was made with fruit punch, 7up, frozen strawberries, and rainbow sherbert. We also had bottled water, sodas, and juice boxes.

Alice and me after a full weekend of cooking!

These are such inexpensive decorations…I paid 99 cents a vase at Marcs and have reused them for SO many events. Fill them up with water and place a daisy inside and you have a very elegant/festive centerpiece.

Is this beautiful or what?! A room filled with fellowship.

Menu for the day:

Grandma Ruth’s Lasagna

Garlic Toast

Italian Tossed Salad

Eclairs/Cream Puffs

Pineapple Fluff

Simple Party Punch (I added frozen strawberries)

Kids Menu:

Peanut Butter and Jelly (25)

Carrots with Veggie dip (3 large bags)

Chips (25)

Pumpkin Shaped Sugar Cookies (25)

Juice Boxes (25)


Lasagna for 50 Adults
Prep time: 3 hours
Cook time: 1 hour 30 mins
Total time: 4 hours 30 mins
Serves: 50
Ingredients
  • 8 pounds Mozzerella (Pre-shredded)
  • 15 lbs Ricotta Cheese (whipped preferred)
  • 6 eggs
  • 2 Tbsp parsley
  • 1 Tbsp Garlic Powder
  • 5 lbs ground beef (butcher preferred)
  • 5 lbs Italian Sausage (butcher preferred)
  • 9 (9oz) boxes of Barilla flat /no boiling required Lasagna noodles
  • 3 cups Parmesan Cheese (for inside the lasagna)
  • Sauce:
  • 51 oz cans of Tomato Sauce
  • 2 51 oz cans of Tomato Puree
  • 1 51 oz can of Tomato Paste
  • 1 51 oz can of water (add this slowly and to your desired consistency-you may not need all of this)
  • 3 green peppers cut in half/cores and seeds removed
  • 6 stalks of celery cleaned off
  • 3 Tbsp Garlic Powder
  • 1/2 Sugar
  • 1 Cup Parmesan Cheese (into sauce)
  • 2 Tbsp Parsley
  • 2 Tbsp Oregano
  • 2 Tbsp Sweet Basil
Instructions
  1. Place all sauce ingredients in a large pot (I used 2 to prevent burning). Place halved green peppers and full celery in for flavoring only-these will come out of sauce before serving (do not dice-leave in tact). Let sauce simmer all day. Brown Italian Sausage and Ground Chuck. Beat 15 lbs Ricotta Cheese (whipped preferred),6 eggs,2 Tbsp parsley, 1 Tbsp Garlic Powder together in a large mixing bowl. Set aside. Place Mozzarella cheese in a large bowl.
  2. Assembly:
  3. Line up 3 20x12x4″ Chaffer pans (we are doing 3 layers)
  4. Ladle sauce in bottom of each pan to cover fully
  5. Layer noodles over sauce (I used 12 noodles a row)
  6. Spread Ricotta Cheese mixture over top
  7. Sprinkle with Mozzarella Cheese and Parmesan Cheese
  8. Sprinkle with ground chuck and Italian sausage
  9. Ladle sauce over to cover
  10. Begin again- 3 layers. Top with cheese and sprinkle with parsley
  11. Bake:
  12. Convection oven heated to 350 for 1 hour 15 mins. Uncover and bake 20 more mins. Keep checking because every oven is different.
Notes

*Keep in mind I made 1 lasagna with no meat.

Ladies, I hope I can be an encouragement to you to do this very thing at YOUR church! If you have the gift of hospitality, it will be such a blessing for you-not to mention those on the receiving end 🙂 Much love goes out to you…Thanks for reading.

Signature

Marinated Pork Tenderloin


So sweet and savory. So juicy. So delicious. This recipe is an excellent choice for a weekend dinner with the family. I’ve made it time and time again and it never fails I get asked how I made it. Enjoy.

The marinade for the Pork Tenderloin: Soy Sauce, brown sugar, balsamic vinegar, fresh garlic.

I marinated the pork in this mixture (in the refrigerator) for about 6 hours. I turned the meat over every hour or so. 

I made “fresh” green beans tonight ( they were on sale!) Remember to snap the ends off!

This takes a little time..but fresh green beans are crisp and delicious and well worth the effort if you have the time. I boiled them in water for 5 mins, then made them the same as I make the Speedy Gourmet Green Beans with almonds.

I heated the grill to med-high heat and covered it in foil. I placed the 2 tenderloins on the grill and sprinkled them with a pork rub. I grilled the meat 7 mins x 4 turns= 28 mins total. Then, I took the meat off the grill and covered it with foil and let it stand for 5 mins before I sliced it. You can see in the photo the meat is still juicy and not overcooked. Whatever you do…don’t over cook pork! It gets very dry!

This was our meal! Marinated Pork Tenderloin, Mashed Redskins, Baked ApplesGreen Beans with Almonds, and warm Rhodes rolls..Mmmm..


Marinated Pork Tenderloin
Prep time: 10 mins
Cook time: 30 mins
Total time: 40 mins
Serves: 8
Ingredients
  • 2 pork tenderloins
  • 1 cup Soy Sauce
  • 1/2 cup Balsamic Vinegar
  • 4 cloves of garlic (chopped)
  • 1/2 cup brown sugar
  • Pork rub (pre-packaged)
  • Horseradish sauce for dipping-optional)
Instructions
  1. Combine soy sauce, balsamic vinegar, garlic and brown sugar together.
  2. Pour over pork tenderloins and marinate at least 4 hours or overnight.
  3. Turn meat over every so often to distribute the marinade.
  4. Take the tenderloins out of the refrigerator about 10 mins before you are ready to grill.
  5. Heat grill to med-high heat and cover with foil.
  6. Place tenderloins on grill and sprinkle with rub.
  7. Grill for 7 mins on all four sides=28 mins total.
  8. Take off of grill and cover with foil to keep warm -the meat will continue to cook.
  9. Slice and serve!
Notes

This recipe is adapted fromThe Grilling Companion.
http://www.grillingcompanion.com/grilled-pork-tenderloin/


Signature

Amish-Style Cinnamon Chip Bread Pudding with Warm Vanilla Milk Topping

A little while ago I asked had an online poll asking “ What kind of recipes do you like the best?” The most popular answer was…..homemade! (with a close second to quick and easy) I also had some requests for economical (amen to that!). Here is the perfect recipe for ALL 3 of those requests! Best of all, you probably have most, if not all, of these ingredients on hand at all times!

This traditional Amish- style bread pudding is absolutely delicious… The smell of it baking will draw your family into the kitchen with anticipation! Even better is the warm vanilla milk that is poured on top after it is fresh out of the oven. You will never want to throw out day-old buns, rolls, or bread again, especially when you know what potential they can live out! Enjoy!


Ingredients for Bread Pudding: Half & Half (you may substitute milk), bread (I used rolls), vanilla, sugar, eggs, butter, ground nutmeg and cinnamon chips (if you do not have these, you may sprinkle on cinnamon)

Pour Half & Half into a pot on med-high heat , add butter and let simmer (do not boil)

In a separate bowl add eggs, nutmeg and sugar and mix well

Add your warm milk/butter mixture and mix well again

Rip bread into small cubes and place in a lightly “pammed” casserole dish and cover evenly with mixture

Sprinkle with cinnamon chips (if you don’t have these, sprinkle with cinnamon)

Cover and bake in a 350 oven for 30 mins

Start your Vanilla Milk Topping: Heat butter in a saucepan, then whisk in flour to make a paste

Add milk, vanilla and sugar and let simmer until it thickens

After 30 mins is over, take off the foil and bake for another 15 mins until set and lightly browned on top

Remove from oven and pour warm vanilla milk over top

Serve fresh and pipping hot out of the oven! Those buns didn’t know their potential until this very moment!! Enjoy!!!

Cinnamon Chip Bread Pudding w/ Warm Vanilla Milk Topping

(Serves 6)

Bread Pudding

2 cups Half&Half (you may substitute milk)

2 Tbsp butter

3 eggs

1/3 cup sugar

¼ tsp ground nutmeg

1 tsp vanilla extract

3 cups of bread, torn into small pieces

A handful of cinnamon chips to sprinkle over top (you may substitute cinnamon to sprinkle)

Pour Half & Half and butter in saucepan on med-high heat, let simmer (do not boil). Beat eggs, nutmeg, and vanilla in separate bowl.

Add warm milk and butter mixture and beat well.

Tear bread into small pieces and place in a prepared casserole dish.

Pour mixture over top and sprinkle with cinnamon chips.

Cover with foil and bake @350 for 30 mins.

Take foil off and bake an additional 15 mins.

Warm Vanilla Milk

1 cup milk

¼ cup butter

1/3 cup sugar

1 tsp vanilla

1Tbsp flour

½ tsp salt

Melt butter, add flour to make a paste.

Whisk in the milk, sugar, vanilla and salt.

Let boil for 5 mins stirring constantly until it thickens into a syrup.

Pour over warm bread pudding and serve warm. Enjoy!

A recipe featured on Women Living Well.

Signature

Easy Crab Rangoon


These pretty little Crab Rangoons are simple to make, but look so fancy! If you want to impress your guests, but don’t have a lot of time- these are “your” appetizers. Serve them by themselves or along side of a sweet and sour sauce. Delicious!

Purchase pre-made Wonton wrappers (these are found by the bagged lettuce at your grocery store). Grease a mini muffin pan and place a wonton wrapper in each cup. You will need to fold sides and press them together. If you get a tear, no worries- they will turn out just fine.

In a large bowl, add cream cheese, crab meat, mayo, and green onions.

Mix together well.

Fill each wonton with a heaping teaspoon of mixture. Bake uncovered in a preheated oven at 350 for appx 15 mins or until golden brown. When cool to the touch, take each one out and place on a serving tray for your guests!

Easy Crab Rangoon

(Recipe from Kraft)

12 oz crab meat (you may use imitation)

8 oz cream cheese

1/2 cup sliced green onion

1 cup mayonaise

24 wonton wrappers

  1. Preheat oven to 350
  2. Grease a mini-muffin tin
  3. Place wonton wrappers in muffin tin-gently folding and pressing so they fit and do not attach to one another
  4. Mix crab meat, cream cheese, mayo and green onion together
  5. Place a heaping teaspoonful of filling in each wonton wrapper
  6. Bake uncovered for appx 15 mins until golden brown
  7. Place on serving tray along side of sweet and sour sauce/Thai dipping sauce (World market sells the best).
If you like this recipe you must try my friend, Mem’s Spring Rolls ! I love Asian food…MMMmmmm….

Signature

Meal Ministry Monday: Being "That" Mom

My son and two neighbors eating cookies on the deck

And they were bringing children to him that he might touch them, and the disciples rebuked them. But when Jesus saw it, he was indignant and said to them, “Let the children come to me; do not hinder them, for to such belongs the kingdom of God. Truly, I say to you, whoever does not receive the kingdom of God like a child shall not enter it.” And he took them in his arms and blessed them, laying his hands on them.             ~Mark 10:13-16 


My children and their friends eating popcicles.

Running through sprinklers, playing at the park, fishing, swimming, eating ice cream, laughing, playing, golfing, catching fireflies, vacationing, and biking…these are just a few things I can’t wait to do this Summer with my children…. I’m so excited for school to be out so I can have all of my ducklings in a row and at home with me. At ages 7, 5 and 2 years old I’m sure they will keep me running this year, but all the memories will be well worth all of the energy spent.

Since I can remember I’ve always wanted to be a mom….my life is my dream come true. Even more, I’ve always wanted  to be “that mom” and live in “that home” where other children want to come and play. The mom who bakes chocolate chip cookies and makes lemonade…the mom who loves all of the children deeply like Jesus did and does.

Being “that mom” is a meal ministry in itself….I can’t count how many batches of cookies I’ve made, gallons of kool aid I’ve served, and popcicles I’ve handed out. To be honest, It is actually my favorite ministry. It is such an honor to be part of a child’s life. I am so thankful to live in a neighborhood filled with sweet children, and have so many friends with children that I can help. What a blessing!

As Summer rolls around, I pray that you too will feel called to be “that mom” for all the children in your life….is truly is so special.

The neighbors and my son playing Star Wars in the yard.
My daughter and her friend making sundaes.
My children and more friends with “olive fingers”.
I took my friend’s little girl on a “Build a Bear” day trip with my girls! We had so much fun.
Of course, ice cream was a must!
My children with more friends! We all made cookies together…so sweet.
My friend’s little girl…we made cupcakes for her birthday!
Our next door neighbors came over for some rootbeer floats! I have had these little ones over for 6 years…wow, has time flown and how they have grown!


Each day of our lives we make deposits in the memory banks of our children. 

 ~Charles R. Swindoll


These memories are priceless….Thank you Lord for blessing me with my own children and allowing me to be a part of the lives of other children. 
Love to you,
Janelle 


Please e-mail me at JMNehrenz@me.com to be a guest blogger on Meal Ministry Mondays. I would love to show off your love for the Lord and His people! 

I am participating at Living Well Wednesdays and Titus 2sdays!
For more inspiring stories please click on the button below.

Signature

Meal Ministry Monday Welcomes Lisa!

Please help me welcome our fellow Sister-in-Christ, Lisa! What an amazing life-song she sings…


Lisa and her daughter


I am a follower of Jesus Christ and know that without HIM, I am NOTHING. I live in the Pacific NW with my sweet hubby of 20 years, two very fun teenagers and our little dappled dachshund. I have always loved making things, but after I became a mom myself, I found that I enjoyed crafting gifts EVEN more. There is so much excitement in starting with a few details and bringing it all together…especially when textured paper and ribbon are involved! Growing up in Europe as the child of missionaries to the military, I watched my mom create amazing things with what she had. Most things were handmade. It is the skills I learned from her that I use in all my creative endeavors. I love making simple gifts that have a story, a memory or a special meaning. Recycling and repurposing as much as possible and finding a great bargain are on the list of my favorite things! Most of my days are filled with taking care of my family…avoiding laundry at all costs {except for laundry day which is my Mundane Monday!}, taking meals to people, entertaining and being extremely grateful to God for every day of life.

HOSPITALITY IS…a meal to go

Showing hospitality by taking meals to people when they are sick, have had surgery or just need a little extra tlc when life gets overwhelming can be such a JOY! Sometimes it is easy to become so focused on our own families that it becomes difficult to think of others around us who are in need of our encouragement and help.

There have been 
PLENTY of times in my life when I have been taken under the wings of others and have been shown mercy. It is still a blessing thinking back to so many times others have cared for me and for my family. I can’t help but to think of how it feels to be taken care of. It is one of the best feelings in the world! 

When I think of hospitality, I think of the root word “hospital”. So, I looked it up…just for fun. I know we are all familiar with what a hospital is, but my old 1963 edition of Webster’s Collegiate Dictionary defines it as follows: “a charitable institution for the needy, aged, infirm, or young, an institution where the sick or injured are given medical or surgical care.”

While we are most likely not giving medical or surgical care, taking a meal to someone is comforting beyond words and it is always appreciated and welcome. For those of you who may struggle having people in your homes, this is the perfect alternative for you! 

If your palms are starting to sweat, hold on. Showing hospitality to others does not mean fancy schmancy. It does not have to be homemade and it certainly does not have to be a complete meal…unless you signed up for it. If you did commit and are feeling like it is more than you bargained for, ask a friend to help. Maybe you can split the meal. 


What is the first thing you do after you commit to taking a dinner to someone? Do you start to stress and wish you would have 
never offered? Do you ask a friend to trade dates in hope that the recipient will no longer be in need when it rolls around to your turn? Anyway you look at it, it can be a daunting task, to not only need to fix your family dinner but somebody elses family as well!

I think my favorite binder is the “MEALS TO GO” binder. It has made taking meals to people so easy…and might I add…FUN! I am not even kidding! Taking the guess work out of what to prepare and take allows me to make quick decisions and spend a little extra time embellishing it. It is a great way to pamper people and I no longer feel like I am just doing crafts “to do” crafts, but it allows me to be a little creative while being able to share with those who are in need!

Here is what works for me, but I would love to hear what works for you. Others ideas are always welcome and appreciated!!! I think we all enjoy hearing how other people do things!

BINDER ORGANIZATION:

Label your binder

The first page has the list of meals I choose from…if your recepient loves something in particular that you are aware of it makes it even easier to decide!
Keep this list simple and doable. If it is a chicken from Costco, a loaf of bread, bag-o-salad and lemonade, write it down. If it is a box of cereal, milk and bread write it down. This has to be what works for YOU! If it is having a pizza delivered write the phone number down so that you can call and have it DELIVERED! Are we all on the same page? Onward we go!

Each Meal has a complete list of what I will be taking to make it a “meal”.

I would encourage you to come up with one menu for each season…start with one meal that will be a JOY to make! 


The next page has the recipes, so I am not spending all my time flippin’ through different binders trying to track down what I need to make dinner.


Have you ever thought about taking breakfast the evening before? This is AWESOME. You can deliver it in the evening after your evening has “settled” down and it might be a very welcome change for one VERY happy recipient. You may want to try it!

While we have been talking about “meals to go”, I wanted to make sure that I mentioned this: there are certainly seasons in our lives where helping others is easier than others. Showing hospitality is nurturing. It is showing you care. Simple as that.

A few of my favorite things I have received as a “bedridden Momma” are: {1}a little bag with a card, a peppermint plant and a box of tea, {2}a bottle of sparkling water and a fresh lemon, {3}a bag of epsom salts etc. Even a sleeve of Saltine crackers and 7 UP is something you could keep on hand to deliver when the need arises!

So, as we have all been given the gift of TODAY, I hope that you, too, will find JOY in showing hospitality in a very real way wheather it be a meal, a note or a cup of lemonade!

Happy May!


Lisa, thank you so very much for the amazing tips. Your packaging is so beautiful! It is such a blessing to know other women share the gifts of hospitality and mercy.  Love to you, Janelle 


Please click here to visit Lisa’s Blog at The Pearson Family Blogspot

Please e-mail me at JMNehrenz@me.com to be a guest blogger on Meal Ministry Mondays. I would love to show off your love for the Lord and His people! 


I am participating at Living Well Wednesdays and Titus 2sdays!
For more inspiring stories please click on the button below.

Signature

Feasting in Fellowship Friday and Friday’s "Featured Recipe" and "Top Picks"

Friday’s Featured Recipe:

Come visit Courtney over at Women Living Well as she shares her resurrection roll recipe with us. You will be so touched by the meaning behind these delicious treats. This recipe is perfect to make with your children as you share the truth of God’s word with them. Thank you Courtney!!!! Love these!

Happy Friday to you my friends! Thank you so much for sharing your delicious recipes with all of us. I would like to take the opportunity to feature 3 recipes that were posted last week. Great job!  Continue serving your families and others. What a blessing it is to see your amazing cooking abilities displayed on the “Comfy” blog!

This recipe is so suiting for the season! How adorable AND simple! My children will enjoy making these! Thank you Missy!

What a beautiful salad! I can almost taste the fresh herbs and veggies just by looking at this photo! Mmmmmm…I can imagine pairing this with a cool glass of lemonade and a beautiful Summer evening out the deck! Thank You Jan!

Baseball season is such a busy time of year for my family. Two nights a week my boys (hubby and son) run out the door with dinner in hand on their way to practice. This delicious yet simple recipe will be great addition to my menu this week! Thank you Suzanne!

It’s Feasting in Fellowship Friday!!!!!!
Whatcha got cookin?

Link up with “Feasting in Fellowship Friday”! 
Simply copy and paste this button to your post. Then, include the link below that takes us directly to your recipe! Thank you for sharing…I love seeing what you  have cooking! 
~Love, Janelle 

Signature

"Baked" Fried Chicken

Ladies, remember when I showed you my favorite cookbooks? Well, this recipe comes straight out of “The All New Good Housekeeping Cook Book”..if you are following me it’s on page 198. But “typical Janelle style”-I have altered it just a bit. This “baked” fried chicken is a delicious alternative to traditional fried chicken. I bet you already have most, if not all of the ingredients on hand! The pictures do not do it justice-it is very moist on the inside and crispy on the outside! I made this meal for a close friend who was not feeling well…
Chicken, corn meal, bread crumbs, parmesan cheese, salt, egg, cooking spray
Cut fat off of chicken and pound- The reason I pound meat is because I want both sides even in thickness so the chicken cooks the same through the entire piece. We don’t want one side dry and the other undercooked. 
Add egg white and salt in a separate dish 
In another dish combine corn meal, bread crumbs, and parmesan cheese. 
Dip chicken into egg white (you may dredge in flour first if you wish-but this is not included in the recipe)
Then, coat in breadcrumb mixture
Spray foil lined baking sheet and tops of chicken with Pam. Place in a 425 oven for 25 mins.
Bake until lightly golden on top and center of chicken is white, but still juicy. 
I made some rolls, loaded baked potatoes, corn on the cobs and a dump cake .
Packed it up and was on my way to drop it off to a special family with one sick Mama! 
And came home to relax and have a nice dinner with my family  🙂 


“Baked” Fried Chicken
(From:The All New Good Housekeeping Cookbook)


non stick cooking spray
1/2 cup plain bread crumbs
1/4 cup parmesan cheese
2 Tbsp cornmeal
1 large egg white
1/2 tsp salt
6 pounded chicken breasts (fat removed)


Preheat oven to 425 and grease a 15×10 jelly roll pan with cooking spray.  In a casserole dish beat egg white with salt. In another dish combine bread crumbs, parmesan cheese, and cornmeal. Dip chicken breast into egg white mixture, then coat with crumb mixture. Place chicken on pan and spray with cooking spray. Bake chicken until coating is crisp and golden brown and juices run clear. Appx 25 mins. 


* You can “be bad” and add a white sauce to this for “chicken (baked) fried chicken”… Kind of negates the “baked” part…but I already did that with the loaded baked potatoes. (pray for me, lol) 


Mom’s Basic White Sauce Recipe
2 Tbsp butter
2 Tbsp flour
1 cup milk
salt and pepper 


On low heat melt butter then add flour for a paste. Add milk salt and pepper -whisk together until thickened (this will take about 5+mins to get desired consistency)


I am participating in Titus Tuesdays and Tasty Tuesdays- Please check these wonderful sites out for more delicious recipes from fellow bloggers! YUM!


Beauty and Bedlam

Signature

Meal Ministry

A dear friend with her new baby…I was blessed to cook lunch for her 🙂
As each has received a gift, use it to serve one another, as good stewards of God’s varied grace.
1 Peter 4:10
Hi Ladies.. I would like to show you a window into my meal ministry…this is what I do for families who are in need of a meal, can’t cook for themselves, or have just had a baby. I also feel called to share God’s love randomly with those who just need a pick me up- I am so blessed. 
I prepared this meal yesterday for a family who just had their second baby. Amidst the sleepless nights, nursing, and diaper changing…what sweet relief it is for a mother with a newborn to have dinner delivered..
Rolls Rising
Making broth for chicken n dumplings
A simple Italian tossed salad
Cream Puff Dessert (see womenlivingwell.org for the recipe this Friday!)
Starting to make green beans….
Packing everything up! 
A little “plug in” for the blog..haha. My sweet cousin Jen made these for me for Christmas
A card! 
I always, always, always make the same meal I make for others for my own family. They do NOT get my leftovers.  God, husband, children, then friends/ministry…Thank you Lord for laying that out for me and giving me grace!

I would love to post YOUR pictures/story of your meal ministry!
PLEASE e-mail me at JMNehrenz@me.com
I am looking for ANY story that shares the love of God with others through food.
You do not have to have a blog. 

Blessings to you my Friends,
Janelle

Tips for YOUR Meal Ministry

  • For new moms (nursing)- stick with foods that are easy on the stomach-stay away from anything  spicy.
  • Aim for a meat, a carbohydrate, and a vegetable. You may also add a salad, roll and dessert if you wish.
  • Add a card to make it personal. 
  • label food items.
  • Use throw away containers so the receiver does not have to return dishes to you.
  • I recommend the site Take Them a Meal -it helps coordinates meals for people who need them! 


Signature

Crescent Chicken


*Comfy in the Kitchen’s “Most Pinned” recipe!!! 290 thousand pins!
Wow! Go Nana B! 

This delicious recipe comes from my Grandma (or “Nana B” as we call her)…I have wonderful memories coming home from college to this delicious home cooked meal. It has become one of my husband’s favorites too. I like serving it along side of mashed potatoes …. the cream of chicken soup serves as a delicious gravy. Enjoy this simple yet delicious meal! 
~Janelle 
Crescent rolls, chopped and cooked chicken (I simply boil chicken breasts and cut), cheddar cheese, cream of chicken soup (milk).
Make soup in a medium saucepan using milk according to directions.  
Lay out one crescent roll at a time and place appx 3-4 bite sized pieces of chicken and appx 1Tbsp of cheese in the center of each triangle. 
Gently roll up
Seal edges by pinching the dough. (You will not get perfection, just make sure the filling cannot leak out)
Place all of your rolls in a 9×13 dish (I love my Pyrex 9×13- this brand lasts forever) and pour soup mixture over top ( salt and pepper as desired).
Bake at 350 for 30 mins until crescents are golden brown
Serve with mashed potatoes and your choice of veggies! 
A combination of buttery crescent roll, melted cheddar and juicy chicken…Mmmm…
Crescent Chicken
Author: Janelle Nehrenz
Prep time:
Cook time:
Total time:
Serves: 4
Ingredients
  • 1 (8 or 6 jumbo count) package refrigerator crescent rolls
  • 2 cups chopped cooked chicken
  • 1 cup shredded cheddar cheese
  • 1 can cream of chicken soup
  • 1 can of milk (using soup can)
Instructions
  1. Preheat oven to 350
  2. Prepare soup using milk and set aside.
  3. Separate crescent rolls.
  4. Spoon chicken and cheese onto each crescent; roll and seal to enclose filling.
  5. Place in a 9×13 baking dish.
  6. Pour soup over rolls.
  7. Bake at 350 uncovered for 30 mins.

*This post contains affiliate links, which means that if you click on one of the product links, I’ll receive compensation for purchased items through Amazon.com 

Signature

Pot Roast with Garlic


This is a recipe my mom always made for me as a child…now, I make it for my family! It is the perfect supper to have on cold winter days. If you like garlic as much as I do, you will love the way it is  added into the meat to carry out its delicious flavor. Serve with dinner rolls for dipping and a nice garden salad..it will be wonderful. 
Start out with a roasting meat of your choice.. you can use chuck, top/ bottom round, or rump.  I suggest purchasing 1 lb per 2 servings. I have a 3 lb roast in this photo
(keep an eye out at your grocery store these meats are often BOGO). 1 large can of beef broth, olive oil, garlic and salt and pepper. 
I use 1 head of garlic in my roast, but have 2 here to show you what it looks like when I prepare it. I peel the outside layers off like so…
And break the cloves apart and peel the outside layer of the cloves off…
Then cut into quarters
With a sharp knife cut slices into the meat (about an inch through)
Fill the holes in the meat with the quarters of garlic on all sides. 
Place olive oil in a large pan and heat to medium/high heat. Brown all sides of the roast and season with salt and pepper. This will only cook the meat 1/4 of an inch through, but it adds a delicious flavor! 
Place your roast into a Crock Pot (you can also do this on a stove in a large pot).  Season with worcestershire sauce. 
Pour 1 large can of beef broth over top 
Prepare your veggies..I have here potatoes cut in halves, onions cut in quarters and baby carrots. (I also really like cabbage, but my hubby doesn’t, so I spare him ..haha)
Simply place all your veggies on top of the meat, if the broth does not cover everything you may add water. 
Cover and cook on high for 6 hours in the Crock Pot. If you are cooking stovetop, place on a medium heat. 
When your roast is done the veggies will be tender and the roast will flake apart..Mmmm

Pot Roast with Garlic
3 lb roast (or larger)
1 large can of beef broth
1 head of garlic
2 Tbsp olive oil
1 onion cut into quarters
2 cups baby carrots
4 potatoes cut in half
1 tsp worcestershire
salt/pepper
water (optional to cover)
Slice small holes in roast and fill with garlic quarters. In a large pan, heat olive oil on med/high heat and brown meat on all sides seasoning with salt and pepper. Place meat in Crock Pot and season with worcestershire sauce, pour beef broth over top. Cut onion into quarters, potatoes into halves, and place all veggies into Crock Pot over top of meat. Add water to cover if needed. Cook on high for 6 hours in crock pot or if using stove top cook on medium.
ENJOY!
~Janelle

TastyTuesday200pix The Worst Cook in America   Cooking with Kids


Signature