Women Living Well Conference- What a JOY!

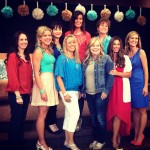
The FIRST Women Living Well Conference from left to right…Jen from Good Morning Girls, Clare from Peak 313, Ruth from The Better Mom, Courtney from Women Living Well, Whitney from Good Morning Girls, Darlene from Time Warp Wife, Karen Ehman from Proverbs 31 Ministries (and Karen Ehman dot com), Me from here (lol), and Angela from Good Morning Girls.

The very FIRST Women Living Well Conference….what a blessing it was. 

If you were able to make it, we were SO glad to have you there with us IN PERSON! It honestly was such a joy to see the faces of women we’ve chatted with online. Giving real hugs instead of cyber ones…hearing your journeys, seeing your smiles, sharing your tears, praying together…wow. I could go on and on!

If you were NOT able to make it. We would still like to have you! Starting Sept 26th, every Thursday for 7 weeks there will be a FREE webcast with recorded clips from the conference! For more information you can visit Women Living Well . I hope to see you there!


WLW-Conf-speakers-Collage

“There are different kinds of gifts, but the same Spirit distributes them. There are different kinds of service, but the same Lord. There are different kinds of working, but in all of them and in everyone it is the same God at work.” 1 Cor 12:4-6

As I look at the photo above…I can’t help but think of a quilt….intricately sewn together with life experiences, pain, joy, love, hope- woven together with the goal of being whole, up and running…all parts of the body being used to glorify Christ. One thing I noticed while rooming and working together at the conference was that each one of the ladies above has a deep desire to encourage women in the name of Jesus. In their own unique way…using their own unique gifts…with their own unique relationship with the Lord. How awesome is that? There are just no words. I do believe God put us ladies together according to His purpose because we all love Him and one another so much. I’m so proud of each and every one of these precious lives above. Ohhhh…I can’t even talk about anymore or I’ll cry! lol! 

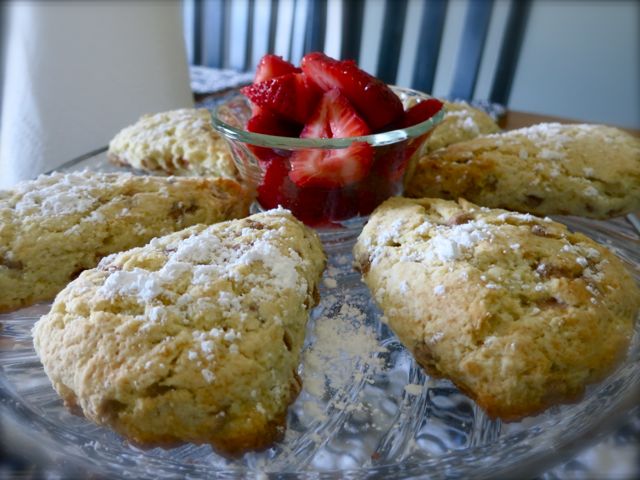
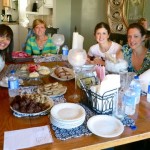
Here are some fun photos taken over the weekend…..

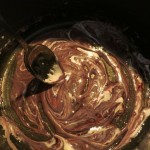
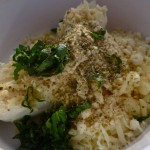
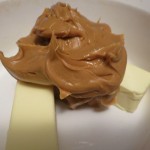
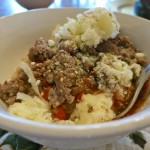
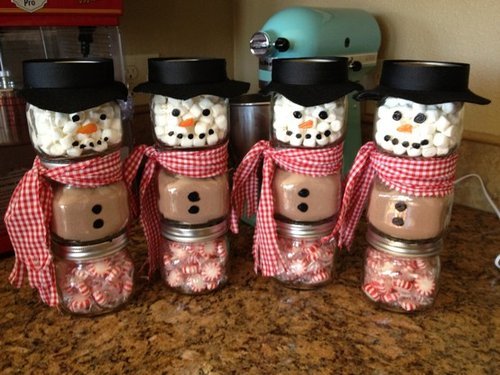
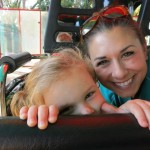
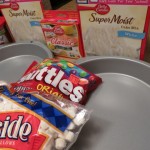
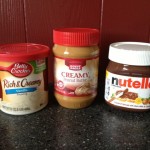
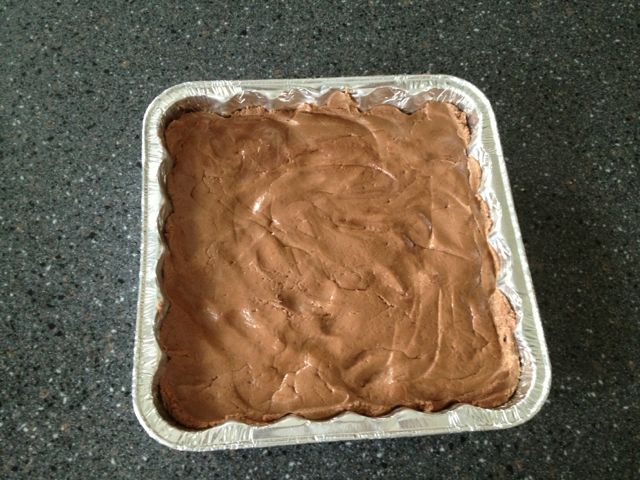
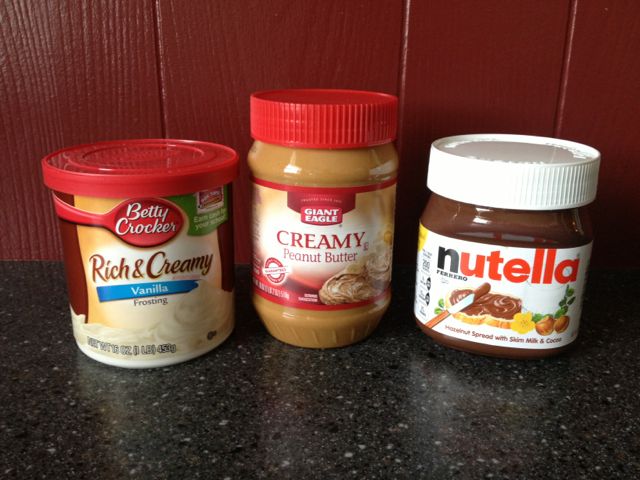
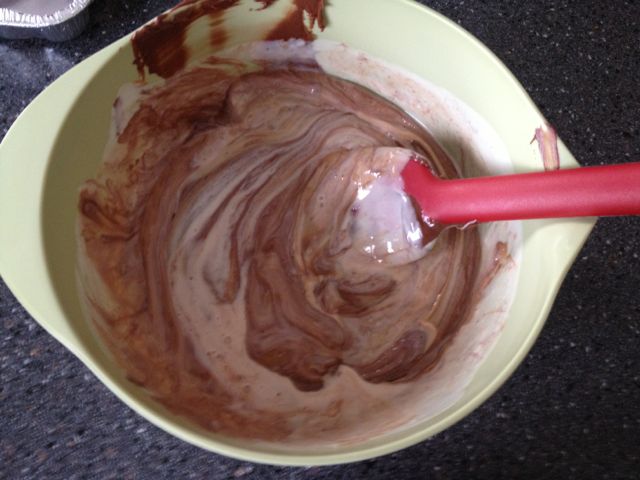
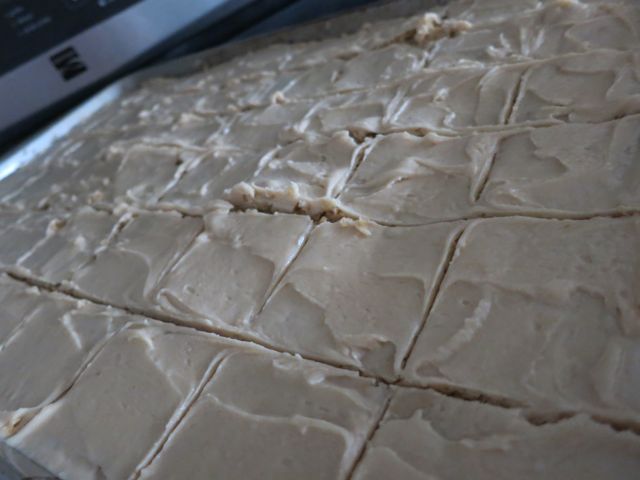
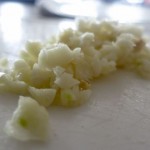
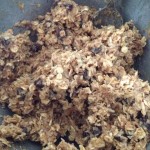
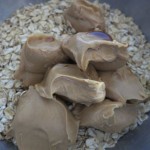
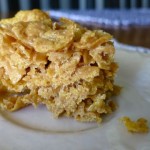
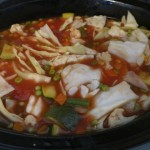
Clare from Peak 313 scolding me, lol! This was our girls night over Nutella pizza…Yes, I will create a replica recipe. It must happen. What a FUN night with lovely ladies!!!!

Photo: We had an awesome hour of prayer and devotions together this morning!  God is good! #womenlivingwell

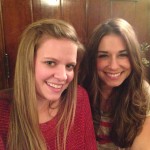
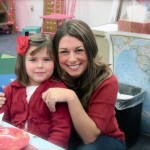
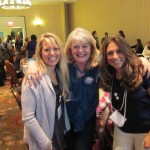
The next morning, Whitney with Good Morning Girls, prepared the most beautiful devotional for us. She shared the message to never forget our journeys, but to use them for God’s glory!! We are all broken…none of us feel worthy- but we are HIS! We cried, prayed, laughed….an amazing time. I’m pictured “make-up less and all cried out” with my dear friend Katina…she was the one who gave us the idea for a conference and helped plan the entire event!

Photo: My precious family at the conference!!!

At the conference from left to right..my Mother-in-Law Kathy, me, my Mom Diane , Grandma Ruth, and my Aunt Cathy. These women have played such valuable roles in my life- Ohhh, how I love them. God has used them to shape me, teach me, guide me, and the list goes on.


There will be more photos to come….make sure to visit all of these lovely ladies blogs for their recaps on our amazing journey together over the weekend! Love to you, Janelle

Signature

The BEST Twice-Baked Potatoes

IMG_2436

There’s somethin special ’bout them taters…there suuuuure is!

These twice baked potatoes are simple to make, are ohhh so tasty and are a definite crowd pleaser. Make sure to add this recipe to you next outdoor BBQ!  They may look a little “fancy”, but only you will know they are just “comfy” 😉

*Gluten-Free

IMG_2429

Preheat oven to 400. Wash, dry, and poke potatoes with a fork on both sides. Roll in olive oil and sprinkle with sea salt. Bake in the oven for 45 mins to 1 hour until a fork easily penetrates through the potato. There may be a little smoke…thats no biggie. It’s worth the crispy outside!

IMG_2430

Take potatoes out and let cool slightly. Slice in half. Scoop out the inside of the potato being careful not to go through the skin (A grapefruit spoon works great here). Put the “potato whites” in a bowl.

IMG_2431

Add sour cream, butter, cheese, salt and pepper and beat well.

IMG_2432

Because the potatoes are still warm everything will melt nicely together like so.

IMG_2433

Turn down the oven to 350. Place your potato skins on a baking sheet (I line mine for easy clean-up), put potato filling inside, top with remaining cheese and cooked bacon. Bake for another 20 mins until bubbly.

IMG_2435

Add chopped scallions.

IMG_2436

YUM!

The BEST Twice-Baked Potatoes

 
Prep time:
Cook time:
Total time:
Serves: 12
Ingredients
  • 6 large Russet Potatoes
  • 1/4 cup olive oil
  • Sea Salt/Black Pepper
  • 4 Tbsp Butter
  • 3/4 cup Sour Cream
  • 2 cups Shredded Cheddar Cheese (halved)
  • 6 slices bacon cooked and torn into pieces
  • 1/4 cup scallions chopped for garnish
Instructions
  1. Pre-heat oven to 400 degrees.
  2. Wash, dry and poke potatoes with a fork. Roll in olive oil and sprinkle with salt.
  3. Place potatoes on a baking sheet and bake for 45-60 mins until tender. Test with a fork.
  4. Take out and let cool for appx 5 mins. Cut in half from top to bottom and scoop out insides, leaving the skins in tact.
  5. Put the potato whites in a large mixing bowl. Add butter, sour cream, 1 cup of cheddar cheese and salt and pepper to your liking. Mix well until combined.
  6. Place potato skins on a cookie sheet and fill with mixture. Top with cheese and bacon. Bake in a 350 oven for 20-30 mins longer.
  7. Garnish with scallions.
  8. Notes:
  9. You may halve or double this recipe
 
 
Signature

3 Ingredient Nutella Fudge (SO Easy!)


IMG_1248

Now you see it….now you don’t! That’s the best way to describe this simple, yet delicious Nutella fudge. My sweet friend Katina thought to bring this to me last week….what a gift! I honestly have never seen a dessert vanish so quickly, haha!!! When she told me it had only 3 ingredients, I about fainted! You must try this one Ladies….it’s a keeper.

A HUGE thank you to Katina for making this treat for me AND for organizing the upcoming Women Living Well conference. She is such an amazing and supportive friend-I love her!!! Can’t wait to see everyone who will be attending!!!!

*Gluten FREE! Great to make with kidos.

IMG_1241

This is it! Just 3 ingredients…check that out.

IMG_1244

Microwave frosting for approximately 45 seconds, then combine with other ingredients in a bowl.

IMG_1246

Mix well, spread in an 8×8 pan, and refrigerate for 30 mins until set.

IMG_1248

Bada bing. DEEEEElish.

3 Ingredient Nutella Fudge (SO Easy!)

Prep time:
Cook time:
Total time:
Serves: 8-10
Ingredients
  • 1 Cup Nutella
  • 1 Cup Peanut Butter
  • 1 16 oz Container Vanilla Frosting
Instructions
  1. Take the lid off of frosting and microwave for 45 seconds.
  2. Combine all ingredients in a mixing bowl-it will start to thicken.
  3. Spread into an 8×8 pan.
  4. Refrigerate for 30 mins until firm.


Signature

Debbie’s EASY Crustless Orange Custard Pie


Orange Crustless Pie

 Hi Ladies! It’s such a pleasure to introduce you to one of my new friends, Debbie from Deliciously Inspired. Sweet Debbie shares the same interests that I do…we love God, our families, others and enjoy sharing that love through cooking. Debbie is also a new grandparent!!! By her picture, I am still not convinced this is a true statement, you will see what I mean when you take a look 😉 

Today, Debbie is sharing with us a Gluten-Free  (or glutenous maximus if you choose regular flour) Orange Crustless Custard Pie. What a refreshing dessert for these dog days of summer…

Please take a moment and browse around her site…I’m certain you will love her just as much as I do! You can also like her on Facebook

Thanks for sharing this delicious treat with us today Debbie!

Much love to you and those grand babies…..Anyone else a new grandma????? 

Orange Crustless Custard Pie

Prep time:
Cook time:
Total time:
Serves: 8
Ingredients
  • ¾ cup flour (you may use white rice flour for gluten-free)
  • 4 eggs
  • 1/3 cup freshly squeezed orange juice
  • 1/2 lemon, squeezed
  • 1/2 cup sugar
  • 2 Tbsp honey
  • 3/4 cup sweetened shredded coconut
  • 1 Tbsp vanilla extract
  • 1 ½ cups almond milk, unsweetened or milk of your choice
  • 1/4 cup butter, melted
  • 1 tsp freshly grated orange zest
  • Fruit Spread, your choice – I used an apricot
  • Fresh Strawberries
Instructions
  1. Preheat oven to 350 degrees.
  2. Throw all ingredients in your blender (I use a Vitamix)
  3. Blend until well combined.
  4. Pour into a well greased standard 9-inch pie dish and bake for about 1 to 1-1/2 hour.
  5. Test the pie with a skewer.
  6. When it comes out clean it is done.
  7. If it starts to brown too much on the top – cover lightly with foil to continue baking without disturbing the pretty top.
  8. Cool completely
  9. When ready to serve, spread with fruit spread to create a glaze and place sliced strawberries on the side.
  10. Store in refrigerator.
Signature

Our Deepest Valley…

Photo Credit 

“Consider it pure joy, my brothers and sisters, whenever you face trials of many kinds, because you know that the testing of your faith produces perseverance. Let perseverance finish its work so that you may be mature and complete, not lacking anything. “James 1:2-4

When we are in, what seems our deepest valley, it’s difficult to think we’ll ever get out of it… isn’t it? Emotional and physical pain can overwhelm us…human emotions start to kick in: Fear, hurt, bitterness, feelings of abandonment, disgust, worry, anger and the like start to “whirlwind” around us. At times we can even become numb and feel as though we are standing still in the eye of a storm. When is this all going to end?  Why me? What did I do to deserve this? These are all questions we ask…

 One of the first things we must do as Christians…when we feel lower than low, is go to the Written Word of God. What He has to say means everything….everything. It just does, Ladies.

What God’s word says about “our valley”:

“Even though I walk through the darkest valley, I will fear no evil, for you are with me; your rod and your staff, they comfort me.” Psalm 23:4

In our darkest valleys-whether we are victims of illness, others or to are our very own sin- He is with us. Through forgiveness or repentance depending on the scenario, He promises to guide us, be by our side and give us comfort. People and life will let us down, but God never will. His goal is always to save us.

What God’s Word says about how to cope while we are in “our valley”. 

“My Sheep listen to my voice; I know them, they follow me.” John 10:27

One of the most important things I’ve realized is not the methodology of getting out of a trial, it’s our reaction to our trial. This reaction is such a huge testimony to those around us and gives God glory. We are human- there will be times we won’t  live out God’s word in our reactions.  But, thankfully He is a forgiving God and remains there for us under every circumstance. He puts us back on track and our knowledge of this unworldly love keeps us coming back to Him. Our unworldly reactions speak loudly. Thank you, Lord.

What God’s Word says about what to do when we are out of “our valley”. 

“Come and hear, all you who fear God, and I will tell what He has done for my soul.” Psalm 66:16

We are to share with others that they are not alone in this troubled world- God gets the glory for the way he has shaped us here on Earth. Even if we got ourself into our own messes- He doesn’t care, He wants to be glorified, worshiped, loved and told about.

What God’s Word says about how to serve Him while we are in “our valley”. 

“For even the Son of Man did not come to be served, but to serve, and to give his life as a ransom for many.” Mark 10:45

Friends, I’ve heard that we are always in 1 of 3 places….in a valley, about to go into a valley, or just getting out of one. No matter where we are in life we are called to be the hands and feet of Christ. We can carry out His love through our reactions, our testimony, serving others, encouraging others, and learning from our pain to help others in the same pain.

As Jesus bore our sins on the cross, He was in pain beyond words-yet he served and laid his life down inorder to give us eternal life. If we are followers of Him, we are to be imitators of His ways…Our pain, their gain. Amen.

As I look at the photo above taken from the top of the Grand Canyon, I can’t help but think of it  metaphorically. “Look where I was…I remember that …. Oh, dear I wouldn’t have signed myself up for that, but look where I am now. That valley actually looks beautiful from up here…I’m so grateful. God got me through that valley and there are more to come, I’m sure. But, glory be to Him no matter where I am standing.”

Missing you Ladies…but I will be back 🙂 God is doing a work in my life and I won’t miss the opportunity to share it with you. Much Love to YOU.

Signature

Strawberry-Banana’s n Creme Fruit Smoothie {High Protein!}

Oh, how I love a cool, fresh, fruit smoothie! Make one for breakfast, after a workout, or enjoy as a treat on a sunny afternoon. Here is a delicious recipe you and your entire family will enjoy!

 Strawberries, ice, bananas, orange juice, vanilla soy milk
 
Blend well
Serve with a straw and enjoy!


I make this smoothie often after my workout routine-the protein powder aids in recovery. If I don’t have this on hand, I end my workout with a protein drink such as  Ensure….What is your favorite smoothie/post workout drink? 


Strawberry-Banana’s n Creme Fruit Smoothies

 
Prep time:
Total time:
Serves: 4
Ingredients
  • 15 Whole Strawberries (Appx)
  • 2 Bananas
  • 1 Cup Vanilla Soy Milk {or milk of choice}
  • 1/2 Cup Orange Juice
  • 1 scoop Whey Protein
  • 2 Cups of Ice
Instructions
  1. Blend together- enjoy!
 
Signature

Smothered Chicken

photo_3


Marinated chicken breasts topped with sautéed onions and melted cheese, what’s not to love?  Serve with mashed potatoes, corn and a dinner salad and you have yourself a winner, winner chicken dinner!

*By golly-it’s naturally gluten-free too {make sure to check cheese, seasoned salt and dressing marinade}.

Smothered Chicken

Prep time:
Cook time:
Total time:
Serves: 6
Ingredients
  • 6 boneless skinless chicken breasts
  • 1-2 cups Italian dressing
  • Seasoned salt/pepper
  • 1 onion sliced
  • 1 Tbsp olive oil
  • 6 slices of cheese {your choice, I had American on hand}.
Instructions
  1. Marinate chicken in Italian dressing for at least an hour {preferably 3-4 hours}.
  2. Place chicken on greased broiling pan or foil lined pan.Sprinkle with seasoned salt and pepper.
  3. Broil on low for 10 mins per side, 20 mins total. Cooking time will depend on how thick your chicken is.
  4. In a small skillet, on medium high heat, sauté onions for 3-4 mins in olive oil.
  5. Place sautéd onions on top of each chicken breast- top with a slice of cheese.
  6. Put chicken back under the broiler for 1 min until cheese is melted.
Signature

WLW Featured Recipe Gluten-Free Strawberry Shortcake!

I’m over at my dear friend Courtney’s blog, Women Living Well, today! We’re whipping up some delicious Gluten-Free Strawberry Shortcake…if you don’t have a gluten allergy, no worries! Use your traditional Bisquick for a delicious semi-homemade dessert sure to please your family and guests. Strawberries are on sale this week! Wohoo!

Signature

Aunt Linda’s Homemade Window Cleaner


Spring is in the air! Ahhhh…..

Spring cleaning can be quite a chore, but doesn’t it feel great after ya do it?

Hand is raised, Ladies!

So, open some windows and whip up Aunt Linda’s {proven} homemade window cleaner. This is an oldie, but goodie that I’ve had in my recipe box for over 10 years. 

Here’s to cleaner windows and cheaper cleaner! 

*Thanks Dee for giving me this recipe on the day of my bridal shower!

Aunt Linda’s Homemade Window Cleaner

Prep time:
Total time:
Ingredients
  • 4 oz ammonia
  • 12 oz rubbing alcohol
  • 16 oz water
Instructions
  1. Mix together and store in a large squirt bottle.
Signature

Frosted Peanut Butter Brownies


IMG_2387

My son’s homework assignment for the weekend was to make a recipe to share with his class…he went through Mom’s old recipes and picked a winner! These Peanut Butter Brownies are delicious, easy, and make plenty for a class full of 3rd graders. 

*For a gluten-free alternative use this GF flour blend

IMG_2361

Gear up! 

IMG_2367

Put all your ingredients in a bowl ….

IMG_2369

and away you go! 

IMG_2370

The batter will be thick…

IMG_2371

Press it into a greased 17×11 pan with your hands. Bake at 350 for 15-18 mins. 

IMG_2372

Start whipping up your homemade frosting! 

IMG_2374

This is goooooood…..

IMG_2377

Lol…just ask the baby of the family 😉 

IMG_2383

A little ole fashioned pile up while the goodies are baking..

IMG_2385

Let brownies cool, frost, and divide into 48 squares! 

IMG_2387

We added a little something extra for fun- what child doesn’t like sprinkles? 

IMG_2388Taste testing before he goes to class in the morning! Great job Buddy! 


Frosted Peanut Butter Brownies

 
Prep time:
Cook time:
Total time:
Serves: 48
Ingredients
  • 1 1/4 cup oats
  • 1 cup sugar
  • 1 cup brown sugar
  • 1 cup softened butter
  • 2 eggs
  • 2 cups flour
  • 1 cup peanut butter
  • 1 tsp baking soda
  • 1/2 tsp salt
  • ~Frosting~
  • 4 cups powdered sugar
  • 1 tsp vanilla
  • 3 Tbsp peanut butter
  • 1 Tbsp oil
  • Hot water to desired consistency
Instructions
  1. Preheat oven to 350.
  2. Mix all brownie ingredients in a large bowl. Batter will be thick.
  3. Spread evenly onto a greased 17×11 cookie sheet with your hands.
  4. Bake for 15-20 mins until lightly golden brown.
  5. Cool then frost.
  6. Frosting:
  7. mix sugar, vanilla, PB and oil together.
  8. Add hot water until desired consistency.
  9. Pour over brownies and frost evenly.
  10. Cut into 48 squares.


Signature

Roasted Brussel Sprouts

The other day I posted on Facebook about my love for brussel sprouts. When I say love…I mean like the same kind of love I have for chocolate-yeah, I know. To my surprise, I was not alone! So many ladies commented about how-they too-shared this love! Wohoo!!! Here’s my favorite method of preparations…very simple, so delicious. Enjoy.

Cut stems and rinse about 16 brussel sprouts.


Pat dry with paper towels. Drizzle with olive oil and balsamic dressing. Add chopped garlic, sea salt and cracked black pepper.


Place on a foil lined pan in your pre-heated oven {400 degrees}. Roast 15 mins, shake the pan and roast another 15 more mins.

The leaves will have a caramel color like so…the balsamic gives this dish a sweet/nutty flavor. Salt and pepper more if desired. Delicious!

Looking for a gluten-free meal plan? This side would be the perfect accompaniment to a Grilled Pork Tenderloin and Mashed Redskins.

Roasted Brussel Sprouts

Prep time:
Cook time:
Total time:
Serves: 4
Ingredients
  • 16 Brussel Sprouts
  • 3 garlic cloves {chopped}
  • 2 Tbsp Olive Oil
  • 2 Tbsp Balsamic Vinegar
  • Sea Salt and Cracked Black Pepper to taste.
Instructions
  1. Preheat oven to 400 degrees.
  2. Cut stems off of brussel sprouts, rinse, and pat dry. You can leave sprouts whole or slice in half-whatever you prefer.
  3. Place in a bowl and coat with oil and balsamic vinegar, add garlic, salt and pepper.
  4. Place on foil lined pan and roast for 15 mins, shake pan to turn, roast another 15 mins.
  5. Add additional salt and pepper if needed.


Signature

Homemade Salted Caramel {In under 10 mins!}

I’m laughing at myself as I post this amazing recipe right after an hour of “Cross Fit”. Ohhh Ladies, forgive me….your “Comfy” hostess is so contradictory. But, at least I’m burning off the crazy calories pictured above…right? Help me. Someone. 😉

In all seriousness….one square of this caramel is worth about 100 burpeesnot kidding.  You all know I’m a softy when it comes to sweet and savory -this salted caramel is no exception!!!! I loooooove this recipe. Oh, is this stuff good.

Place your squares in wrappers {cut parchment paper and tie ends} for gifts, in paper cups for display, or just eat them out of the pan {hand raised, ha!}. Enjoy Ladies! 

Conviction {ekk!}.

In a medium saucepan on medium-high heat melt your butter, sugar, brown sugar, sweetened condensed milk, corn syrup and vanilla.

Stir with a whisk constantly for about 5 mins -it will bubble like so and turn into medium golden color.

Butter an 11×7 {you can also use an 8×8 or 9×9, no biggie}. Pour caramel into pan.

And here comes the savory part.…sprinkle a little coarse sea salt on top {don’t over do it!}. I buy my sea salt at Marcs.

Refrigerate for 1 hour, then slice into squares! This is so good….so so so so so so good.


Homemade Salted Caramel {In under 10 mins!}

Prep time:
Cook time:
Total time:
Serves: 24 pieces
Ingredients
  • 6 Tbsp butter
  • 1/2 cup white sugar
  • 1/2 cup brown sugar
  • 1/2 cup light corn syrup
  • 1/2 cup sweetened condensed milk
  • 1 teaspoon vanilla
  • coarse sea salt
Instructions
  1. Add all ingredients except salt into a medium sauce pan.
  2. Let boil on medium/high for about 5 mins stirring with a wire whisk until caramel thickens and deepens in color {a medium golden color}.
  3. Butter an 11×7 {or 8×8/9×9} pan and pour in caramel.
  4. Lightly salt the top of caramel.
  5. Refrigerate for 1 hour and cut into pieces.
Signature

Nifty Thrifty Week at Karen Ehman’s!

Hi Ladies!

If you haven’t already heard…Karen Ehman from Proverbs 31 Ministries is hostessing a “Thrifty Nifty” week! She invited Five frugal and fun guests….{what an honor} to give ideas on to help you spend less and live more; to fret less and GIVE more! 

Come visit me over there where I’m sharing Ebay’s FREE recipe book “90 meals under $1.25” featuring Comfy in the Kitchen.

See you there!

Signature

Bacon-Wrapped Asparagus

The maple bacon paired up with cracked black pepper and sea salt makes this sweet and savory dish a winner in my book! A side that looks fancy, but is soooo easy. Enjoy roasted in the oven {as shown} or grilled! 

Trim the bottoms of your asparagus so they are even with one another {about 1-2 inches} and rinse. Bundle 5-6 together, wrap tightly with one piece of uncooked maple bacon -seal with a toothpick.

Line up bundles in a foiled lined 9×13 baking pan {I would steer away from a cookie sheet because the bacon juices will run off}. 

Drizzle with olive oil and sprinkle with black pepper and sea salt. Roast in a 400 oven for 15 mins {turning in between} until browned. If you would prefer, you can grill 5 mins on each side until bacon is cooked and crispy. 

Bacon-Wrapped Asparagus

Prep time:
Cook time:
Total time:
Serves: 6
Ingredients
  • 2 lbs Asparagus
  • 1 package of Maple Bacon
  • 2 Tbsp Olive Oil
  • Salt/Pepper
Instructions
  1. Trim Asparagus ends so that they are all even with one another {about 1-2 inches off}. Rinse
  2. Bundle 5-6 asparagus, wrap tightly with maple bacon, seal with a toothpick.
  3. Place all bundles in a foil lined 9×13.
  4. Drizzle with olive oil and season with salt and pepper.
  5. Roast for 7 mins, turn and roast an additional 7 mins until bacon is cooked through.


Signature

“We’re missing the best part of each other”.

Last week, I posted the above photo on FaceBook from the book “What Women Fear”, by Angie Smith.  Sitting here on the couch on a Saturday night I thought-I bet a lot of other Ladies have felt this way-I know I sure have. Even amidst the company of other women, we can still feel very alone if we dont’ get hard core about it-I’m talking being real.

“Carry each other’s burdens, and in this way you will fulfill the law of Christ”. ~ Galatians 6:2

The truth is every one of us has struggles. It’s promised.

Financial Stress…Health Issues… Marital Problems…Depression…Loneliness…Anger…Grief…Loss…

If I asked you what your top 3 challenges or hurts are currently, I bet you could name them almost immediately. Throughout our day we can fixate on these issues until they literally consume us…then we go to a bible study and act hunky dory. Why do we do this?

Here’s my personal internal dialogue:

“I’m sure this will pass and no one will ever need to know that I struggled today.” Pride

“These ladies may loose respect for me if they catch on I don’t have it all together.” Worry

“What if they think less of me?” Fear

“I’m the person people come to, I can’t burden them with my issues.” Nonsense

“What if they talk about me when I’m not around?” What-if thinking

“What if they judge me?” Idolizing

And the list goes on….and there is always a kibosh on our silly worries when the wisdom of God steps in.

Sometimes all we need from one another is to hear these precious words : I’ve been there too. 

Seriously?

Yep.

Ahhhhh……

Everyone of us is a living, breathing, walking…. book. What good is a book if you can’t open it up and read it? What can it teach anyone by just sitting there? The stories, humor, good times and bad times…the meat. That’s what we are missing in one another!!!! I could care less about that shiny cover that we all end up tossing aside anyways.

Ladies, I encourage you to share a page in your book the next time you’re with trusted and like-minded friends. Your testimony will most likely be a huge blessing to someone else in the room wondering if they are all alone in their struggles. Some of the kindest people I’ve ever met are the ones who have been through the hardest of times. 

“Been there”. 

 No temptation has overtaken you that is not common to man.  God is faithful, and he will not let you be tempted beyond your ability, but with the temptation he will also provide the way of escape, that you may be able to endure it.

~1 Corinthians 10:13
.

Signature

Sweet Garlic Glazed Chicken

My mom forwarded me this recipe and my, oh, my is it a keeper! As you know, I’m a huge fan of sweet and savory dishes- this one is no exception! Enjoy!

Chop fresh garlic – it’s gotta be fresh for this recipe {I know, I know- I don’t like the smell of it on my hands for days either….but it’s worth it for this one}.

In a small/medium pan add olive oil and sauté garlic on medium heat until tender. Be very careful with your stovetop setting-garlic can burn quickly! 

Add brown sugar to the olive oil and garlic- stir until it makes a paste.

Place thawed chicken breasts in a 9×13 pan, cover with paste and sprinkle with salt and pepper. Bake uncovered at 400 for approximately 20 mins. I placed mine on a cookie sheet, but when I make this again, I’ll use a 9×13- there was a little spillage, don’t ya hate that?.

*I am a huge fan of smaller, organic chicken breasts. If your chicken is larger than shown below, make sure to pound it. This will help it cook evenly!

Mmmmmm…..You’re going to love this one! Thanks Mom! 

Sweet Garlic Glazed Chicken

Prep time:
Cook time:
Total time:
Serves: 4-6
Ingredients
  • 6 boneless chicken breasts
  • 4 garlic cloves chopped
  • 4 Tbsp of brown sugar
  • 2 Tbsp olive oil
  • Salt/Pepper
Instructions
  1. Preheat oven to 450.
  2. Place foil in a 9×13 pan and put your chicken in it.
  3. In a small or medium pan pour olive oil and sauté your garlic on medium heat until tender.
  4. Remove from heat and add brown sugar to your olive oil/garlic. Stir until it’s a paste.
  5. Evenly divide mixture over each chicken breast.
  6. Season with salt and pepper.
  7. Bake uncovered for 20-30 mins depending on the size of your chicken.
Signature

Quick and Simple Berry Trifle

This elegant dessert is so light, so simple, and so delicious…perfect for a warm Spring or Summer day. The juice from the berries naturally soak into the angle food cake. The homemade whipping cream adds a special touch to this “semi-homemade” Berry Trifle. Your guests will be delighted!


Strawberries, blueberries, blackberries, raspberries, whipping cream, {sugar}, 1 store purchased Angel Food Cake, a trifle bowl.

Cut strawberries and rinse all berries in a colander.


Mix berries {beautiful, aren’t they?}

Pour whipping cream into a large mixing bowl and beat on high until soft peaks form. Please know that you can over mix whipping cream and it will loose it’s creamy smooth texture.

Add 1/2 cup of sugar to whipping cream and beat for 30 seconds until combined. {Yes, you may substitute Cool Whip if you need to…but the extra 5 mins to make your own whipped cream is SO worth it in this particular dessert}.

You are ready to layer! Start by simply tearing large pieces of angel food cake apart and layering them at the bottom of your trifle bowl. Add berries, then whipping cream. Repeat 3 times.


Quick and Simple Berry Trifle

Prep time:
Total time:
Serves: 12
Ingredients
  • 2 cups strawberries
  • 1 cup black berries
  • 1 cup raspberries
  • 1 cup blue berries
  • 1 pint whipping cream
  • 1/4 cup sugar
  • 1/2 tsp vanilla
  • 1 store purchased angel food cake
Instructions
  1. Beat whipping cream with sugar and vanilla until soft peaks form- set aside.
  2. Cube angel food cake.
  3. Rinse all berries and begin layering: Cake, whipping cream, berries.
  4. End with whipping cream and berries for a garnish
Signature

Take Them a Meal Blog- Raising a Family and Meal Ministry….

Raising a family and a Meal Ministry

Hi Ladies!

Have you ever wondered how I manage a family and a meal ministry? I know what you’re thinking:” I can’t even keep up with my own family’s meals let alone another’s, Janelle!”

Trust me, I am NO Super Woman {In fact, I’m extremely human}. 

Join me over at Take Them a Meal where I’m sharing some tips and tricks that I’ve picked up throughout the years…like any ministry, it’s a live and learn situation. 

Keep serving!

Take Them A Meal Blog

Signature

Healthy “Copy Kat” Peanut Butter Chocolate Chip Balls

Last week I posted a delicious recipe: “No Bake” Peanut Butter Chocolate Chip Balls. Words can’t describe how tasty those little treats are! Then, I had a sweet reader, Amanda, comment and share a similar recipe… but on the lighter side. Would you know, I tried her version today and loved them too?! Wohoo!!!! I’m so proud of my “Comfy” readers! 

So, in Amanda’s words: ” No stove top or oven required!! I made these all last summer and everyone loved them. They make everyone happy even the health nuts in your life because it uses honey instead of sugar:) I also have a child with constipation issues and these have a lot of flax seed in them to help him work things out:) Enjoy!!!!!!!”

Thank you SO much Amanda! This recipe is an excellent Copy Kat! My husband had 2 after lunch! I’m sure I’ll be making this version this Summer too! 

In a large bowl combine oats, coconut, peanut butter, chocolate chips, milled flax seed, honey, and vanilla. 

Stir it up and place in the refrigerator for 1 hour- then shape into balls. Keep refrigerated! YUMMMM!!!!

I love the addition of the milled flax seed…Many of you might be thinking “Oh that’s probably expensive- sounds organic, lol”. Honestly it’s not and it’s known to be one of the healthiest things we can add to our food! I purchased 3/4 lb for $1.25 at my local indoor farmer’s market {make sure to purchase it already milled or “ground”}.  It’s a sneaky, yet effective way to add some pretty powerful health benefits into your recipes! Awesome.

 Thanks Again Amanda! 


Healthy “Copy Kat” Peanut Butter Chocolate Chip Calls

Prep time:
Total time:
Serves: 15-20
Ingredients
  • 1 cup oats
  • 1 cup coconut
  • 3/4 cup peanut butter
  • 1/2 cup chocolate chips (I use dark so I can eat more cookies and feel good about it:)
  • 1/2 cup ground flax seed (Costco has the best at an awesome price!)
  • 1/3 cup honey
  • 1 tsp. vanilla
Instructions
  1. Mix and refrigerate for 1 hour.
  2. Roll into balls.
  3. Refrigerate until ready to eat! No oven required!
Signature

Grandma’s Coleslaw

Are you looking for a coleslaw recipe just like grandma used to make? Well, look no further…this slaw has ” just the right” amount of mayo, vinegar, and sugar to please the harshest connoisseur . It’s also the perfect addition to a backyard barbecue!

In a food processor, throw in your carrot, onion and celery.

Give it a whirl, like so…Then, scoop out the mixture and place it in a large bowl.

 Add 1/2 a head of cabbage cut into chunks. Process and place in the bowl with the carrot mixture. Then, add the other 1/2 a head cut into chunks, process and place into bowl. 

Mix it all together.

In a medium bowl whisk together mayo, milk, white vinegar, sugar and salt and pepper.

Pour over cabbage mixture and stir well.

Garnish with a little paprika and there you have it! YUM! Just like grandma used to make!

Grandma’s Coleslaw

Prep time:
Total time:
Serves: 8
Ingredients
  • 1 carrot peeled and cut into chunks
  • 1/4 of an onion
  • 1 stalk of celery cut in half
  • 1 head of cabbage cut in half {then into chunks for easier processing}
  • 3/4 cup mayonaise
  • 1/4 cup milk
  • 3 Tbsp white vinegar
  • 1/2 cup sugar
  • salt/pepper to taste
  • paprika for garnish
Instructions
  1. Process carrot, celery and onion together in a food processor and place in a large bowl.
  2. Process chunks of cabbage in 2 batches and add that to your carrot mixture.
  3. In a medium bowl whisk together mayo, milk vinegar, sugar, salt and pepper. Pour over cabbage mixture and stir well.
  4. Garnish with paprika.
Signature

“No-Bake” Peanut Butter Chocolate Chip Balls

Oh wow, wow, wow, wow. I am so excited to share this recipe with you!!!!

Recently, I was the recipient of a delicious {and very heart warming} meal ministry….the sender gave me a dessert labeled “Monster Cookies”{It was a secret recipe- bummer!}.

Well, I knew I couldn’t live a day without trying to figure out how to recreate these amazing little masterpieces of awesomeness. So, here is my best effort- boy, are these gooooooooood.

A sweet friend of mine came over {who will remain nameless -she made me promise}after I made these and had 3..or 4? Oh, who counted? I could have eaten the entire plate! haha!

Anyways- make these, they’re good…really, really good. I love them. Make them for me. 

* Naturally gluten-free. 

In a medium sized mixing bowl add your oats, 5 Tbsp of peanut butter {save 2 Tbsp}, vanilla and salt. Set aside. 

In a medium sauce pan bring brown sugar, milk, and butter to a simmer for about 3-4 mins- whisking so it doesn’t burn. 

Pour hot mixture over dry mixture and stir well. Then, add in the remaining 2 Tbsp of peanut butter. Stir well again. 

Place in the refrigerator for 1 hour until cooled and firm. 

Add 1 cup of chocolate chips, mix with hands and shape into balls. 

I can’t explain how good these are, you’re just going to have to try them yourself 😉


“No-Bake” Peanut Butter Chocolate Chip Balls

Prep time:
Cook time:
Total time:
Serves: 15-20
Ingredients
  • 4 1/2 cups old fashioned oats
  • 7 Tbsp of Peanut butter {divided 5 and 2}
  • 2 tsp vanilla
  • 1/2 tsp salt
  • 3 cups brown sugar
  • 3/4 cup milk
  • 1/2 cup butter
Instructions
  1. In a medium sized bowl add oats, 5 Tbsp peanut butter, salt and vanilla. Set aside.
  2. In a medium sauce pan bring to a simmer your brown sugar, milk and butter. Let simmer for 3-4 mins-whisk every 30 seconds so the bottom doesn’t burn.
  3. Add hot mixture to your oat mixture. Stir well. Add the remaining 2 Tbsp of peanut butter and stir well again.
  4. Place bowl in refrigerator for 1 hour to let cool and firm up.
  5. Add 1 cup of chocolate chips, mix with hands and roll into balls.
Signature

Featured Recipe @ WLW…Easy Guacamole


I’d have to say it’s up there with chocolate in my book…..I love guacamole THAT much 😉 Come join me over at my friend Courtney’s blog- Women Living Well, where she’s sharing this delicious recipe .

This is a great little lunch treat I make for myself often…

Signature

Gooey Cornflake Bars {Gluten-Free}

These cereal bars are not just delicious…they’re also SO simple to make {4 ingredients!} and naturally gluten-free! My entire family loves when I make these! You’ll make them over and over again, I know I sure do….

*Being on a gluten-free diet has had some challenges, these cereal bars have helped satisfy my sweet tooth!


In a large microwaveable bowl, melt honey and peanut butter together for appx 1 1/2 mins.  {you may melt in a saucepan on your stovetop}.

Add vanilla and stir all together.

Add cornflakes and coat well.

Butter an 11×7 {or 8×8} pan. With wet hands {run your hands under water} press cornflake mixture into pan. Cover and refrigerate for at least 2 hours.

These were “set” just in time for my son for an “after football practice” snack. Ohhhh, I love those moments when just he and I sit down and talk about his day…he’s growing up so quickly, but is still my little boy 🙂

Did I mention he’s also a ham for the camera? Hehe…..{he’s expressing his love for the bite of cereal bar he just took}. I’m so blessed to be his mom-I bet you can see how much laughter he gives me just in this photo.

I eat these on morning when I’m super rushed. Keep them refrigerated and they will stay in tact. MUCH better for you than a Nutri -grain Bar and naturally allergy friendly!  Enjoy!

Gooey Cornflake Bars {Gluten-Free}
Prep time: 5 mins
Cook time: 2 mins
Total time: 7 mins
Serves: 12-15
Ingredients
  • 6 cups cornflakes {you can use regular- I use gluten-free}
  • 1 cup peanut butter
  • 3/4 cup honey
  • 1 tsp vanilla
Instructions
  1. Melt peanut butter and honey in microwave for 1 1/2 mins.
  2. Add vanilla.
  3. Pour cornflakes into bowl and coat with mixture.
  4. Butter an 11×7 pan {you may also use 8×8}
  5. Wet hands with water and press firmly into pan.
  6. Cover and refrigerate at least 2 hour before cutting.
  7. Keep refrigerated.


Signature

Cucumber Salad

 
{Cucumber Salad shown with shrimp scampi and creamy parmesan rice; a gluten-free meal}

I make this simple Cucumber Salad as a side all the time. It’s easy, refreshing, delicious and my entire family loves it! This makes a great dish for picnics…multiply the recipe as needed! 


Peel an English Cucumber like so; Why? Because it’s pretty.


Slice in thin slices.


Slice a sweet Vidalia onion into thin slices.

Mix water, white vinegar and sugar together. 

Pour over cucumbers and onions and let marinate for at least 2 hours {you may make ahead of time in the morning}. 

Delicious!


Cucumber Salad
Prep time: 5 mins
Total time: 5 mins
Serves: 4
Ingredients
  • 1 English Cucumber
  • 1 Vidalia Onion
  • 3/4 cup water
  • 3/4 cup white vinegar
  • 3 Tbsp sugar
  • salt, pepper, and/or dill weed optional}
Instructions
  1. Peel cucumber leaving some decorative peel in tact.
  2. Thinly slice cucumber and onion.
  3. Whisk water, vinegar and sugar together and poor over cucumber and onion.
  4. Let marinate for at least 2 hours or make ahead of time in morning.
  5. Add seasonings to your liking.
Signature

Ladies Home Journal- Watergate Salad {Perfect for Easter!}

Watergate salad

{Watergate Salad aka Pistachio Delight} 


Ladies Home Journal March 2013

Hi Ladies! Just wanted to let you know that Comfy in the Kitchen’s Watergate Salad is being featured over at Ladies Home Journal! This is a perfect side dish for an Easter gathering! Just love those pastel marshmallows- such a pretty little dish, don’t you think? Oh…and its so easy to make {gotta love that}. 

While you’re there, make sure to check out all the rest of the amazing recipes they have listed under Reader Favorites: “Recipes from Across the U.S.” My personal favs? Frito Pie  , Gooey Butter Cake , and Ree Drummond’s Mac n Cheese.

What an honor to be among those fabulous cooks. Thanks for thinking of Comfy in the Kitchen, Ladies Home Journal Magazine! 

Make sure to “like” LHJMagazine on FB for updates!


Signature

Whole-Wheat Blueberry Scones w/ Vanilla Lemon Glaze {Easter Brunch Ideas! GF options if needed}

If you’re looking for recipes for Easter Brunch, you simply must add this one to your list. This recipe starts out similar to the base of my Cinnamon Chip Scones, but takes kicks it up a notch. The mix of whole-wheat and white flour give these scones a hearty yet “still moist” texture. Adding fresh blueberries and a lemon glaze …well, I can’t explain just how good it tastes {my dear friends who I made these for closed their eyes and “mmmmed” after their first bite, lol.}

For step-by-step picture directions visit my Cinnamon Chip Scone recipe, but make sure to note the differences below in the recipe.

To make the glaze: Combine Confectioner’s sugar, lemon juice, lemon zest, milk, vanilla. Whisk together. If you think it’s too thin, add more sugar. Too thick? Add more milk.

Wondering what lemon zest is? It’s the outside of the lemon {rind}. I simply use the small holes on my cheese grater to zest my lemon. This gives it a bit of a kick!

MMMmmmm….warm, rich, hearty and delicious! A “must make” for your Easter Brunch! 

For gluten-free use Silvana’s GF flour blend {cup per cup}. A SHOUT OUT to my sweet friend {and amazing baker} Danielle who made these GF and added candied ginger! Mmmm!!! Check out how good hers look! 

Photo: Janelle Nehrenz<br /><br />
Here they are! The dough was beautiful- baked even, didn't brown really, but I was expecting that. They're moist and tender- which are the two things (besides flavor) I care most about in a scone- that flours no one trick pony! You found a keeper! Thanks for sharing.<br /><br />
(I was going to say it was a tad salty- but then... I realized I didn't put any sugar in them- ! With the glaze, though it was perfect- I don't like scones to be as sweet a cookies anyway. And was shocked again at how tender they were without the sugar.)

What else to make for Easter Brunch???  

Easy Ham and Cheesy Quiche

{For gluten-free, make without a crust! Simply pour egg mixture in a buttered 9″ round pie pan}

Easy Fruit Salsa

Cheesy Potatoes

{for gluten-free sub 1/2 heavy cream and 1/2 chicken stock for cream of chicken soup. Sub cornflakes on top. Simply Potatoes are GF.}

Freshly Squeezed OJ

Whole-Wheat Blueberry Scones w/ Vanilla Lemon Glaze {Easter Brunch Ideas! GF options if needed}

Prep time:
Cook time:
Total time:
Serves: 8
Ingredients
  • 1 cup whole wheat flour
  • 1 cup white flour
  • 4 tsp baking powder
  • 1/4 tsp salt
  • 1/3 cup sugar
  • 4 T butter
  • 2 T shortening
  • 3/4 cup heavy cream
  • 1 egg
  • Handful of cinnamon chips
  • 1 cup fresh blueberries
  • Glaze: Juice from 1 lemon, 2 cups confectioners sugar, 1 tsp of lemon zest, 1 tsp vanilla, 1-2 T of milk {to desired constancy}.
Instructions
  1. Pre-heat oven to 375
  2. Sift together dry ingredients
  3. Cut in the butter and shortening
  4. In a separate bowl, beat eggs and heavy cream
  5. Add to dry ingredients
  6. Stir in cinnamon chips
  7. Fold in fresh blueberries with delicate hands
  8. With floured hands, shape dough into a ball and lay out onto a floured surface
  9. Flatten into a disk {not too thin, not too thick}
  10. Using a pizza cutter, cut in half, then in half again 2 more times diagonally.
  11. Place individual scones onto a baking sheet covered with foil {easy clean-up}
  12. Bake 375 for appx 18 mins until golden brown. Let cool on a wire rack.
  13. Drizzle glaze on slightly cooled but still warm scones.
  14. To make glaze: Zest lemon, then squeeze juice into a bowl, add Confectioner’s sugar, vanilla, and milk to desired constancy.


Signature

Easter Egg Recipes!


{Easter Egg Toast- My hubby’s absolute favorite breakfast from childhood}

Hi Ladies! Come join me over at Women Living Well where Courtney and I are whipping up some “Eggcelent” recipes to help use up those Easter Eggs!

Don’t even think about throwing them out!!!! Enjoy! 

Signature

No God, No Change. Know God, Know Change.


{Photo Credit}

“Therefore if any man is in Christ, he is a new creature. The old things passed away; behold new things have come.” ~ 2 Corinthians 5:17

It’s The Truth.

The Lord meets us, greets us and even loves us right where we’re at. In the depths of our sins, he knows where we are and offers His rescuing over and over again. We either accept His great mercy and clothe ourselves in Him… or turn away and remain where we are-hopeless, helpless and feasting on an artificial love for the world.

Throughout our lives, He knocks on our doors over and over again…

Do you remember some of the times He’s knocked?

I bet you do.

I know I do.

He loves you no less than He loves me, and He’s knocked on my door plenty.

Who would turn away this offer? Why would someone say no to Him?

Most….and because…

With Him, comes sacrifice. Indeed, Jesus freely gave his life for us on the cross…No “good works” could ever come close to pay for what he did for us. But, there is still a trade-off.

It’s our junk.

Oh, how embarrassing to have to hand over junk to a Holy God who is perfect in every way. Couldn’t there be a way to hide the junk? Maybe stick it over there in the corner or under the rug? What about making it look prettier so it doesn’t seem so bad?

Nope.

” He cuts off every branch in me that bears no fruit, while every branch that does bear fruit he prunes so that it will be even more fruitful.” ~John 15:2

No God. No change…Know God. Know change.

Nothing this world has to offer compares to the freedom God gives us when we are obedient to Him. Don’t think you can do it?

“Jesus looked at them and said ‘With man this is impossible, with God all things are possible.'” ~Matthew 19:26

What would it feel like to be free? Can you even imagine? Yeah…it may hurt at first, but in the end? Obedience is freedom. 

I’m speaking to both believers and non-believers when I’m writing this…and don’t you think for one minute that because you are a believer there isn’t more junk to hand over or more branches to prune. My hand is RAISED and these thoughts are being typed out more for my use than yours. 

But, dear friends know this….

The bible wasn’t written to condemn us…it was written to save us.

Don’t know what your “junk” is? Ask Him…

And guess what? Junk is junk. Here on Earth we tend to “rate” sin, but God doesn’t. It is what it is and no one person has “better junk” than the other…it all stinks.

So I pray this for you and for me again…

No God…no change. Know God…Know change.

Love you all so much, Janelle

Signature

Homemade Veggie Soup

This is my grandma’s delicious recipe for hearty vegetable soup. The only difference is that I simmer mine in the crockpot and she made her’s on the stove. I make this soup on Sundays and keep it in my refrigerator for a gluten-free lunch throughout the week! Mmmm….enjoy!

Crockpot cooking is so simple and convenient! By the end of the day you’ll have a delicious, simmering and homemade vegetable soup!


Homemade Veggie Soup
Prep time: 5 mins
Cook time: 6 hours
Total time: 6 hours 5 mins
Serves: 12
Ingredients
  • 32 oz box of chicken broth
  • 1 small jar of tomato puree
  • 1 14 1/2 oz Stewed Tomatoes
  • 1/2 head of cabbage cut into small pieces
  • 2 cups frozen veggies {carrots, edamame, peas, green beans}
  • 1 small onion chopped
  • 3 stalks celery chopped
  • 1 zucchini
  • 1/2 stalk of cauliflower
Instructions
  1. Put all ingredients into a crockpot and simmer on low for 6-8 hours.
Signature

How Dining Room Colors Make Us Feel…

You might not have ever given thought to this…but, did you know that the color of your dining room set’s a stage for how people will feel in it? Many of us choose paint colors and accents that appeal to us, never thinking of the mood they will set in our home! Here are some examples of dining room colors and the psychology behind them….very interesting.

* Information about colors was gathered from Fresh Home.

RED

{Photo Credit}

The color red raises a room’s energy level, draws people together and stimulates conversation. Red has been shown to raise blood pressure and the heart rate. Red also is known to *increase our eating habits and promote hunger {which is why many restaurants paint their dining rooms red!}. 

YELLOW

Pastel Color Scheme 

{Photo Credit}

The color yellow {when used in moderation} is uplifting, welcoming and cheery. But be careful…too much yellow has been shown to do the opposite effect! Studies show that babies cry more and people are more likely to loose their temper in a yellow room.

BLUE

blue by PIWOW1 

{Photo Credit}

The color blue is relaxing, calming and serene…it brings down blood pressure and the heart rate. However, dark blue does the opposite effect giving a feeling of sadness. Stay with lighter shades to bring out the best mood in your guests! Blue may result in slower eating and give fewer feelings of fullness. 

GREEN 


{My dining room!} 

Green in the most restful color for the eye, encourages unwinding, promotes comfort and togetherness. I had no idea when I was choosing paint colors that green had this effect…but it sure is good to know.

PURPLE 

Purple dining room.  Would be very pretty with only the one wall dark purple and the rest a kind a pale silvery grey or palest shade in the dark's family.

{Photo Credit}

The shade of purple above is rich, dramatic and sophisticated ….it sends off a restful message.

ORANGE

dining room  

{Photo Credit}

Orange brings out excitement and enthusiasm! This color also may stimulate appetites making over-eating more likely. This is similar to the color I first had in my dining room.

What color is your dining room???


Signature

Bless Them Best {TTAM}

Take Them A Meal Blog

I’ve become very empathetic to other’s needs over the years that I’ve served in meal ministry . I didn’t always have this empathy-it’s definately been a learned experience. Even through bringing a meal to someone in need is a blessing…. there are ways we can “bless them best”. For example,  nursing moms, mourning families, those with food allergies, etc…all have different needs. How can we, as servants, tune into what would be of most help to our neighbors? 

Please take a moment to visit me over at my favorite meal ministry blog, Take Them a Meal, where I am sharing ideas on how to “Bless them best”. I hope this helps you to help others! Keep serving, my friends! 

Love to you, Janelle

Signature

How to make homemade Frappuccinos

Hi Ladies!

This weekend we were all smiles in Ohio….there was a heat wave! Yep, you heard it..the sun made an appearance and it went up to {a whopping} 60 degrees! My neighbors were walking their dogs, we had our windows open for fresh air, friends posted pictures of their families at the park. It’s been a long winter, haha.

One Facebook update that made me smile was from my sweet friend Megan who works at Starbucks. She quoted “I just can’t make any more Frappuccinos. I just can’t.” Bless her heart- with the beautiful weather came thirsty customers in the mood for an ice cold Summery treat.

I remember my dear friend Courtney, from Women Living Well having posted a “copy cat” recipe for this delightful drink. What a timely treat for the turning of the season! YUMMMmmmm!!!!

* I have known people to be very judgmental towards certain establishments. Thank you so much for choosing to fault on the side of righteousness and sharing God’s love rather than judging. Loving is the greatest power we have through Jesus Christ- Matt 22:36-40.

Courtney shares:

This is my FAVORITE Starbucks drink! There can be 10 inches of snow on the ground and I still crave this icy drink! But we all know that these little Starbucks drinks are $4 a pop! So I was DELIGHTED to find that my oldest sister, Kristen, has discovered how to make these at home – bless her heart! This is what older sisters are for right? lol!


Last week, while the kids swam at her house – she whipped one up (actually two and she offered me thirds but who’s counting right?) and it was delicious!!! Here’s the recipe:

Starbucks Mocha Frappuccino

3/4 cup double-strength coffee

3 tablespoons granulated sugar

1 cup low-fat milk

2 cups ice

3 Tbls. Hershey’s Chocolate

Optional:

3 Tbs whipped cream

Trade chocolate syrup for caramel copping to make a Caramel Frappuccino

Directions:

Make double-strength coffee by brewing with twice the coffee required by your coffee maker (that should be 2 tablespoons of ground coffee per each cup of coffee). Chill before using.

Then combine all the ingredients in a blender and blend on high speed until ice is crushed and drink is smooth. Pour into two 16-ounce glasses, and serve with a straw.

MOCHA Version:

For this version, add 3 tablespoons Hershey’s chocolate syrup to the original recipe and prepare as described. Top each glass with whipped cream, if desired.

CARAMEL Version:

For this version, add 3 tablespoons of caramel topping to the original recipe and prepare as described. Top each glass with whipped cream and drizzle additional caramel over the whipped cream.

If you have one of these going in the blender you must invite me over – cause there’s enough for two you know? Enjoy!

Thank you Courtney!!!! 


How to make homemade Frappuccinos

Prep time:
Total time:
Serves: 1-2
Ingredients
  • 3/4 cup double-strength coffee
  • 3 tablespoons granulated sugar
  • 1 cup low-fat milk
  • 2 cups ice
  • 3 Tbls. Hershey’s Chocolate
  • Optional:
  • 3 Tbs whipped cream
  • *Caramel topping for caramel version
Instructions
  1. Make double-strength coffee by brewing with twice the coffee required by your coffee maker(that should be 2 tablespoons of ground coffee per each cup of coffee). Chill before using.
  2. Then combine all the ingredients in a blender and blend on high speed until ice is crushed and drink is smooth.
  3. Pour into two 16-ounce glasses, and serve with a straw.
  4. For Caramel version add 3 tablespoons of caramel topping to the original recipe and prepare as described.
  5. Top each glass with whipped cream and drizzle additional caramel over the whipped cream
Signature

Gettin “Comfy” with the Waffle Iron!!!


Waffle iron’s are just for making waffles anymore, Ladies!!! Here are some delicious recipes shared by my beloved fellow food bloggers. What great ideas they have! You must check these out….who would have thunk?

Cinnamon Roll Waffles with Cream Cheese Glaze

 Mmmm…These Cinnamon Roll Waffle’s with Cream Cheese are SO EASY to make! Simply place a Pillsbury Grand Cinnamon Roll  in each square of the waffle iron, shut and let bake! Don’t forget to pour on the frosting…ahhh!

Love this idea for Waffle Hashbrowns with cheese from “My Favorite Things“! Again…so simple, so clever.


Amy from Amy’s Cooking Adventures has got the right idea…”Waffle Iron Eggs n Biscuits“- The egg is IN the waffle! I can totally see my kidos running out the door for school with one of these in their hands- Genius! A meal in itself! 

Cinnamon Waffle Iron Cookies - might try with my new waffle maker!

For a yummy change, swap those regular oven- baked cookies out for these delicious Cinnamon Waffle Cookies! What a great conversation piece over coffee with the Ladies…These look awesome, Jen

Laura, from Come Together Kids has such a fun idea here…Ice Cream Sandwiches made with cake mix and ice-cream! I honestly want to take a bite through this computer screen!


Have you been getting “Comfy” with your waffle iron? If so, what are some things you’ve been cooking/baking up?! Would love to see more recipes!   

Signature

Featured Post on WWL- The Perfect Chocolate Chip Cookie!

Who doesn’t love a good ole fashioned chocolate chip cookie warm out of the oven??? Mmmmm….I can’t name a single soul 🙂

Years ago, I was on a mission to find “The Perfect Chocolate Chip Cookie” recipe …after many mediocre tries….this one one the prize!

Please join me over at Women Living Well, where my friend Courtney and her sweet little one’s are whipping up a delicious batch- they look SO good!!!!

***Need a Gluten-Free alternative?? Make as directed but use Silvana’s Flour Blend cup per cup- They will turn out beautifully!

Signature

Rainbow Rice Krispies


We sure are a rainbow lovin family. So, of course, when I saw Rainbow Rice Krispies on Pinterest- I just HAD to make them for the kidos!

Ladies, SAVE this recipe for St.Patty’s Day in a couple of weeks for a fun {gluten-free} and festive treat!

*Make sure to check out more festive ways to make Rice Krispies HERE!  

Melt butter and marshmallows -add food coloring.

Take off heat and add Rice Krispie cereal {I use GF}. Spread this color in a glass 9×13 buttered pan.

Repeat this process with all the colors of the rainbow!

Keep on layering! I actually just wet my {clean} hands with water and spread…so easy that way.

Hey you! 😉

The top layer is not colored, but I did add some rainbow sprinkles for a “preview” of all the fun to come when you cut in! Warning: this dessert attracts children {he,he}

How adorable are these!? Ohhhh….I don’t know what child wouldn’t smile 🙂

Off to school!

Rainbow Rice Krispies

Prep time:
Cook time:
Total time:
Serves: 24-36
Ingredients
  • 10 cups marshmallows
  • 3/4 cup butter
  • 10 cups Rice Krispies
  • Food coloring {I used coloring gel}
Instructions
  1. Butter a 9×13 pan.
  2. Melt 1 1/2 Tbsp of butter in a medium sauce pan on med-high heat.
  3. Add 1 1/2 cups marshmallows -stir until melted.
  4. Add food coloring {the first one will be purple}.
  5. Take off burner and stir in 1 1/2 cups Rice Krispies.
  6. Pour mixture into 9×13 pan. Wet hands with water and spread evenly.
  7. Repeat this step with all the colors of the rainbow with a top layer of no coloring. This will be as follows:Purple, blue, green, yellow, orange, red, no color.
  8. Add rainbow sprinkles.
  9. Cover and let cool before cutting.
Notes

These are very THICK! Cut them as desired! Enjoy!


Signature

Easy Italian Sausage Planks

Oooo…this recipe is a keeper! It’s simple, gluten-free and delicious. I’ll be making this on a monthly basis for sure!!! Love when I find new recipes that work out so well! Wohoo! 

The first time I saw this recipe was on Skinny Taste-I altered the recipe a bit to fit the ingredients I had on hand and to keep it simple, but if you’re interested in a lower-fat version, definitely check out the original recipe!

Slice 3 zucchini’s lengthwise. Take a spoon and scrape out seeds like so..

Blanch zucchini in hot water for 2 mins. 

Start shredding your mozzarella! I have an excellent assistant, if I do say so myself. 

Brown and drain 1 package of Bob Evans Italian Sausage. 

***** If you don’t think your children will like the Zucchini I recommend boiling some noodles and making spaghetti with sauce/cheese**** It’s a small extra step, but worth it. 

Pour 1/2 cup of marinara on the bottom of a 9×13 pan. Fill zucchini planks with Italian sausage, pour marinara sauce over top, sprinkle with mozzarella and parmesan cheeses and top with garlic powder and oregano. Bake covered in a 375 oven for 35 mins until bubbly.

*You don’t have to make your own marinara -I recommend Newman’s Own Marinara if you’re looking for a good jarred sauce!  

Who could resist? Delicious!


Easy Italian Sausage Planks

Prep time:
Cook time:
Total time:
Serves: 4-6
Ingredients
  • 3 large zucchinis
  • 1 lb Bob Evan’s Italian Sausage
  • 2 cups Marinara Sauce
  • 2 cups Mozzarella Cheese
  • 1/2 cup Parmesan Cheese
  • 1 tsp Garlic Powder
  • 1/2 tsp Oregano
Instructions
  1. Preheat oven to 375.
  2. Boil water in a large pot.
  3. Slice zucchini’s and scoop out seeds.
  4. Blanch zucchini’s for 2 mins in boiling water.
  5. Pour 1/2 cup of marinara on the bottom of a 9×13 pan and set zucchini on top.
  6. Brown and drain Italian sausage.
  7. Fill zucchini’s with Italian sausage, top with remaining marinara sauce, mozzarella, parmesan, garlic powder and oregano.
  8. Cover with foil and bake for 35 mins or until bubbly.
Signature

Easy Guacamole {for 1~or 2 if you’re nice}

3 questions-4

It’s up there with chocolate on my list….seriously. I love guacamole! In fact, my entire family loves guacamole! ha! I’m very proud of that fact, being that my little ones are tight lipped when it comes to eating their veggies {I know, I know- it’s a “fruit”}. Nevertheless….this recipe is for 1. Why? Because 1 avocado is the perfect size for a portion of this deliciousness- you can multiply the recipe as you wish. I make this often for myself for lunch …I eat it in a salad or with corn tortilla chips for a gluten-free meal!

Listen Ladies, if you don’t have all of the ingredients on hand- NO worries, be “comfy” about it- as long as you have a ripe avocado, salt, pepper, and garlic powder you are good to go. I’ve “made do” many of times!

Start with a ripe avocado- you’ll want to look for dark skin and when pressed it will feel tender on the inside. If your avocado isn’t ripe-its going to be tough-figuratively and literally. Add diced onion, diced tomato, garlic powder, sea salt, cracked black pepper, lime juice and some cilantro. I don’t typically measure, but for story telling purposes I will 🙂

Mash with a fork- nothing fancy about it.

Here you have it! Wasn’t that easy?! There are SO many health benefits to eating avocado and to top it off..it’s delicious! Serve with corn tortilla chips or serve with lettuce and some homemade salsa for a tasty lunch!

Easy Guacamole {for 1~or 2 if you’re nice}

Prep time:
Total time:
Serves: 1
Ingredients
  • 1 ripe avocado
  • 1/2 tsp of lime juice
  • 1 Tbsp diced onion
  • 1 Tbsp diced ripened tomato {I like Romas}
  • 1 Tbsp fresh cilantro
  • 1/2 tsp garlic powder {you may use 1 garlic clove if desired!}
  • salt/pepper as desired {you can add more if needed}
Instructions
  1. Mash all ingredients together with a fork!


Signature

Greek Chicken Gyro on Rice with Homemade Tzatziki

This is my husband’s and my newest favorite dinner….It’s healthy, gluten-free, and tastes {almost} just like a gyro!!! The homemade Tzatziki sauce, made with greek yogurt, makes this delicious dish.  Mmmmm…..lovin this.  How to make the sauce: Scrape the seeds out of 2 English cucumbers. Add dill weed, the juice of one lemon, sea salt, and fresh ground pepper. 

Press in your garlic…

Process well..

Pour cucumber mixture in a bowl and add Greek yogurt.

Stir well and refrigerate.

Chop veggies, saute chicken, and prepare brown rice according to package directions.

Add rice into individual dinner bowls, top with chicken, veggies, and sauce. Mmmmm…SO good!

Greek Chicken Gyro on Rice with Homemade Tzatziki

Prep time:
Cook time:
Total time:
Serves: 6
Ingredients
  • 3 cups Greek Yogurt
  • 1 lemon {juiced}
  • 2 pressed garlic cloves
  • 1 Tbsp dillweed
  • 2 English cucumbers {peeled and seeds scooped out}
  • salt and pepper {to taste}
  • 6 chicken breasts
  • 2 cups Greek dressing {for marinating chicken}
  • Brown rice made according to package directions {for 6}
  • Chopped veggies: I used tomatoes, scallions, onions, and cucumbers
Instructions
  1. For sauce: Peel cucumbers and scoop seeds out. Slice and place in processor.
  2. Add lemon juice, garlic, lemon juice, dillweed and salt and pepper to taste.
  3. Process well.
  4. Empty cucumber mixture into a bowl and add Greek yogurt. Stir well. Refrigerate.
  5. Take sliced marinated chicken out of refrigerator {this should have been marinating for at least 2 hours} and sauté in a wok or skillet. Season with salt and pepper.
  6. Make brown rice according to package directions.
  7. Chop veggies.
  8. In dinner bowls add rice, chicken, veggies and top with sauce. Mmmmmm
Signature

Featured Recipe- Wedding Soup

The ultimate comfort food on a cold winter’s day….a bowl of piping hot and hearty Wedding Soup. I’ve made this countless times for my family and for others. Come visit me over at Women Living Well where my friend Courtney and I are whipping up a batch together!

Signature

EASY Muddy Buddies {Puppy Chow}

I would say that this is such a delicious {gluten-free} treat for the kidos…but I’d be fibbing. There were just as many grown-up hands in this bowl of “Muddy Buddies” as were little one’s last night.

Who can resist the marriage of chocolate and peanut butter? I know I can’t…what a treat for a gal who has to pass on pizza at a party!

*This recipe is one of my children’s favorites!!!! WARNING: Contents in this bowl are extremely addictive.

Your ingredients: Rice Chex cereal, peanut butter, semi-sweet chocolate chips, vanilla and powdered sugar.

Place your chocolate, peanut butter and butter in a medium microwaveable bowl. Microwave for 1 min, stir and microwave another 30 seconds.

Add vanilla and stir. My kidos fought over this bowl to lick, lol. 

Place your Chex in a large bowl and pour chocolate mixture over top – stir to coat the cereal.

{In 3 batches} add your cereal and 1 cup of powdered sugar in a large Ziploc. Seal and shake until cereal is coated with the powdered sugar. Empty in a bowl and repeat 2 more times. 

Mmmm….these are seriously good. Seriously.  

EASY Muddy Buddies {Puppy Chow}

Prep time:
Cook time:
Total time:
Serves: 10
Ingredients
  • 1 {12.8 oz} Box of Rice Chex
  • 1 {12 oz} Bag Nestle Semi-Sweet Morsels
  • 6 Tbsp Butter
  • 3/4 Cup Peanut Butter
  • 2 tsp Vanilla
  • 3 cups Powdered Sugar
Instructions
  1. Melt chocolate, butter and peanut butter in a medium microwave safe bowl for 1 min. Stir. Microwave another 30 seconds. Stir.
  2. Add vanilla, stir.
  3. Pour cereal into a large bowl and pour chocolate mixture over top. Stir to coat.
  4. Take 1/3 of your coated cereal and place it in a large Ziploc bag. Add 1 cup powdered sugar, seal and shake. Empty in a bowl.
  5. Do this step 2 more times.


Signature

90 Meals Under $1.25 Per Serving!


Hi Ladies!
This was a nice surprise post! I was just contacted by Ebay Deals that Comfy in the Kitchen’s Crockpot Oatmeal was included in their FREE E-book: 90 Meals Under $1.25! I took some time to look over these recipes and am so impressed by the “comfy” and “economical” cooks we have here in cyber world! Wohoo!! This book will certainly be a blessing to many. I hope you’ll enjoy it -I know I will! Thanks Ebay! 

Here are some great tips provided by ebay deals on how to cook on a tight budget: 

Cooking on a tight budget starts with an understanding of which ingredients are most economical as well as how to get the most savings on higher-priced items. Check out these quick tips for significant grocery savings:

  • Prepare meals around which items are on sale that week at your grocery store. Stock up on meat when prices are low and freeze it for later.
  • Buy seasonal produce. Summer vegetables can cost you several times more in the winter, and they don’t taste nearly as good.
  • Don’t let anything go to waste. Soups are both economical and a smart way to use up leftover vegetables and meat scraps.
  • Avoid items marked up for convenience, like pre-cut vegetables, individually packaged meats, and bottled salad dressings.
  • Shop in the bulk bins. You’re not paying for packaging, and dried beans cost significantly less than canned.

In this book, there are enough meals to feed you breakfast, lunch and dinner for a month, all at around $1.00 per serving or less.

You can follow ebay deals on FB if you’re interested in getting their deal updates!  

via eBay Deals

*** Fellow bloggers- here is the code to share with your readers!***

Signature

WWW Wednesday- Love Bugs <3


Hi Ladies! Just wanted to let you know I’m going to be guest posting at Women Living Well each Wednesday now…

Today, Courtney is sharing our friend Katina’s ADORABLE little Love Bugs– You’ll be so surprised at how easy these little guys are to make! They’re sure to give many smiles this Valentine’s Day!

Signature

I have GREAT news!!!! Take Them a Meal Blog….


Take Them A Meal Blog


Hi Everyone! I have such great news….I’m officially a contributor to the blog…Take Them a Meal. For those of you who don’t know about this blog/website…it’s my heart and absolute favorite meal ministry website. I’m humbled beyond belief to serve for a website that I’ve used as a tool so many times for my meal ministries. God is so good. Please be praying for me to encourage others who have this same passion who I meet over there. These willing souls are the hands and feet of Jesus. 

What is Take Them a Meal {dot} com? It’s a website designed to gather a community of people to sign up for meals for a certain individual/family in need of this kind of help. This need could be because of a surgery, death, birth of a baby, etc. Whatever the case…it is such a blessing for this individual or family. You may not be able to help take away their trial, but you can make a meal.

I love this site because it’s so easy to set up, send to people via e-mail and it has all of the recipients information right on the page. There are even reminder e-mails that get sent to those people who signed up to make and take a meal!

There’s more…

This site offers delicious recipe ideas, prepared meals you can purchase and send, and many inspiring stories of how meal ministry blesses so many people.

Today, I’m sharing my favorite meal ministry story yet. I can’t tell you how honored I was to make a meal for this sweet family who’s 6 year old son is fighting a brave fight with Leukemia.

Please come visit me over at Take Them a Meal to hear all about it…Jonny’s mom is one of the most beautiful women I’ve ever met, inside and out…by her letter, you’ll see what I feel this way. She truly is anchored in Christ. After you read her letter, would you please pray for this family? I know you will…you are my team and I just love you for that. 


Tonight we're all looking forward to a special meal from a friend

Take them a Meal is on FB– Make sure to like them for updates!

Signature

Give me your eyes….your heart….your arms…


{photo credit}

“For I was hungry and you gave me something to eat, I was thirsty and you gave me something to drink, I was a stranger and you invited me in, I needed clothes and you clothed me, I was sick and you looked after me, I was in prison and you came to visit me.’

“Then the righteous will answer him, ‘Lord, when did we see you hungry and feed you, or thirsty and give you something to drink?  When did we see you a stranger and invite you in, or needing clothes and clothe you?  When did we see you sick or in prison and go to visit you?’

“The King will reply, ‘Truly I tell you, whatever you did for one of the least of these brothers and sisters of mine, you did for me.”

~Matthew 25:35-40


It isn’t our job to save people…but it is our responsibility to love people. Without judgement {Matthew 7:1}.

My dear friend and mentor told me recently, “Janelle, love is messy…look at all the examples in the bible!”

And so I did.

  • Jesus died on the cross for all of mankind {Matthew 27:45-56}
  • Jesus sought Zacchaeus {Luke 19:1-10}
  • Jesus talked with the Samaritan woman at the well {John 4:1-29}
  • Jesus ate with tax collectors {Matthew 9:10}
  • Jesus’s grace with Mary Magdalene, a woman-sinner-and faithful servant of Christ, who washed his feet with her hair. {Luke 8:1-3}

 When I think about all of these examples Jesus lived out, I can’t help but beg to see what he sees.

Am I missing anyone, Lord?

Is there someone who needs a smile, hug, or encouragement today? How about a meal?

Anyone….anyone. It doesn’t matter who.

I can handle the messiest situations and love anyone….with your grace. 

He bestowed his grace, love, and protection on me….someone showed me that same love. I was lost too. Someone took the time from her circle of friends to include me. I can’t imagine how different my life would have been had she not?

That’s the neat thing about my life….that I got to experience the difference. I will never forget that and will use it as my second greatest strength next to Yours. 

Ladies, I ask that you dig deep into the words of the song below and to pray to be the eyes, heart and arms of Jesus…remembering that the King will say “whatever you did for the least of these brothers and sisters of mine you did for me.”  


Give Me Your Eyes

By: Brandon Heath

Looked down from a broken sky
Traced out by the city lights
My world from a mile high
Best seat in the house tonight
Touched down on the cold black tar
Hold on for the sudden stop
Breathe in the familiar shock
Of confusion
And chaos

All those people goin’ somewhere
Why have I never cared?

Give me Your eyes for just one second
Give me Your eyes so I can see
Everything that I keep missing
Give me Your love for humanity
Give me Your arms for the broken-hearted
The ones that are far beyond my reach
Give me Your heart for the ones forgotten
Give me Your eyes so I can see
Yeah
Yeah
Yeah
Yeah

Step out on a busy street
See a girl and our eyes meet
Does her best to smile at me
To hide what’s underneath
There’s a man just to her right
Black suit and a bright red tie
Too ashamed to tell his wife
He’s out of work, he’s buyin’ time

All those people goin’ somewhere
Why have I never cared?

Give me Your eyes for just one second
Give me Your eyes so I can see
Everything that I keep missing
Give me Your love for humanity
Give me Your arms for the broken-hearted
The ones that are far beyond my reach
Give me Your heart for the ones forgotten
Give me Your eyes so I can see
Yeah
Yeah
Yeah
Yeah

I’ve been there a million times
A couple of million eyes
Just move and pass me by
I swear I never thought that I was wrong
Well I want a second glance
So give me a second chance
To see the way You’ve seen the people all along

Give me Your eyes for just one second
Give me Your eyes so I can see
Everything that I keep missing
Give me Your love for humanity
Give me Your arms for the broken-hearted
The ones that are far beyond my reach
Give me Your heart for the ones forgotten
Give me Your eyes so I can see

Give me Your Eyes (Give me Your eyes for just one second)
Lord, give me Your eyes (Give me Your eyes so I can see)
Everything (Everything that I keep missing)
That I keep missing
Give me Your heart (Give me Your arms for the broken-hearted)
For the broken hearted (The ones that are far beyond my reach)
Give me Your heart (Give me Your heart for the ones forgotten)
Lord, give me Your eyes (Give me Your eyes so I can see)
Yeah
Yeah
Yeah
Yeah


Who will you uniquely love today? Be crazy about it….

Signature

What Women Living Well is cooking up today…..Mmmm

My friend, Courtney, from Women Living Well has “Comfy’s” Creamy Bacon Chicken simmering in her crockpot today….yes, I said “bacon”{lol}. You won’t want to pass on this delicious and easy recipe!

Signature

Healthy Almond Joy Bites

So- I’ve never done this but I have REVISED an already existing Comfy recipe! Why?? Because I’ve made this recipe a million times and feel like I’ve mastered it by tweaking it just a bit {and listening to your-yes your!! suggestions! } See how iron sharpens iron Gals? I can’t keep THAT a secret! lol!

So here we go again…

Mmmmm…..these are good.

I was browsing Pinterest the other day and spotted these….a sort of “Lara Bar” copy cat recipe.

By the taste of them, one would never guess these are allergy friendly and healthy! The pitted dates add a decadence that fools your mind into thinking there’s a ton of butter in these little guys!  But, there’s not….hot dog!!!!  Enjoy!

In a food processor, add your dates {you may slice them in half if your processor doesn’t have enough umph}, vanilla, salt, cocoa power,1/2 of your coconut, nuts and warm water . Process well until a soft ball forms.

Take a small amount, oh about 2 tsps full and insert an almond. Make a ball around the almond.

Shape into balls like so.

Then, roll in extra coconut.

Now, you have the taste and texture of a true Almond Joy….without the guilt.

These are awesome!!!!! Yuuuuuuuum.

Healthy Almond Joy Bites

Prep time:
Total time:
Serves: 12
Ingredients
  • 3/4 cup pitted dates {you may want to cut in half for easier processing}
  • 1 tsp vanilla
  • pinch salt
  • 2 Tbsp cocoa powder
  • 1/2 cup almonds {and 12 more to insert into center}
  • 3/4 cup coconut {use 1/2 cup inside of mixture and 1/4 cup to roll}
  • 2 Tbsp warm water
Instructions
  1. Add dates, vanilla, salt, cocoa powder, almonds, 1/2 cup coconut and water in a food processer. Process well until ball forms.
  2. Roll into small balls and insert and almond inside .
  3. Roll in remaning coconut.
  4. Refrigerate.


Signature

Super Bowl Appetizers!

It’s that time again!!!! As millions around the world are getting excited to watch the 2013 Super Bowl this Sunday, us Ladies are chicken scratching a list of groceries to get. If planning a spread isn’t your thing…no worries. I gotcha covered.

Every guy wants Wings….if this is the only thing you have, all will be well with his world. 

And ya gotta have Nachos…. Loaded Nachos, that is. 

No man I’ve ever known has ever turned down Sweet and Sour Lil Smokies {If you’re lucky- you’ll find these on sale at the grocery store!}. Stick them in the crockpot and you have 1 appetizer…done!

You can also do the same thing with frozen meatballs!  

You never know if one of your guests is on a diet ….so make a Tidbit Tray just in case. Either way….everything on this tray will be gone before the game’s over.

Or you could incorporate a tidbit tray into a salad buffet {this is great for the Ladies! I know I always appreciate a salad!}


Easy Spinach Dip is a hit with everyone. Serve with cubed bread and veggies.

Bacon Wrapped Jalapeños are aaaaaaamazing {and easy to make!}

So….which brother is going to win? That’s one proud Mom and Dad either way! Have fun everyone!!!

Signature

Prepping for Dinner in the Morning!

Would you like to know the trick to making “rush hour” {the hour of 4pm-5pm-I know you Ladies know what I’m talking about!} a TON easier?! Prep your dinner in the morning- just after breakfast!

This not only helps carve off 20-30 mins , it also helps with clean-up! You’re already cleaning up after breakfast, so what’s a few more dishes??? Trust me…it’s worth it. 

This was my prep-work this morning just to give you an example…. We’re having “Fajita night“!

I washed and sliced green and red peppers and onions.

Sliced half-thawed chicken breasts and cut off fat {it’s way easier to slice half-thawed meat, btw}.

Placed everything in bags that I had on hand and added Italian dressing to everything.

Set it all in the fridge to marinate.

Bad-a-bing- prep work is complete!

Now, when I go to make dinner tonight, I’ll empty the contents of these bags into my wok and stir fry!

Serve this meal with warm tortillas {I use corn or none at all for a GF meal}, and whatever fixings you like….cheese, salsa, guacamole, lettuce, etc!

Now, what to do with you two….hehe.


Signature

A Gluten-Free {but full of love} Valentine’s Day! @The Better Mom…

Hi Ladies! Come join me over at The Better Mom where I’m sharing some great ideas for a Gluten-Free Valentine’s day!  You won’t want to miss out…See you there!

TheBetterMom.com

Signature

Gettin Comfy in the Kitchen for New Wives!


{photo credit}

Hi Ladies! 

So, last week I asked the question on Facebook:

“Do I have any new wives on here??? If so….Girls, what is your biggest challenge right now with cooking?” 

Some common answers were:

1. Making meals on a budget.

2. Making meals that are healthy and yummy.

3. Making quick and easy meals.

4. Portions…not many recipes are made for 2! 

5. Staying motivated.

I think I can help…..let’s go through this step by step together.

1. Making meals on a budget

  • Use those coupons! Websites I recommend are Money Saving Mom,  Coupon Mom, and Smart Source. If you get the Sunday paper-save those coupons and clip away {only clip items you would typically purchase though! Don’t let them reel you in}.  
  • Remember Wal-Mart offers an “ad-match guarantee”– this could save you some running around if you live near a Super Wal-mart! 
  • Buy your meats at a butcher {or even straight from the farmer} in a bundle and freeze.  You can purchase half a hog, cow, etc. You can also find good deals at butchers for a mix of popular meat selections {for example: burgers, chops, chicken breasts, etc}. 
  • If possible buy fresh produce at Farmer’s markets! 
  • Shop for certain items that you know are less expensive at certain stores. At Marc’s, dry foods, detergents, and toiletries are good deals here. Dairy? Not so much. You’ll get good at knowing what prices are reasonable and what aren’t.  
  • Trader Joe’s, Aldi’s and Ollie’s have good deals.
  • Some generic food brands are less expensive than brand names with coupons. I really like Food Club! 
  • Make recipes that aren’t as pricey- Well, duh Janelle! LOL! Honestly though….Scallops are more expensive than Chicken. Ground Beef is cheaper than Steak. Chilli is less expensive than Clam Chowder. Make wise choices. This requires planning.

2. Making Meals that are Yummy and Healthy:

  • Some yummy/healthy meals I enjoy are HERE
  • I also contribute healthy recipes to Roomag.
  • For healthy on the go…I recommend making homemade grab bags!

3. Making Quick and Easy Meals:

  • Most meals on Comfy in the Kitchen are quick and easy. However, you must plan your meals ahead of time. In the morning- dice veggies, shred cheese, and thaw meats. When the times comes to make your meal, you’ll be happy you prepped. 
  • I’ve been known to make dinner during my children’s nap times and warm it up later ! You  do what you have to do when 5 o’ clock is busy and everyone’s hungry. Keep your sanity. It’s really ok. 
  • Rotisserie chicken is awesome. You can use it in soups, enchiladas, and yes….even the famous Crescent Chicken.  
  • Crockpot recipes come in handy on days you won’t be home. It’s great when the smell of dinner greets you at the door. 

4. Portions….not too many recipes are made for 2!  

  • Very true! Make your recipe as directions say. But before you bake it, set aside half in a container and freeze it! This would not be considered “left overs” for those of you who snub your nose at the word {lol}. Date it and put baking directions on the container. You’ll have yourself a quick meal later on in the month!  
  •  Most recipes can be halved. Here’s a good Recipe Calculator to help you!

5. Staying Motivated:

  • Read my “Burnt Happens” post and laugh with me.
  • Know that you will get better as time progresses- I was a new wife at one time and was not so comfy in my kitchen either. Don’t give up!  
  • Have thick skin – don’t take yourself or food too seriously.
  • Turn on some music …relax and have a little fun. I remember, before we had kids, I would jam to Aretha Franklin when I cooked. I’ve been known to rock the
  • spoon microphone to “Respect”.   
  • Know that as little of a task as cooking seems…it’s actually very big thing.  I can’t think of a better family image than one around a dinner table.  YOU are blessing your family. I promise.
  • One failed day doesn’t mean a thing. Tomorrow’s another day. If you failed to plan today…pick up the pace tomorrow. 


Ladies, you can do this!

“Bless this kitchen, Lord, and those who gather here each day. Let it be a place where we can meet to love and laugh and pray.”

For some of my “seasoned” cooks out there {no pun intended} what other suggestions do you have for these Spring Chicks?!

MUCH love to you!!!!!      

Signature

Meal Ministry Guest Today! Welcome,Suzanne from Blueberry Cottage!


Today’s guest is no stranger to Comfy in the Kitchen…Suzanne from Blueberry Cottage shared with us at the beginning of my blogging journey. She’s been a blessing to have as a fellow blogger, reader and friend. Today she’s giving us a sneak peak into the Meal Ministry she has helped start at her very own church!

If starting a Meal Ministry been on your heart- she has the perfect tips on how to do just that!

Suzanne writes:  

A couple of years ago I started a Wednesday night meal ministry at my church. I had this on my heart for a couple of years before I brought this to the leadership. At our last church there was such a ministry and I served on the team of “chefs”. Cooking once a month was easy, but running the whole ministry was going to be a huge time commitment and I wanted to make sure this is where God wanted me. I had been chatting with one of the deacons wives one Sunday and she had shared they were having a leadership meeting and wanted to know if I had any women’s ministry requests. The Lord prompted me to share my idea for a weekly Wednesday evening supper before service. At the meeting she presented my idea and the Pastor shared he had been praying for a year about such a ministry on Wednesday’s! Needless to say this gave me some serious goosebumps! God was giving his blessing, I had my husband’s blessing and the Pastor was totally on board and ready to give me whatever I needed. When it is God’s timing everything falls into place so easily.

We are now on our second year providing home cooked meals on Wednesday’s and I feel a lot of the kinks have been worked out during the first year. Many people have remarked that this ministry has enabled them to feel more connected to the church and the body of believers. Sunday’s, for a lot of us, can be a bit rushed. We dash from service to Sunday school , or we serve in the nursery, and often times we just don’t have time to chat and get to really know one another. Sitting down to a meal that isn’t rushed and you didn’t have to prepare gives a person time to converse. A lot of folks come right after work. Many that never attended Wednesday evening Bible study are able to come because they have a bit more time in their schedules due to not having to provide a family meal. As I have watched from the serving line I notice people who don’t know each other introduce themselves and have wonderful fellowship time over their meals. There is always lots of laughter and joking around! Teens hang out together and also help me, especially when dessert time comes! There are babies in high chairs and toddlers sneaking under tables. It’s really like having a big familyget together each week.

Like Janelle, my gift has always been hospitality and it always involves food. Being from a large Italian family where you saw all your relatives over meatballs and pasta after church on Sunday, I think has groomed me for this calling. There is no better feeling for me than providing a meal for a new mom, someone who is sick or going through a difficult time, or that person you know just needs a bit of help. We can certainly encourage one another by such gestures. When I am on the receiving end of a meal I feel so blessed and cherished. It is my hope no one reads this and thinks they can’t run something like this, it’s just too much. Well, that may be true for the season of life your in now. Yet, perhaps you could consider cooking once a month or helping with set up or clean up. There are a lot of little jobs and details that need to be attended to. However, if this is your season to just be blessed by such a ministry, then do come to dinner and enjoy yourself. Introduce your family to another and build relationships. Just eat and laugh!

How to start a weekly meal ministry in your church:

• Pray! Make sure you feel this is the Lord’s will not your own or you will burn out.
• If married, make sure your husband is on board. Listen to his wisdom, he knows you best.
• Approach your pastor and leadership and present your idea.
• Assuming you have your pastor’s blessing, develop a questionnaire with questions such as: Would you attend a weekly meal here at church? How often? How much would you be willing to pay per family member for a home cooked meal? Would you be interested in helping in this ministry? Would you cook once a month? Twice a month? Then add your contact info. Do this for one month by adding this paper into the weekly bulletin. Document the results and bring them to the leadership.

A few things to consider:

• Your church must have a kitchen with ovens and adequate refrigeration. You do not need a professional kitchen, although that would be great.
• Which space will you use? Do you have a fellowship hall that can accommodate a large crowd? Are there enough tables and chairs? Do you have serving containers for water, salad, and baskets for rolls.
• Are there serving spoons, tongs, knives and cutting boards?
• You may have to obtain a permit to cook, check with your local board of health.

From your survey determine how many people may show up to start. This will give you an idea of how many servings of food you will need. Our church averages 50-60 each Wednesday. I have a team of 4 chefs (12 different ladies) each Wednesday that cook the main dish only. Each lady cooks between 15-20 servings of her recipe. They bring this already warm to the supper or leave it earlier for me to warm up when I get there, in a disposable foil pan. This cuts down on dishes that need to be done and returned!

What is on the menu?

Each Wednesday has a theme:

The first Wednesday of each month is Italian Night. Each chef cooks whatever they want that is Italian for the amount of people I have specified. I used to assign recipes, but found this too stressful on the chef. Not everyone is proficient in the kitchen and many have their old family standby’s that work just great. So, for example; one gal may bring two lasagnas, another American Chop Suey and then another may bring meatballs and spaghetti. I never know what I am getting so it is always a surprise! I make, at the church, a large salad and provide rolls with butter.

The second Wednesday is Soup du Jour and Sandwiches. Each chef brings a crock pot of her favorite soup or stew. I order a couple of deli platters or sub sandwiches from the market. I provide some lettuce, tomato, mustard and mayo. I also provide the breads or rolls.

The third Wesnesday is Chicken a la Chef. Each chef cooks up her favorite chicken recipe and I also have one woman do a large pan of rice pilaf. I cook baked potatoes, provide salad/dressings and sour cream and butter for the taters.

Fourth Wednesday is Pizza Night! Yes, we order pizzas from the local pizza parlor. We only do plain as I get a large for $5.00. I provide the chips, salad and soda.

What do you usually provide for drinks?

Iced water in pitchers with lemon wedges. This is placed on the table with all the napkins, plates, etc. A separate smaller table holds coffee, stirrers, cream, sugar, etc.

What do kids eat?

I do have a kids table set up with one loaf of wheat bread, peanut butter & jelly and a half gallon of milk. There are smaller plates, cups and napkins. Kind of make your own. Once in awhile I will make hotdogs, but mostly they eat what the adults eat.

What about plates and napkins and all?

Yes, right now we use disposable. I am looking into eco- friendly alternatives, but until I find something, weekly we use what the meals need, this includes dinner plates, soup bowls, napkins, cups, plastic knives, forks, spoons and soup sized spoons. These are all on the same table when the diner walks in. They take what they need and proceed to the serving line.

Who serves?

Often times I will and one or two ladies that have cooked. Depends on the crowd if we need more helpers here.

Who does the shopping for the salad and drinks and other items needed?

The coordinator, that’s me(or you) . Each week I make the salad, shop for rolls and butter, etc. I will often time make any sides I want served.

What’s for dessert?

Ice cream! Yes, each week, in order to keep it very simple, ice cream. One styrofoam cup full of Blue Bunny oreo cookie or vanilla/chocolate swirl. Sometimes an adult will bring a different treat for the adults, but I don’t go crazy here, just keep it simple☺

What do you charge?

We charge $3.00 per person for diners ages 3 and up with a max of $12.00 per family. I have a flyer typed up and it is in a plastic upright holder with a basket in front of it to put the money in. It is an honor system. Also, because this is a ministry, at the bottom of the flyer is a bolded notice that reads: If your unable to pay for your meal this evening please enjoy your dinner compliments of your church family. We never want to deny a meal or fellowship to anyone. This may not be financially possible for all churches, however.

How do you and the chefs get reimbursed?

Most of my chefs do not ask to be reimbursed they view this as a ministry. If they choose to not be reimbursed they and their family eat free that night. If anyone needs reimbursement I take it out of the money collected, if there isn’t enough then the church gives reimbursement. This is also another area that all churches may not be able to accommodate, but I have found our church has really not had to put out a lot for this. The church does provide all paper goods, however.

How about set up and clean up?

I set up the tables and chairs and arrange the condiments, napkins, etc., with the help of my husband, when available, or children. I do have a few teens show up early and pitch in too. I make the sides and put out the rolls, etc. I usually arrive 1.5 hours prior to serving and find this is plenty of time to be prepped and ready.

What time is supper?

We serve from 5:30 pm-6:15 pm. We have a 7pm service and our youth group starts at 6:30 pm so this time frame works well for all as well as clean up.

When do you start and end?

I have found October to be a good month to start and I end in May. There is another woman who keeps the ministry going all through September with weekly barbecues. She sets her ministry up the same way as I do, but it is all grilled items. It’s great and I have a needed break!

Last things….

Each week the church secretary puts the following week’s menu with info in the bulletin. I also type up a schedule with all the dates of the dinners and who is cooking which night for the year. Each chef gets a copy as wells as the church secretary and pastors.

I do jazz up the tables a bit as funds allow. Often I will dress up tables with a seasonal theme such as a jar of candy corn in a glass jar with pumpkin scented candle. I do not use table cloths as our tables are new. However, a placemat is in the center with the centerpiece and S&P, butter or sour cream.

Also, once during the year I have a meeting with all those on my team. It’s important to get new ideas and feedback from everyone involved.

If anyone has questions feel free to ask, I love talking meal ministries☺You can contact me at  Taketimefortea@comcast.net

Thank you SO much Suzanne- your church body is so blessed to have you! I love your themed weeks and ideas on how to keep costs low. Keep cooking for the King!!! 

Signature

Meatball Subs, Mmmm..{and my son’s 1st Meal Ministry!}

 Grandma Ruth’s Meatballs and Sauce, shredded Mozzarella cheese and herbs….all melted together on a fresh Italian Hoagie roll…

I don’t know to many people who could turn down a meatball sub…Today was no exception.

This happens to be one of my son’s favorite sandwiches…While I was cooking and he was doing his homework, he asked if he could bring one to his coach tonight.

Ohhhh, my heart melted faster than mozzarella cheese on a hot meatball. My son had initiated a meal ministry! Wohoo! He really is watching!!!

So, with that…I let him make the sandwich himself. He did a great job and was able to share God’s love with his very own Coach. 

“Enjoy the little things in life, for one day you’ll look back and realize

they were big things.”

~ Robert Brault

When I make meatball subs, I typically put the sauce and meatballs in a crockpot to simmer all day. This is actually a great sandwich for potlucks because it can be self-serve.

Prepping …Here I just gave my son 3 meatballs and some sauce in a bowl, shredded some cheese and put the hoagie under the broiler for 2 minutes.

Ready for assembly!

{With clean hands} Add the meatballs…

A little sauce {not too much or the bread will be soggy!}

Freshly shredded mozzarella cheese…

A pinch of Italian herbs…oregano, basil, thyme, rosemary. Then broil again for 1 more min until cheese is melted.

MMMMmmm……

My son after he delivered his 1st ever Meal Ministry {outside of our home}… to his beloved Coach!

 ” Dear Children, let us not love with words or tongue, but with actions

and in truth.”

~1 John 3:18

His well deserved…after workout meal.


Meatball Subs Mmmm..{and my son’s 1st Meal Ministry!}

Prep time:
Cook time:
Total time:
Serves: 4
Ingredients
  • 12 meatballs in sauce {See Grandma Ruth’s recipes}
  • 4 hoagie rolls
  • 1 cup freshly shredded mozzarella cheese
  • Italian herbs
Instructions
  1. Broil rolls for 2 mins.
  2. Place meatballs with a small amount of sauce onto rolls.
  3. Add cheese and herbs – broil again until cheese is melted.
  4. Prep time below is if you have meatballs and sauce already made up.


Signature

Balsamic Roasted Brussel Sprouts {Roomag}


Not too long ago I mentioned “Brussel Sprouts” on FB and got a whirlwind of delightful responses. I am so excited to know I’m not the only one who LOVES these little green bundles of deliciousness! Wohoo!

I’m over at Candace Cameron Bure’s Roomag today sharing my favorite way to make  them….come join me for a “guiltless pleasure”, if you will.

Thanks Ladies! Enjoy!

Roo Mag

Signature

Pizza Bianca Dip

You. Have. To. Make. This.

Ohhhh, Ladies…. With all the cooking I do….and recipes I love… my life’s greatest food joy is……Pizza.

Seriously. I love pizza.

Cheap date, hu? lol. 

Woe was the day when I found out I was allergic to wheat. {{tear, sniff, sniff}}

BUT, while I was browsing Pinterest, I stumbled upon this delightful looking appetizer and thought, “Self, you could totally eat that with corn tortilla chips.” And that’s exactly what I did. What an unexpected treat- I truly felt as though I was eating pizza again..Ahhh…..

For those of you who can eat gluten – grab some crackers or some Italian bread and dig in. This dip is so delicious, my mouth is watering just typing up this post!

Who can resist the marriage of cheese and garlic? I sure can’t!

In a large mixing bowl add cream cheese, 7 oz of your provolone and shredded mozzarella {leaving a bit for the topping at the end}, parmesan cheese, garlic, fresh basil and dry oregano. 

Preheat oven to 400, line a baking sheet with foil, slice and place tomatoes on top and drizzle with olive oil , cracked pepper and sea salt. “Roast” for 15-20 mins. Add to mixture.

Top with remaining cheese and bake for 25-30 mins until bubbly and golden brown.

 Ohhh…..I could just cry happy tears. This dip is absolutely delicious!!!! You’re going to LOVE it!

Pizza Bianca Dip

Prep time:
Cook time:
Total time:
Serves: 8
Ingredients
  • 1 pint plum tomatoes, sliced in half
  • 1 teaspoon olive oil
  • 1/4 teaspoon sea salt
  • 1/4 teaspoon cracked pepper
  • 1 1/2 (12 ounces) block cream cheese, softened
  • 8 ounces mozzarella cheese, freshly grated {reserve 1 oz for topping}
  • 8 ounces provolone cheese, freshly grated {reserve 1 oz for topping}
  • 1/4 cup finely grated parmesan cheese + more for garnish
  • 4 garlic cloves, minced or pressed
  • 1/4 cup freshly chopped basil leaves
  • 1/2 tablespoon freshly chopped oregano leaves
  • crackers, bread or chips for serving
Instructions
  1. Preheat oven to 400 degrees F.
  2. Line a baking sheet with aluminum foil then place tomatoes on top.
  3. Sprinkle with olive oil and salt, then roast for 20-25 minutes, until bursting. Set aside.
  4. While tomatoes are roasting, mix softened cream cheese with about 7 ounces each of provolone and mozzarella, then and parmesan.
  5. Stir in oregano, fresh basil, garlic and roasted tomatoes, mixing well to combine.
  6. Transfer mixture to an oven-safe round baking dish.
  7. Sprinkle with remaining provolone and mozzarella.
  8. Bake for 25-30 minutes, or until top is golden and bubbly.
  9. Serve immediately with crackers, chips or bread.
Signature

Browned Butter and Swiss Chicken

{Browned Butter and Swiss Chicken, Green Beans and a Baked Sweet Potato. This is a naturally gluten-free meal}

My mom gets credit for this delicious recipe…it’s one of those “go to” week night main dishes that I’ve made over and over again. Make sure to use real butter and a high quality swiss cheese. The entire family gobbles this one up!

On high heat, melt 4 Tbsp of real butter {its in style again- yea!}.

Add 4 thawed chicken breasts to melted butter. Sprinkle with salt, ground pepper, and onion powder. Brown on both sides.

The inside of the chicken will not be completely done…that’s ok.

Place browned chicken into a 9×13 pan, pour reserved butter over top of chicken, top each breast with a slice of Swiss cheese {Guggisberg is my personal favorite Swiss}.

Cover with foil and bake in a 350 oven for 5-8 mins. I use organic chicken breasts so they’re smaller…if your chicken breasts are larger, you will have to bake about 20 mins longer. The chicken is done if it is just slightly pink….once you take it out of the oven it will continue to cook. Don’t overcook or it will get dry!

Take foil off and broil for 2 mins.

Mission accomplished! Mmmm….buttery and cheesy, who could resist?


Browned Butter and Swiss Chicken

Prep time:
Cook time:
Total time:
Serves: 6
Ingredients
  • 6 chicken breasts {preferably organic}
  • 4 Tbsp butter
  • 6 slices swiss cheese
  • salt, pepper, onion powder
Instructions
  1. Preheat oven to 350.
  2. Melt butter on high in a large skillet.
  3. Add chicken.
  4. Sprinkle with salt, pepper and onion powder.
  5. Brown on both sides.
  6. Transfer chicken and remaining butter into a 9×13 pan, place a slice of cheese onto each breast.
  7. Cover with foil and bake for 5-8 mins longer. If you have larger chicken breasts you may have to bake for 20 mins longer. Do not over cook! Remember if it’s a tad pink it will continue to cook after you take it out of the oven.
  8. Take foil off of chicken and broil for 2 mins.


Signature

Chinet Bakeware


Chinet Bakeware®

Hi Ladies!

The makers of Chinet contacted me a few weeks ago to let me know about their new Bakeware.

Wait a second…Chinet makes bakeware?

YES! They SURE do.

When I read their e-mail, this product really peaked my interest….I use disposable containers all the time for meal ministry! You know, those paper-thin foil throw-aways that bend, spill, and drive us all a little bonkers at times. 

Now, I’m already a huge fan of Chinet– if I purchase paper products…hands down, this is the brand I always get. The plates are large, sturdy, and don’t leak. But, bakeware? 

Hmmmm….

So, I asked them if I could try it?

Would you know they agreed and sent me the most beautiful package of samples?! I was blown away and so grateful-I actually had someone to cook for that day! 

The box. I’m a grown woman and this gave me butterflies- I still love packages in the mail.

I opened the box..

…and found some very impressive throw-away containers {that I can bake in!} and an official Chinet apron! Wohoo! Thank you so much Chinet!

I was a little nervous about baking inside paper products…but the inside was completely lined with a non-stick surface. These brownies baked up perfectly. I also appreciated the high see-through lids….these would especially come in handy for whipped topping desserts.

Next, I prepared a chopped salad. Now, there were quite a bit of toppings on this salad…most containers would bend during transportation-not this one…it was sturdy and didn’t budge. 

Again…love the lids! It looks so professional, doesn’t it? 

I also baked up some Ham and Cheese Poppyseed Sliders and Homemade Mac n Cheese. The containers did a great job! I even used the box they came in to transport the meal to the family in need. lol.  

 So, Ladies…..I definitely recommend having some of Chinet’s bakeware on hand for your bake and take needs. I’m sold!

  • It goes directly from oven to table to freezer to microwave
  • It’s sturdy and non-stick
  • It comes in 4 shapes and sizes
  • I love the clear high-top lids
  • Its uniform and pretty
  • You can bake, take, and leave! No worries to get your dishes back!    


Thank you SO much Chinet, for my free products!

Psssss….I’m not getting paid to say all of this 😉 These containers are the best I’ve used.

Signature

The Perfect Gluten-FREE Chocolate Chip Cookie Recipe!!! Wohoo!

Hi Ladies! I made these DELICIOUS GF Chocolate Chip Cookies the other night … My camera was charging so I took a couple shots with my phone. I wasn’t planning on posting them- but I HAD to- they were SOOOO good! 

I mean REALLY! Even the dough was good….{shhhh-I know, I know- raw eggs}. But tell me…how many GF cookie doughs are good? You know what I’m talking about…lol.


I simply made my ” The Perfect Chocolate Chip Cookie” recipe, but instead of using All-Purpose Flour, I used Silvana’s Flour Blend. The ingredients were simple to find..in fact, I found them all at a local market {I didn’t have to go to a fancy shmancy organic food place! Wohoo!}. 

Her recipe makes enough for a batch of cookies and then some. Store the rest of the flour blend in an air tight container and use it for a later date…

I would be willing to guess most people would not be able to tell the difference between these and the glutenous maximus version. Rich, butter, fluffy, soft….Mmmmmmm….My children gobbled them up {and they can always tell if something is gluten-free….not this time, hehe}

It’s that flour blend…it’s such an incredible substitute. Most GF flour blends give such a bad taste to baked goods…but I give Silvana a huge round of applause- she really nailed this one!! I will never try another GF flour blend again- this one is BINGO.


The Perfect Gluten-FREE Chocolate Chip Cookie Recipe!!! Wohoo!

Prep time:
Cook time:
Total time:
Serves: 2 dozen
Ingredients
  • 2 1/2 c Gluten Free Flour Blend {Silvana’s}
  • 1 tsp baking soda
  • 1 tsp salt
  • 1 c butter, softened
  • 3/4 cup brown sugar
  • 1/4 cup sugar
  • 1 pkg vanilla instant pudding
  • 1 tsp vanilla
  • 2 eggs
  • 12 oz semi-sweet chocolate chips
Instructions
  1. Preheat oven to 375
  2. Combine flour, baking soda and salt..set aside.
  3. In a large mixing bowl, beat together butter, sugars, vanilla, and pudding mix.
  4. Beat until smooth and creamy.
  5. Beat in eggs.
  6. Add flour mixture.
  7. Stir in chocolate chips.
  8. Place in refrigerator for 1 hour {don’t skip this step}.
  9. Place heaping Tbsps of batter onto un-greased cookie sheet {I use parchment paper}
  10. Bake until golden appx 10-12 mins.
  11. Take out of oven and let sit 2 mins on cookie sheet before transferring to cooling rack.
Signature

Got a light?

{Photo Credit}

“No one lights a lamp and puts it in a place where it will be hidden, or under a bowl. Instead he puts it on its stand, so that those who come in may see the light.”

~ Luke 11:33

It makes perfect sense doesn’t it? The “White Knight” always wins…Being a light is a blessing! Why would anyone want to hide their light?

I’ll tell you why…scripture explains it perfectly.

“Everyone who does evil hates the light, and will not come into the light for fear his deeds will be exposed”

~John 3:20

When we are around others who fear, don’t understand, or hate the light…it puts us in an akward situation, doesn’t it? We’re out of our comfort zone with like-minded family and friends….all of a sudden we feel the need to cover up. To blend in. To slight our beliefs. To bend….not offend.

For a married Christian man, it could mean going golfing with other married friends who make flirtatious comments about women. He would seem prudent not to join in….right? A witty joke under his breath would give him a pat on the back and some laughter. That feels a lot better than hearing, “Man, you’ve been driving that swagger wagon to church a little too much, loosen up a little.” 

Or for a Christian woman getting together with friends. They start gossiping about another friend’s personal life. She would offend the Ladies if she asked them to stop….so she listens, laughs and adds a few stories she’s heard too.

For a teenager, it’s rough. The music, movies, language, alcohol, drug use, clothing, relationships…the list is looooong…its all so enticing.  Everyone’s doing these things. She’s desperately seeking love and approval during this sensitive stage of life..it sure would be easier to blend in. Here comes that basket over the candle image again.  

Ugh, this makes me ill thinking about all the times I’ve done this. The people pleasing ….being embarrassed of my light for Jesus. It’s the “trading the treasure in heaven thing for the measly praise on earth thing again“. Blah!

There’s a few problems when we do this.

1. Our faith is shaken: Psalm 62:6 says, “He alone is my rock and salvation; He is my fortress, I will not be shaken.” We aren’t trusting in God’s truth and His plan. We’re more concerned about making others and ourselves comfortable. 

2. We aren’t fearing God enough: “Do not be afraid of those who kill the body but cannot kill the soul. Rather be afraid of the One who can destroy both the soul and the body in hell.” Matthew 10:28 {enough said}.

3. We are passing up the opportunity to be contagious: Jesus said “Let your light shine upon men, that they may see your good deeds and praise your Father in heaven.”~Matthew 5:16. We are told by Jesus to SHINE for HIS glory! Sometimes these peers mentioned above are craving the light but are so used to living in darkness…your hand can be the one that lifts them out. 

Let me be an example to #3…if my neighbor Julie {I know you’re reading Julie, Hi my friend!} did not shine her light on me by knocking on my door and inviting me to her bible study…I would not be writing for Comfy in the Kitchen.

So ladies…if you’ve “Got a light”…let me encourage you today to let it shine brightly….

Keep strong in your faith, Fear God, and by all means BE CONTAGIOUS!!!!

I want to leave you with this….

The Beatitudes in Matthew 5:3-10.

This is when Jesus stepped away from all of the crowds {all the noise}…went and sat on a mountainside and taught his disciples….

“Blessed are the poor in spirit,
for theirs is the kingdom of heaven.
Blessed are those who mourn,
for they will be comforted.
Blessed are the meek,
for they will inherit the earth.
Blessed are those who hunger and thirst for righteousness,
for they will be filled.
Blessed are the merciful,
for they will be shown mercy.
Blessed are the pure in heart,
for they will see God.
Blessed are the peacemakers,
for they will be called children of God.
 Blessed are those who are persecuted because of righteousness,
for theirs is the kingdom of heaven.

 “Blessed are you when people insult you, persecute you and falsely say all kinds of evil against you because of me. Rejoice and be glad, because great is your reward in heaven, for in the same way they persecuted the prophets who were before you.”

MUCH love to you!

Signature

Is genuine concern about what other’s think… biblical?


{photo credit

Many of you may be surprised when I say this, but I have not always been….outgoing.

In fact, I’m a closet introvert. Meaning, I pretend to be outgoing and no one knows the difference. Pulled one over on ya, did I? 😉  

Throughout the years, I’ve gotten progressively better at this feat. As a young child, my fear of others {and what they might think of me} was painfully obvious as I sat alone under the sliding board at recess.

Now, I take a deep breath and ask the Lord to hold my hand while I take the first step towards others. To give a hug, a compliment, a meal, an invitation….

But, like many other people out there, I’ve been guilty of caring too much about what others thinkparticularly about what their thoughts of me might be.

There are times when I truly just want to stay inside…where I’m protected.

If I just keep to my immediate family and a few friends, I won’t open myself up to possible hurts. 

Ministry…it’s a beautiful thing…it’s what we are called to do. But it’s scary. When a person is in ministry…he or she places a huge “bulls eye” on their forehead that gives the message “open for attack”. Christians and non-Christians {and Satan- yes….Satan} can throw fiery darts. This fear…this pain-is the worst. I’ve felt it. I don’t want to feel it again. Too bad… I will {Mark 13:13}. 

What if I come across “too nice” and get mistaken for fake?

What if someone is gossiping about me!? Oh, stick a knife in me, would ya! How could this ever be?!

Did I offend her?

Could it be true that {gasp} someone out there doesn’t like me? Oh, the horror!!!! I could cry all day {seriously}.

Do you know what the problem with all of this is? It’s prideful.

My hand is raised that I’ve forgone treasures in heaven for a poor , poor substitute – a measly praise on Earth. Hooo, haaaa.

Fleshiness can be pretty strong, can’t it?

Blah.  

“For the Spirit God gave us does not make us timid, but gives us power, love and self-discipline” ~2 Timothy 1:7

The bible says we aren’t to fear others…but to be motivated for them, in love. No matter the consequence. If we get thrown under the bus- let us remember our Savior, who died on the cross for us. Oh, the amazing grace! 

As Christians we have to be willing to also die…to ourselves, and in reality. Throughout history, to this day and days to come, until Jesus arrives…there have been, are and will be Martyrs. This humbles me – “Am I willing?” I’m already a dead woman walking…I can’t fear this. My soul has a permanent reservation in heaven.    

“Serve wholeheartedly, as if you were serving the Lord, not people.” ~ Ephesians 6:7

The compulsion of pleasing people is bondage at it’s finest …we will never go out and produce the fruit God wills for us if we are constantly second guessing what others opinions of us will be {John 15:8}. We will remain paralyzed in fear that we will goof, offend, or fail completely. God made us for His glory {Isaiah 43:1-7}and we must keep our eyes on the prize… God Himself. If we are doing what honors Him- we are doing the right thing.

“And without faith it is impossible to please God, because anyone who comes to Him must believe that He exists and that He rewards those who earnestly seek Him. ~ Hebrews 11:6

Prepare yourselves ,this is going to sting again…. Constant worry about what other’s think about us…is prideful. What?! I thought it was being genuinely concerned for others?! Nope. We are looking to the left…to the right…but not straight ahead. Our faith is shaken. We are idolizing, not prioritizing.

Let me encourage you today to let the fear of what others think….go. There is so much freedom in this through Christ!

“Our fall was, has always been, and always will be, that we aren’t satisfied in God and what He gives. We hunger for something more, something other.” ~ Ann Voskamp 

Let us not hunger for the adoration of one another…but the process of loving one another through glorifying God first.

Now, do I want to give love and joy to others…uh huuu. Do I want to be loved back? Absolutely.

But Jesus is plenty.

There have been and will be times when the message I send off isn’t what someone wants to hear. I may have to stand up for something biblical, in love-not agree with what a friend is doing, or I could just rub someone the wrong way. A smile aimed at someone who is deeply hurting sometimes isn’t what they are looking for. Heck, someone may not want me to make them a meal because they struggle with cooking and it makes them feel inferior! That is SOOO the opposite of my intentions, but its possible!

But, serving and loving God and others is well with my soul…I need to say that again, Janelle …it is well with my soul.

What will people think if I post this?

<<Click>>

Signature

What is Hospitality…..really?

(Photo credit)

“Oh Christina, I would love to have a home big enough to hostess our family gatherings in…I feel very blessed to live here-it’s plenty big enough for our family. But, I just have this aching in my heart to serve more. Sometimes I feel people are cramped in here…I want them to be comfortable and to love being here…like a home away from home. A guest room would be nice too…what if a member of our family is sick, or someone needed a place to stay?” These are the words I said over coffee with a dear friend, in my living room. 

I’m always concerned about the cleanliness of my home…the food…the warm drinks…cold drinks…are there enough chairs…are the air wicks full?

Then, my sweet friend stopped me in my tracks.

“Janelle, you don’t need any of this …YOU are hospitality. Where ever you go, you make people feel loved and cared about. People don’t come to your home- they come to you!” 

Then the tears started rolling…I mean rolling…

For the umpteenth time, I was reminded of our Savior.

“Jesus replied, ‘Foxes have dens and birds have nests, but the Son of Man has no place to lay his head.'” ~Luke 9:58

Jesus…

God {John 8:24}

Creator of all things {John 1:1-3}

The Bread of Life {John 6:35}

The Good Shepherd {John 10:11}

The Way, the Truth, The Life {John 14:6}

The Ultimate Forgiver {Matt. 9:1-7}

Our Savior {John 4:42}

Had “no place to lay his head?” 

He could have had an elaborate home here…but our Lord of Lord’s went out and sought…by foot and by faith. He chose to have no home. Perfect. 

He preached, taught, loved, healed, performed miracles,and spread the truth….He was on a mission.

Amazing.

Sooooooooooo Humbling.

I. Get. It.  

Ladies, may this remind you of what true hospitality is…you don’t have to have a beautiful home, a large home, or even the cleanest home {many of us have multiple children -it’s hard!!}.

Hospitality is what Jesus is…Love.

Thank you, my friend, for helping me see this…and I’m crying again.  


Signature

Mexican Dip Trifle {For a Crowd}


It’s delicious, filling, simple…..and pretty. What’s not to love about this dip? Serve with homemade tortilla chips or your favorite store bought brand {here’s mine!}.  I love how this trifle bowl displays all the different layers and colors! This recipe makes enough for a crowd and is excellent to bring to potlucks and get togethers!

Don’t have a trifle? You certainly can use a 9×13 pan! Don’t be intimidated by the cost of a trifle bowl- I’ve seen them at Marcs, Big lots…and this one, from JCPenney outlet {$9). 

*Naturally Gluten Free!

Mexican Dip Trifle {For a Crowd}

Prep time:
Total time:
Serves: 15
Ingredients
  • 1 32 oz can of refried beans
  • 1 1/2 pack of taco seasoning
  • 1 16 oz carton sour cream
  • 3 roma tomatoes diced
  • 2 green onions chopped
  • 2 1/2 cups of freshly shredded cheddar cheese
  • 6 oz can black olives sliced
Instructions
  1. Beat refried beans with a mixer -pour to the bottom of trifle bowl.
  2. Beat sour cream with taco seasoning-add onto beans.
  3. Shred cheddar cheese and add to the top of sour cream mixture.
  4. Sprinkle diced tomatoes, onions, and black olives on top. Cover and refrigerate until ready to serve.
  5. Serve with tortilla chips!


Signature

New Year’s Eve Appetizers!

What are YOU doing New Year’s Eve???

Might I suggest keeping safe, inviting some friends and family members over, making yummy food and playing games! If you take me up on this offer…here are some “comfy” appetizers that will be sure to please and won’t stress you out {they are EASY}!


The Tidbit Tray– It’s naturally gluten and carb free {for those who may be watching!}, nutritious, yummy, simple, and filling. Need I say more? Add as many veggies, cheeses and meats as you wish- trust me, it won’t last long!

Sweet and Sour Little Smokies– Adults and children alike cannot resist this tasty treat. You can also purchase pre-made meatballs and prepare the same way!

Cucumber Sandwiches- These are SOOO good!!! Not to mention….pretty.

Poppyseed Ham and Cheese Sliders-are a great addition to any spread. I can’t tell you how many people have asked me for this recipe!


Hot out of the oven Loaded Baked Potato Chip Dip. Need I say more?


Easy Spinach Dip– So simple, so addicting!!!! Serve with veggies and cubed pumpernickel.

And the Finale???? Why not end with something “Better than a Hug?!” {hehe}

{Make sure you still give your sweetie a kiss when the ball drops!}

Better than a Hug Cake– Oh yum.

Be SAFE, have fun, enjoy in sweet fellowship and have a Happy New Year, my sweet friends!!!  

Signature

Grandma’s Veggie Soup! {Roomag}

Mmmm…this recipe brings me back to my childhood. Grandma made this soup often … it was and still is one of my favorites. You can keep the recipe “as is” or for a heartier meal you may wish to add a chuck roast …either way, it’s delicious. Join me at Candace Cameron Bure’s Roomag where I’m sharing Healthy Vegetable Soupin the crockpot! Perfect for a cold winter day

Signature

Snowman Cheese Ball

Oh, Pinterest! You inspire me!

I’m making some appetizers for a family Christmas party tonight and wanted to bring something a little more “cheerful”….I typed in “Snowman Cheese Ball” and Voila! A winter wonderland appeared right before my eyes! Serve with crackers and/or veggies!

Frosty- you ARE adorable.

Snowman Cheese Ball

Prep time:
Total time:
Serves: 15
Ingredients
  • 2 8 oz cream cheese
  • 1/2 cup chopped green onions
  • 1/2 cup sliced almonds
  • 4 cups freshly shredded cheddar cheese
  • 1 package of “Bacon Bacon” from Tastefully Simple {This is optional! You may add 1/2 tsp of cayenne pepper as this is what the recipe called for}
  • 1/2 cup of Parmesan cheese for rolling
  • 15 Peppercorns {you may not have to go out and buy these if you have a pepper mill take some out of it!}
  • 1 baby carrot {slice it for a nose}
Instructions
  1. Beat cream cheese, green onions, almonds, cheddar cheese, bacon bacon OR cayenne pepper together.
  2. Divide mixture into 3 balls- one large, one medium, one small.
  3. Roll each ball in Parmesan cheese.
  4. Place peppercorns on as buttons, eyes and smile.
  5. Place a slice of your carrot on for a nose.
  6. Serve with crackers/and veggies!

This method looked “Comfy” so it was the chosen one…I doubled it and changed it around a bit with the ingredients I had on hand. You can do the same! Enjoy!


Signature

Healthier Christmas Treats! {Roomag}


Looks yummy, pretty and a different thing to add into the regular Christmas treats :)

Photo Credit

I know, I know…Christmas may be one of the most difficult times of the year to make healthy choices. Wondering how to accomplish this feat?! Join me over at Candace Cameron Bure’s Roomag where I share my favorite healthier treats for the Holidays!

With recipes like these, you won’t feel left out of the festivities at all! Fill up on the healthier treats first …..then, sneak a cookie. You will be SO glad you didn’t’ do it the other away around the next day 🙂 hehe.

Signature

Edible Christmas Treats!

Ice cream cone Christmas trees

Edible Christmas Trees

My friend Julie made these with her children this week-they looked so cute next to their gingerbread houses! 

Easy No-Bake Gingerbread Houses  -This is how my friend Julie made her houses. I can’t wait to make these with my children this week! Thanks to Martha Stewart for her “comfy” instructions!

Photo: If you want to make a fun treat for Christmas or your child's class...these Nutter Butter Reindeer are super easy!! Just use white frosting in a tube as the "glue" to hold everything on:)

My friend Katina posted this photo to FB today- You know I HAD to scoop it up! Check out how cute these little Rudolphs are! She used Nutter Butters and piped white icing on the top, held pretzels in place for the antlers-chocolate chip eyes-and red skittles for the nose. Katina also made the cutest Rolo Rudolphs last year on the Comfy blog!

What child wouldn’t smile if they saw these adorable snowmen marshmallows staring at them out of their hot cocoa?

Adorable Gum Drop Kissing Balls...these make me smile 🙂


Cookies will look even sweeter on this creative Peppermint Tray! YES, this is made from melted peppermint candies!


Have fun, Ladies!

Don’t worry about the mess- it can get cleaned up! Think about all the fun your children will have with you making sweet, sweet memories.

Signature

EASIEST Peanut Butter Fudge EVER!

I found it! The PERFECT fudge!!!! It’s EASY, has only 4 ingredients, doesn’t require constant stirring…or a candy thermometer….or even a stove! WHA??? That’s right ladies!!! It’s rich, creamy and delicious too. My official “go to” fudge is made in the microwave? Why yes….it is. 

{I know some of you prefer not to use microwaves, that’s ok!}

Microwave butter and peanut butter in a medium bowl for 2 mins.

Stir- it’s melted at this point, but put it back into the microwave for 2 more mins- this gives it a “brown butter” taste and gets it to the right temperature.

Add in vanilla and powdered sugar and stir well- fudge will have a chalky texture.

Place parchment paper into an 8×8 dish and -butter the parchment paper.

Pour fudge into pan.

Refrigerate for at least 2 hours until set and firm. Cut into squares.

Mmmm…..delicious and SO EASY!

I made these for gifts…I added some chopped Reese’s PB cups to the top. The little dishes came from Michael’s craft store- $1 a piece! Adorable!

I wrapped the tops like so..

Placed them into matching plastic bags…they were also $1 for 20.

Wrapped them up with a bow and a plastic butter knife…

Ready to give!

This recipe sure did give me fudge making confidence…I’ve done it too ladies, made fudge that didn’t quite set. It happens! But this recipe is mistake proof- follow the instructions and you will get perfect fudge every time.

***This recipe is from Alton Brown– again, LOVE his recipes!***


EASIEST Peanut Butter Fudge EVER!

Author: Alton Brown
Prep time:
Cook time:
Total time:
Serves: 8-10
Ingredients
  • 2 sticks butter, plus more for greasing pan
  • 1 cup smooth peanut butter
  • 1 teaspoon vanilla extract
  • 1 pound powdered sugar
Instructions
  1. Combine the butter and peanut butter in a microwavable bowl. Cover with a paper towel and Microwave for 2 minutes on high.
  2. Stir and microwave on high for 2 more minutes.
  3. Add vanilla and powdered sugar to the peanut butter mixture and stir to combine. The mixture will become firm.
  4. Spread into an 8 by 8-inch pan lined with buttered parchment paper.
  5. Cover and refrigerate for at least 2 hours.
  6. Cut into cubes.
Signature

A little birdy…

“For it is God who works in you to will and to act according to his good purpose.”

~Philippians 2:13

Last night, while I was at a Christmas ornament exchange, I got to talk to this sweet sister in Christ, Carol, about a non-profit ministry her and her husband started this year. It’s called A Little Birdy...

“What breaks your heart?”

A family you know who will not have enough groceries this week?

A child who’s terminally ill?

A working man who’s car recently broke down and does not have the money to fix it?

Whatever the situation, this website was designed for those who see or have needs to be a “birdy” and let the site know by filling out an online application. The story will be posted, then advertised by social media to those who may have the means to fill that need…. 90% of the money donated is given to the person in need {the 10% is used to keep the site running}. That is a big deal to me...

A video of a recent blessing….


If you know someone who has a need…this is a great resource. Please let them know!

Or…If you feel led to filling one of the needs listed on this website…God Bless YOU!

I was so touched by Carol last night, that I had to take an opportunity to share this on the Comfy blog. The look she had on her face when she shared how much money has come in to help those in need was the best part of my night…God’s work never ceases to amaze me. THIS is such a great example of faith and action!!!

God Bless you Carol and your ministry!!!

You can like A Little Birdy on Facebook too! You never know when you can be a little birdy or perhaps feel led to fill a need that will change someone’s life!


Signature

Loaded Italian Rice- A Quick GF Meal Idea!

A fellow mom and I were chatting at birthday party not to long ago and would you believe she was also a fellow glutenous minimus warrior!? lol!

So, we did what all glutenous minimus people do and talked about all the foods we COULD eat, ha!

She was so sweet to share this easy idea-I’ve made it a ton of times! It’s great for those busy weeknights. Enjoy!

*Kid friendly! Wohoo!

Loaded Italian Rice- A Quick GF Meal Idea!

Prep time:
Cook time:
Total time:
Serves: 4-6
Ingredients
  • Brown Rice {per package instructions}
  • 1 jar of marinara {I recommend Newman’s Own- or thaw out frozen homemade sauce}
  • 1.5 lbs browned and drained lean ground beef
  • 1 cup freshly shredded mozzarella cheese
  • Italian spices
  • Parmesan cheese for dusting
Instructions
  1. Cook rice per package instructions.
  2. Place 1 cup of cooked rice in an individual serving bowl.
  3. Pour warmed marinara over top.
  4. Add browned and drained beef
  5. Cheeses and spices to the top!
Notes

You can add ANY ingredients to the top of your dish…try veggies, and/or different kinds of meats/cheeses! Make it your own and enjoy!

Signature

Rhodes Rolls

I get asked all the time for my “refrigerator roll” recipe. Well, Ladies- I hope I’m not disappointing you, but I use Rhodes dough! I tend to spend most of my time on the main meal I’m making and less time on salads and rolls. Please don’t under estimate how delicious these are though…I honestly can’t make them from scratch any better than they taste!

Rhodes freezes individual dough balls {I actually use 2 dough balls per roll}. A bag like this can be found in your grocer’s freezer… It’s nice because you can use as many or as few as you like and have freshly baked rolls at any time!

Spray tins with Pam and place 2 rolls in each tin like so. Spray the tops of rolls.

Cover.

Refrigerate overnight.

If rolls have not risen enough when you’re ready to bake…let them sit out on the counter covered in plastic wrap for another hour-they will rise.


Bake in a 350 oven for 15 mins or until golden brown. Ahhh…. one of my favorite {glutenous maximus} smells. These rolls are simple to open … dot with real butter and jelly and enjoy! MMMmmmmm!!!!!

Rhodes Rolls

Prep time:
Cook time:
Total time:
Serves: 12
Ingredients
  • Rhodes frozen roll dough
  • muffin tin
  • Pam spray
Instructions
  1. Spray a muffin tin with Pam.
  2. Take 24 rolls out of bag of dough. Place 2 balls in each muffin tin.
  3. Spray tops with Pam, cover with plastic wrap and refrigerate overnight.
  4. If dough hasn’t risen enough when you’re ready to bake, let covered rolls sit out on counter for an extra hour.
  5. Preheat oven to 350 and bake for 15 mins until golden brown.


Signature

Classic Christmas Cookie Recipes @ The Better Mom!


One of the reasons I have this blog is for my children and their future spouses. I want to leave a legacy of homemaking, cooking, and sweet memories of us together. Oh, I hope they’ll remember the times we made these cookies during the Christmas season… and someday they’ll be able to make them with their children and grandchildren…Ahh, how time will fly, I’m sure. 

Light a fire, turn on your christmas lights, grab a glass of milk and come join me over at The Better Mom for these Classic Christmas Cookie recipes that will be sure to put you in the Christmas Spirit.

Signature

{My Favorite} Edible Homemade Gift Ideas for Christmas!


Snowman hot cocoa’s

3 baby food jars cleaned, dried, and filled with peppermints, hot cocoa, and marshmallows. Felt hats, buttons, eyes, mouths and noses. Fabric scarves.

I don’t know about you…but I feel blessed more than words can say. ALL of my “needs” are taken care of. Truly- I do not “need” anything for Christmas. I have my faith, health, a home, a swagger wagon, 3 beautiful children, a husband who adores me, awesome friends….I have more than I deserve. Sure, I have major challenges and am often times in the midst of some sort of storm-but honestly, my Faith anchors me and reminds me how much I have in store….that’s the big picture…that’s THE gift, rather…HE is the gift! 

I have a hunch a lot of people reading feel this way- isn’t that something.

Don’t we sometimes get caught up in it all? The shopping, the money, the hoopla and jazz of it?Why?

How do you feel about making a homemade gift? How do you feel about receiving a homemade gift? Are our hearts and minds set on material things? Do we miss out on what is really important…Loving God and loving others {Luke 10:27}?

So many of us feel like giving homemade gifts aren’t “enough”…but once you set your eyes on these adorable mini masterpieces, you may change your mind! What sweet, and thoughtful gifts these are!

***ALL of these are naturally Gluten FREE!***

Christmas Cookie Dough. All ready to go in the freezer.

Christmas Cookie Dough- To GO!

Think Garnish has a lot of great packaging ideas! Simply make a batch of perfect chocolate chip cookie dough and garnish it like so! They will have freshly home baked cookies whenever they wish! Ahhhdorable.

hostess gift: salsa! printables

Feliz Navidad!

Not a baker? No worries! Make homemade salsa–  Certain grocery stores also sell the most adorable red and green chips this time of year. Super cute!

Bake Brownies Right In The Cookie Cutters, Decorate And Give Away As Gifts, Sweet Christmas Gift Idea. Great Idea For Bake Sale.

Sweet Tooth Ornaments! 

Bake brownies or pour fudge right into inexpensive cookie cutters {do not remove, the cookie cutter is part of the gift} Decorate with candies. Finish by wrapping in a small plastic bag {Jo-anns has these} and garnish with a bow!

homemade christmas gifts - Google Search 

Sweet Treats

Who doesn’t like Puppy Chow?!!! Add some green and red M&Ms for a festive twist! Fill up mini milk jars {you can also clean and reuse Starbucks glass containers}, add some flare and a tag- Voila!

Have FUN!!! 

Signature

Homemade Cinnamon Rolls -A Christmas Morning Tradition

Ohhhh Dear…would you look at this. THIS is pure torture for a gluten-free gal. I just can’t think of anything I would rather sink my teeth in, Ladies! Ha! It’s the yeasty, gooey, warm, cream cheesy, cinnamony combination that can send a GF girl like me over the edge…lol. 

On Facebook this week, I asked you to share some of your family Christmas traditions. What a great responses you gave! I’m going to have to steal some of those ideas!  These cinnamon rolls have been on the menu since as long as I can remember. In fact, my mom used to make cinnamon rolls on Christmas morning when I was a little girl.

So, even though I cannot partake in the “eating of the rolls” I still enjoy making them for my family…a very special treat for the special people in my life. 

Don’t be intimidated -these are not hard to make! By preparing the dough the night before and sticking them in the refrigerator saves tons of time in the morning. Just pop em in the oven and voila! Freshly baked cinnamon rolls!

This recipe comes from one of my favorite Chefs…Alton Brown… Love his cooking.  

4 large egg yolks and 1 large whole egg….room temperature. I placed cold eggs in a bowl of luke warm water to get them to room temp. 

Beat together sugar, butter, and “buttermilk” {I used regular milk and added 1/2 tsp of white vinegar}

Add 1 package of instant dry yeast and salt. Oh, would you look at that…gluten free. Bahaaa!!!!!! 

Also add in 2 cups of flour and beat until combined. 

Add all but 3/4 cup of the remaining flour and knead. You can use a mixer attachment or your good ole fashioned hands on a floured surface. Just push forward and roll back until combined.

Roll dough into a ball and place in an oiled bowl. Oil the top of the dough and cover with plastic wrap and let sit to rise for 2 hours. It will double in size.

On a floured work surface, roll out dough into a horizontal rectangle. Make your cinnamon filling but combining brown sugar, cinnamon and salt in a medium bowl. Brush dough with butter everywhere but the outer edges. Sprinkle filling onto of dough.  

Flour your hands and slowly roll up into a cylinder. Even thicker parts by squeezing with your hands.

Slice with a serrated knife into 1 1/2 inch rolls. 

Place cut side down in a buttered 9×13. Cover and refrigerate overnight.

Remove rolls from the refrigerator and place in your oven {don’t turn your oven on}. Place a bowl of boiling water on the rack below. Close the door and let those rolls rise for 30 mins. Remove the rolls and the bowl of water. Pre-heat oven to 350. Bake for 30 mins until golden. Ahhhh…. 

Start making your frosting by combining cream cheese, milk, and powdered sugar. Beat well until nice and creamy. Guess what? I can eat frosting, it’s gluten free….If I remember correctly, I think I fought a child to lick one of those beaters! hahaha…

Spoon on frosting when the rolls are still nice and hot. 

Then it melts…perfectly…over the rolls… 

Enjoy with your families this Christmas morning and for many Christmas mornings to come…

{My dining room table adorned with Easy Ham and Cheesy Quiche, Soft Sugar Cookies, Linzers, Cut outs, Cracker Toffee, Sausage Gravy over Biscuits, hashbowns, bacon, and fruit salad.


Homemade Cinnamon Rolls

Author: Alton Brown
Prep time:
Cook time:
Total time:
Serves: 12
Ingredients
  • Dough:
  • 4 large egg yolks, room temperature
  • 1 large whole egg, room temperature
  • 1/4 cup sugar
  • 6 Tbsp butter, melted
  • 3/4 cup buttermilk, room temperature {you can also use regular milk and add 1/2 tsp of vinegar OR lemon juice to your milk}
  • 4 cups all-purpose flour,plus additional for dusting
  • 1 package instant dry yeast, approximately 2 1/4 teaspoons
  • 1 1/4 teaspoons salt
  • Vegetable oil or cooking spray
  • Filling:
  • 1 cup packed light brown sugar, approximately
  • 1 tablespoon ground cinnamon
  • Pinch salt
  • 1 1/2 Tbsp unsalted butter, melted
  • Icing:
  • 1/4 cup cream cheese, softened
  • 3 tablespoons milk
  • 1 1/2 cups powdered sugar
Instructions
  1. For the dough: Beat together the egg yolks, whole egg, sugar, butter, and buttermilk.
  2. Add approximately 2 cups of the flour along with the yeast and salt; beat until moistened and combined.
  3. Add all but 3/4 cup of the remaining flour and knead on low speed for 5 minutes-you can do this with your hands or if you are using a stand up mixer, change to a dough hook.
  4. Knead on low speed 5 minutes more or until the dough clears the sides of the bowl. Turn the dough out onto a lightly floured work surface; knead by hand about 30 seconds.
  5. Lightly oil a large bowl.
  6. Transfer the dough to the bowl, lightly oil the top of the dough, cover and let double in volume, 2 to 2 1/2 hours.
  7. Combine the brown sugar, cinnamon and salt in a medium bowl.
  8. Mix until well incorporated. Set aside until ready to use.
  9. Butter a 9 by 13-inch glass baking dish.
  10. Turn the dough out onto a lightly floured work surface.
  11. Gently shape the dough into a rectangle with the long side nearest you.
  12. Roll into an 18 by 12-inch rectangle.
  13. Brush the dough with the 3/4-ounce of melted butter, leaving 1/2-inch border along the top edge.
  14. Sprinkle the filling mixture over the dough, leaving a 3/4-inch border along the top edge; gently press the filling into the dough.
  15. Beginning with the long edge nearest you, roll the dough into a tight cylinder.
  16. Firmly pinch the seam to seal and roll the cylinder seam side down. Very gently squeeze the cylinder to create even thickness.
  17. Using a serrated knife, slice the cylinder into 1 1/2-inch rolls; yielding 12 rolls. Arrange rolls cut side down in the baking dish; cover tightly with plastic wrap and store in the refrigerator overnight or up to 16 hours.
  18. Remove the rolls from the refrigerator and place in an oven that is turned off.
  19. Fill a shallow pan or bowl 2/3-full of boiling water and set on the rack below the rolls. Close the oven door and let the rolls rise until they look slightly puffy; approximately 30 minutes.
  20. Remove the rolls and the shallow pan of water from the oven.
  21. Preheat the oven to 350 degrees F.
  22. When the oven is ready, place the rolls on the middle rack and bake until golden brown, or until the internal temperature reaches 190 degrees F on an instant-read thermometer, approximately 30 minutes.
  23. While the rolls are cooling slightly, make the icing by whisking the cream cheese in the bowl of a stand mixer until creamy.
  24. Add the milk and whisk until combined.
  25. Sift in the powdered sugar, and whisk until smooth.
  26. Spread over the rolls and serve immediately.
Signature

Adorable Snowman Cupcakes

To think with just a few ingredients you can turn ordinary cupcakes into….drum roll please….the most adorable little snowman cupcakes you ever did see! I had such a fun time making these with my children’s classmates. These would make adorable gifts in tins, a family craft, or as pictured~ for a child’s class Christmas party.

**Inspiration from Taste of Home** I revised how to make the top hat to make it easier for little hands.

My little girl…she loves crafts!

What a blessing it was to spend this time with her and her classmates.

So sweet!


Here are the simple instructions…


Signature

Beautiful Christmas Truffles {{Easy}}

These are incredibly easy, yet elegant treats to make for the holidays. If you are not a baker -these are perfect. If you are a baker- add them to your cookie tray for a chocolaty treat. You are going to love these melt-in-your mouth beauties!

I made these very truffles for my husband’s clients.  

Featured on Women Living Well.

Heat cream and butter on medium high heat  while stirring. Do this until until slightly boiling. Let simmer for 2 mins.

Remove pan from heat and add vanilla, candy bars and semisweet chocolate.

Stir until smooth. Then, place plastic wrap on top and refrigerate 4 hours or over night.

The chocolate hardens, but is still soft because of the butter and cream.

Roll about a tsp of chocolate into a ball with your hands. Then, roll again in chopped almonds.


Place in small paper cups. I purchased these ones from Jo-Ann fabrics, they were “Martha Stewart” brand in teal and a beautiful red color. I  used teal here to match the colors of our business for gift giving to clients.

Here they are on a cookie tray..YUM! These are always the first ones gone, lol! (and they are the easiest to make- go figure!)

This is one of the boxes I used to package the truffles and cookies in for our clients- The box was purchased at Marcs for 99 cents, the ornament was also purchased at Marcs (50 cents) toile was purchased at Jo-Anns -whala! Fancy yet affordable! I like those qualities! lol.

Marcs did not have enough of those beautiful boxes, so I bought some additional paper boxes at Jo-ann’s – I purchased some paper doilies to make the window look more like a snowflake and added toile and a some flare (that is probably for a wreath?) but it looked elegant and again…was affordable.

Christmas Truffles

Prep time:
Cook time:
Total time:
Serves: 30
Ingredients
  • 3/4 cup heaving whipping cream
  • 1 Tbsp butter
  • 1/2 tsp vanilla
  • 6 Hershey’s milk chocolate candy bars (broken)
  • 6 oz Ghiradelli semi-sweet chocolate chips
  • 1 cup processed almonds
  • Tins and flare (optional)
Instructions
  1. In a medium saucepan constantly stir cream and butter over medium high heat.
  2. Let simmer for 2 mins then take off of burner.
  3. Add vanilla, candy bars, and semisweet chocolate and stir until smooth.
  4. Place plastic wrap on top of chocolate’s surface and refrigerate 4 hours or over night.
  5. When chocolate has hardened roll by the teaspoon into small balls and roll into processed almonds.
  6. Place in small paper cups if desired.
Notes

These make beautiful Christmas gifts!


Signature

Mystery Vacation for Comfy


Hi Ladies! I am on a “Mystery Vacation” this week….can anyone guess where I’m at??? I’ll be back to tell you all about it!

Signature

Give Thanks in ALL Circumstances.

“Give thanks in all circumstances, for this is God’s will for you in Christ Jesus.”
1 Thessalonians 5:18

Oh this video. I cry every time I watch it . It literally stops me in my tracks and humbles me to my knees. Just Watch and you’ll see what I mean…

*This was shown during our church service last Sunday. Oh, how I love that church.

So, the other day:

I walked into my son’s room and stepped on a Lego. OWCH! Those things hurt! After my first reaction of “displeased” passed, I sat in my “Thanksgiving chair” for just a moment…”Lord, you have blessed me and my family with so much that I am literally tripping over things..I’m so grateful.”

The alarm rang at 6 am in the morning. Ugh. Mornings!!! I’m so comfortable right now, I don’t want to get out of bed!!! It seriously cannot be time to get up right now-it’s dark! The kids will fight me, the furry begins… I then looked over at my sleeping husband, got out of bed, and sat in my “Thanksgiving Chair”. “Lord, my husband works hard to support our family, I get to stay at home, my children get to go to a Christian school, my body is healthy…I am SO grateful.

I was thinking about how the Holidays have changed in my family…loved ones have moved, divorce has effected us, deaths…things aren’t the same anymore. Then, I sat in my “Thanksgiving Chair”…”God you have given me some great memories to look back on, and some amazing people to share my life with now. But most importantly, you gave me your Son Jesus Christ. I’m eternally grateful. I don’t even know how blessed I am.

How many times can you sit in the Thanksgiving Chair today? Try it…I dare ya 😉

Happy Thanksgiving Everyone!!!!

Signature

Back in Time Day {A Room Mom Day}


Hi Ladies, I just wanted to share with you one of my “room mom” days at my son’s school. The theme was “Back in Time Day” …the teachers did such an excellent job putting this all together. The children had the opportunity to make homemade applesauce using old fashioned apple peelers, to grind corn into meal, to make home decorations using corn stalks, to wash pennies, and so much more!

What a blessing it was to be part of this! I learned every bit as much as my son did! Ahhhh….I have to say, it was so nice to get back to basics for just a day.


Making homemade butter and applesauce!

That peeler worked great!!!! Wow!

Freshly ground corn meal.

The beloved game of checkers….

They didn’t always have washers and driers, kidos!

Hanging up clothes

Children brought in “old fashioned” items from their grandparents homes…a beautiful buffet of antique nicknacks!

Shinning up those pennies!
Prettiest pennies I ever did see 😉
This was neat- the children would literally “blab” out answers! They had a ton of fun at this station!


And most importantly, they learned how this great nation was built on The Rock ….The Word of our Lord.

Thanks for letting me share one of my day’s with you, Ladies! Have a blessed Thanksgiving!!!!

Signature

A Thanksgiving Potluck at Take them a Meal!

5 Scrumptious Thanksgiving Potluck Recipes, from Comfy in the Kitchen

Hostessing Thanksgiving can be very stressful- the grocery shopping, cleaning, meal planning, cooking, baking, financial stress-just all of it added up can leave us feeling quite exhausted. Ladies, this really shouldn’t be. I am asking you to accept help this year. Please join me over one of my favorite websites Take Them a Meal where I’m sharing ideas on how to create the perfect potluck for your Thanksgiving meal. You don’t have to do it on your own!! Drop the guilt and enjoy this time with your family!!!

Take Them A Meal


***Don’t forget about The Perfect Potluck website- it makes planning a potluck SO EASY!!!!***

Signature

Noodle Art at The Better Mom

“Children need the freedom and time to play. Play is not a luxury, play is a necessity.” ~Kay Jamison, Clinical Psychiatrist


As the cold winter days quickly approach us, this fun and easy craft I’m sharing on The Better Mom will be sure to keep your little ones busy. Just 4 simple ingredients that you already have in your very own kitchen and you are set for some Comfy FUN!!!!

Speaking of fun…please have lots of it. This life is way too short and those children grow up way too quickly to pass it up. ;)

TheBetterMom.com

Signature

Butternut Squash Pizza {Allergy Friendly and SO yummy!}


I’m currently doing the “Butter Churn Dance” for this “Butternut Squash Pizza”!!! On my GF journey this year, I have had quite a few GF pizzas but I have to say….this is up there with one of my FAVORITES. The most awesome thing about it? You don’t have to “make” a crazy concoction of different flours- you just cut a veggie and roast it! Now, that’s what I call “Comfy”. The aglio e olio sauce gives the “crust” a delicious flavor. Mmmmm….boy, was I pleasantly surprised by this one.

* I got this idea from my friend Andy who posted it to FB- this is where he got it: Empowered Sustenance- her version is a bit healthier if you want to take a gander!
Start by preheating your oven to 400. Lay out parchment paper on a large cookie sheet. Then, peel your Butternut Squash. I recommend finding a squash that has a long “stem” because that will serve as your mini pizza crusts.

Slice 1/4 of an inch slices. Resist the urge to make them thicker….it will be mooshy. Thiner slices will give you a nice crispy crust.

Make the aglio e olio by placing in a bowl 1/2 stick of butter, 1 Tbsp of olive oil, 2 cloves of freshly minced garlic, 1/2 tsp of oregano and 1/2 tsp of salt. Microwave for 1 min.

It’s already smelling goooooood!!!!

Spoon a little of the aglio e oilio on each mini pizza crust.

Roast in your 400 oven for 20 mins on one side- flip- then another 20 mins. So, 40 mins total or until nicely browned.

Get your toppings ready! Here I have freshly shredded mozzarella cheese, olives, pizza sauce, pepperoni and parmesan cheese.

Add your toppings as desired and bake for another 4-5 mins until cheese is melted. I am SO pleased with this recipe!!! For all my GF friends out there- this is a must make!

Butternut Squash Pizza {Allergy Friendly and SO yummy!}
Prep time: 10 mins
Cook time: 45 mins
Total time: 55 mins
Serves: 4-6
Ingredients
  • 1 large butternut squash with a long stem {peeled}
  • 1/2 stick of butter
  • 1 Tbsp Olive Oil
  • 1 cloves garlic minced
  • 1/2 tsp oregano
  • 1/2 tsp salt
  • toppings as desired {I used mozzarella cheese, pre made pizza sauce, olives, pepperoni, and parmesan cheese}
Instructions
  1. Preheat oven to 400 and lay out parchment paper on a large cookie sheet. Your butternut squash may make enough for 2 cookie sheets.
  2. Peel butternut squash.
  3. Slice the stem into 1/4 inch slices and lay on covered cookie sheet.
  4. Make your aglio e olio by melting butter, oil, garlic, oregano and salt together in the microwave for about 1 min.
  5. Spoon butter mixture over top of mini crusts.
  6. Roast for 20 mins, flip and roast another 20 mins until nicely browned. 40 mins total.
  7. Top with your favorite toppings and bake another 5 mins until cheese is melted. Enjoy!
Signature

The Perfect Roasted Thanksgiving Turkey {Herbs and Citrus}

Hi Ladies! Thanksgiving is in 10 days! The countdown begins now! Wohoo!

I’m over at Candace Cameron Bure’s Roomag this morning sharing one of my favorite ways to roast a Turkey. This recipe comes from Giada de Laurentiis from The Food Network.

{She is Coooooomfy!}

Here are a couple photos from this weekend….I made a mini Thanksgiving meal for my In-laws…such great evening!

The herb butter gives a great flavor and nicely browns the skin. Stuffing the bird with citrus gives it a delicious mildly sweet flavor.

Winner, Winner…..Turkey Dinner.

Signature

Cranberry Sauce

Cranberry sauce is a deliciously sweet and tangy addition to a Thanksgiving Meal. Here is a simple recipe that I am sure you and your family will enjoy this Holiday season.

Place 3/4 of your fresh or frozen cranberries in a medium saucepan {reserve 1/4 to the side}. Turn heat on medium heat. Then, add orange zest by simply grating the peel right over your cranberries. This gives the sauce a stronger “citrusy” flavor.

Add water sugar and cinnamon – let simmer for about 15 mins {stirring frequently} until cranberries start to open and liquify. Add your reserved cranberries and stir. You’ll have a delicious flavor and a mix of textures.


*Bonnie this was delicious last Thanksgiving!!!


Cranberry Sauce
Prep time: 5 mins
Cook time: 20 mins
Total time: 25 mins
Serves: 10
Ingredients
  • 12 oz bag fresh or frozen cranberries {3/4 of them place in sauce pan, reserve 1/4 of them for the end}
  • 1 cup sugar
  • 1 tsp orange zest {grated orange peel- you can use the small side of your cheese grater if you don’t have a zester}
  • 2 Tbsp water
  • Juice from 1/2 an orange {appx 2 Tbsp}
  • 1/2 tsp cinnamon
Instructions
  1. Place 3/4 of your cranberries in a medium sauce pan. Set your other 1/4 to the side in a bowl for later.
  2. Add 1 cup sugar, 1 tsp orange zest, 2 tablespoons water, orange juice, and cinnamon to the pan and cook over medium heat for about 15 mins. Stir frequently. Cranberries will start to turn into a sauce.
  3. Add your reserved cranberries into the sauce and stir.
Signature

Featured Recipe

Gobble, Gobble…its November Ladies! I can’t believe Thanksgiving is JUST around the corner! My dear friend Courtney, from Women Living Well is Featuring these ADORABLE Turkey Pops courtesy of my other sweet friends Shannon and Katina! Have fun making these {and gobbling them up} with your kidos this month! 

I also want to encourage you {while you are there} to take a look at Courtney’s FALL CHALLENGE! Ladies, don’t think for one second that your jobs at home are not important…being the “Matriarch” of the family is such an honor and blessing. Your “touch” on your family is invaluable and I am so THANKFUL for all of you who want to give yourself to serving God and your families. You are raising the next generation! Bless you! Bless you! Bless you!  

Signature

Homemade Fruit Dip

{My Dad’s wife made this for me last Thanksgiving! Thanks Bonnie!}

Ohhh Boy, the holidays are creeping up on us…Ladies, can you believe Thursday is NOVEMBER 1st?!!!

I wanted to share this simple recipe because 1. It’s yummy 2. It’s easy 3. It’s healthier than other appetizers/desserts and 4. It’s allergy friendly!

You may have seen this delicious concoction on Women Living Well…my sweet friend Courtney makes the same Fruit Dip! High Five Girlie!!!! There’s no doubt that great minds think alike…bahaaa!

This is a delicious recipe for all to enjoy. Especially if you, a family member, or a friend have allergies to wheat. When others are enjoying pies and cakes it will mean SO much to have something to enjoy that’s allergy friendly. Enjoy!

Homemade Fruit Dip
Prep time: 5 mins
Total time: 5 mins
Serves: 10
Ingredients
  • 8 ounce package cream cheese, softened
  • 7 ounce jar marshmallow creme
  • 1/2 teaspoon vanilla
  • Sliced and rinsed fruit {strawberries, grapes, oranges, melon, blueberries, etc}
Instructions
  1. Beat cream cheese with mixer until fluffy.
  2. Add marshmallow creme and vanilla-mix until well incorporated.
Notes

You may wish to add food coloring {my mother in law adds strawberries to hers with a little red food coloring-pretty!}

Signature

Spiced Pumpkin Dip with Roasted Marshmallow Topping

I posted last night that I had some Pumpkin Dip baking in the oven. Well, like a true blogger- I took photos 😉 Here is the recipe! I cut up apples for dipping. You can also use graham cracker dippers or buy pre-made pie crust {or make your own} to cut into dippers.

*This is a natural food allergy friendly treat. 

Beat cream cheese until fluffy- This is an important step to getting a smooth texture. 

Grab a child and put him to work. Did I just write that? Bahaa! Eh hem…Add pumpkin puree, brown sugar, pumpkin pie spice and marshmallows. {This son of mine is going to make one fine husband one day btw} 

Sprinkle with chopped nuts {I used chopped peanuts- can you believe the price of pecans these days?!} 

The best part…

Bake in a 350 oven covered for 20 mins, then take off foil and broil on low for 2 mins to roast the marshmallows. 

Tasty!!!! Mmmmmm…. 


Spiced Pumpkin Dip with Roasted Marshmallow Topping
Prep time: 5 mins
Cook time: 22 mins
Total time: 27 mins
Serves: 6
Recipe adapted from “Festive Family Gatherings” Daymaker
Ingredients
  • 4 oz cream cheese
  • 15 oz plain pumpkin puree
  • 1/4 cup brown sugar
  • 2 tsp pumpkin pie spice
  • 1 cup marshmallows divided in half
  • 1/2 cup chopped nuts
Instructions
  1. Beat cream cheese until fluffy.
  2. Add puree, brown sugar, pumpkin pie spice, 1/2 cup marshmallows and beat on low speed.
  3. Top with nuts and a layer of marshmallows
  4. Cover and bake in a 350 oven for 20 mins. Lift off cover and broil on low for 2 mins.
  5. Serve with sliced apples graham crackers or crust dippers.


Signature

Slow Cooker Baked Beans {a Family recipe!}

Would you believe out of all the recipes on my side bar…THIS recipe is one of my absolute favorites?

You know how when you go to a family pot luck each family member generally brings their “staple dish”? In our family, this is Aunt Shirley’s “dish”. I LOVE these beans! {stop laughing at me and singing that silly bean song in your head, I know you’re thinking it! LOL!}

In all seriousness…these beans are simple to make, sweet, savory, filling, naturally allergy friendly and ohhhh so good. I literally make them my meal, I love them that much! 

For a delicious Autumn side dish, make sure to pin these to your favorites! Thanks for the recipe Aunt Shirley! 

Brown 6 slices of bacon in a skillet on medium heat.

Drain on paper towel. Reserve renderings {bacon fat} in your skillet. 

Slice one large onion and sautee in bacon renderings on medium-high heat.

In the meantime, turn your crockpot onto the high 4 hours setting and add brown sugar, mustard, garlic powder, salt and cider vinegar.

Drain Great Northern beans, Red Kidney beans, and Butter beans. 

Add everything to crockpot. Onions with drippings, pork and beans, drained beans, and bacon {crumbled a bit}. Stir well, cover and cook for 4 hours. 

These are goooooood. Mmm, Mmm, Mmmm!!!


Slow Cooker Baked Beans {a Family recipe!}
Prep time: 20 mins
Cook time: 4 hours
Total time: 4 hours 20 mins
Serves: 20
Ingredients
  • 6 slices bacon
  • 1 large onion cut into rings
  • 1 cup packed brown sugar
  • 1 tsp mustard
  • 1/2 tsp garlic powder
  • 1 tsp salt
  • 1/2 cup cider vinegar
  • 2-15 oz cans Great Northern Beans, drained
  • 1-16oz can Butter Beans, drained
  • 1-16oz can dark red kidney beans, drained
  • 1-28 oz can Pork and Beans
Instructions
  1. Brown bacon until crisp and place on a towel lined plate. Crumble.
  2. Slice onion and sautee in the bacon renderings.
  3. Turn crockpot onto high 4 hours and add brown sugar, mustard, garlic powder, salt, and cider vinegar. Stir well.
  4. Drain Great Northern, Butter and Kidney beans, add them to the pot.
  5. Add pork and beans to the pot.
  6. Add the onions with renderings to the pot.
  7. Stir, cover and bake 4 hours.
Signature

My Gluten-Free Story on Roomag

Is it all in my head? This persistent shortness of breath, migraines, forgetfulness….everything my doctor has tested me for has been fine….what is wrong with me?!!! 

Come join me at Candace Cameron Bure’s Roomag today where I share the journey that led me to a gluten-free life-style. I pray that my story might help some of my readers who could be suffering from the same symptoms I was.


*Please note: For those individuals who are not gluten intolerant {a simple blood test can rule this out}, moderation is typically just fine. For this very reason, I do still incorporate gluten into my recipes. I personally cannot eat gluten in moderation because the side effects are so uncomfortable for me. 

Roo Mag

Signature

Guest Post on WLW

Happy Friday Everyone!

Many of you have been so sweet to e-mail me and ask about my hubby. He is healing up just fine! He’s going to Physical Therapy throughout the week and doing his exercises at home. In just a few weeks, he will be driving again {PTL!!!!!}. Right now, he’s still in a walking boot… But, it definitely beats the cast and crutches 🙂 A small price to pay for all the fun he had being a baseball catcher for HS and KSU, right honey???? Bahaa!


Moving along..

My very dear friend Courtney from Women Living Well is featuring my Lasagna for a Crowd! Ohhhh what a blessing this day was for me, cooking for the new members at the church! You won’t  want to miss “me in a hairnet” lol!

{Courtney’s sister is one of the beautiful girls serving punch at this event!} 


Signature

Contributor Day- What a Blessing!

Ohhh Ladies, what a special day. I have 3 posts I want to share on 3 different websites…all that are very, very, {did I say very?} dear to me. I hope you’ll visit me on these posts….

I’m visiting Sally Clarkson on I Take Joy and bringing her some homemade cinnamon chip scones! I can’t begin to describe what a blessing this is to me…

One of the first bible studies I attended was in my mentor Julie’s home. We were reading Dancing With My Father by Sally …at the end of one of our evenings together, Julie told us to write down www.itakejoy.com and visit it for “mothering” encouragement. I jotted it down and visited it weekly. I got so much encouragement from Sally through her gentle spirit and genuine love for mothers. Through her written words…she reminded me how important motherhood is and what a blessing the Matriarch of the family is. 

At that time I would have never imagined guest posting on I Take Joy…I wasn’t even a blogger at that time!  But, Ladies….this is how God works. He speaks to us individually and in such meaningful ways. What a very small world with such a BIG God.

{Courtney, Sally, and Me at The Relevant Conference last year- now Allume}

Sally has a NEW book written with Sara Mae! Desperate “Hope for the Mom who needs to breathe” I can’t wait to read it!  

You can also visit Sally on her other blog Mom Heart. I think you’ll see some sweet familiar faces under the author button.

Speaking of familiar faces!!!! I am also visiting my sweet friend Ruth at The Better Mom!

Come get the recipe for these delicious, easy, and allergy friendly Cornflake Bars! Just 4 ingredients! My children {and I} LOVE these!!!!  

An excellent snack for on the go!

Speaking of on the go…..

Baked Caramel Apples

I am so blessed to be a small part of “Take them a Meal” this week. It is my ABSOLUTE FAVORITE website/blog for Meal Ministry. I can’t tell you how many meals I have signed up to take through this amazing website. Adina did such a great job making these Baked Caramel Apples that are in my FREE {no strings attached} Thanksgiving E-book

Free Thanksgiving eCookbook 

A sister site of Take them a Meal is Perfect Potluck– this is the Perfect time to get acquainted with this site….it will make Holiday planning SOOOO easy! What a nifty idea!

I encourage you to add “Take them a Meal” to your Pinterest– they have some GREAT meal ideas on there!!! I’m always so impressed with them…

Signature

Rainbow Birthday Cake

My “Baby” had her 4th birthday party with some of her little friends over the weekend. When I asked what she would like her theme to be…she yelled “RAINBOW!” Ok girlie…rainbow it is 🙂 I’m not the most “creative” genius there is {remember, I am “comfy” NOT “creative”)…but I have a willing heart, so I scoured Pinterest for some inspiration.

I truly enjoyed making this special cake for her and thought to share with you. It was a “piece of cake” hehe! For those of you intimidated of making double layer cakes– please don’t be. Again…I am not a baker- just a normal gal. If I can do it, so can you!

There IS something special about a homemade birthday cake, isn’t there? This was one very special cake indeed. The kids LOVED the outside of the cake- then I told them there was a surprise on the inside too…you should have seen their faces. Adorable.

This is where I got my inspiration: The Idea Room and Omnomicon

The ingredients: 2 WHITE cake mixes, 2 fluffy white tubs of frosting, 2 cake pans {with liners}, gel food coloring {this stuff is vibrant!}, skittles and marshmallows.  

Make cakes separately in two bowls. This will insure them being even with one another. Follow package instructions. 

Gather up 3 bowls. For the first cake I went in rainbow order. There will be 3 cups of batter per cake. Put 1 cup of batter in each bowl- red, orange and yellow. You will have to mix the red and yellow to make orange. There is no special amount I used- I just squirted in there like so. 

Stir well. Do this again with blue, green and purple {mixing the red and blue together}. 

Line your cake pans with wax paper liner, spray with Pam {or butter}, then pour the red in, on top of that pour the orange then the yellow. It will flatten out like so. 

Pretty neat! 

Bake 30 mins in a 350 oven.

Cool on wire rack until completely cool- if your cakes are still warm, they may crack during this next step!

Frost in the middle then place the other cake on top and frost all over. 

Use Skittles to make a rainbow and to decorate the sides. Use marshmallows for clouds. This was SO easy- and {I thought} it was super adorable. 

I found some cute candles at the grocery store- yea! I didn’t have to draw anything on the cake, lol! 

Happy Birthday Munchkin!!!!! 

Surprise inside! Wohoo! Oh and yes….that is “superman” ice cream. I just could not resist.

One FUN cake!!! I would make this again in a heartbeat…just adorable!!!! 

I had a lot of fun decorating the house for her party.

But again, you aren’t going to see anything fancy with me…. that isn’t my strength. I think us ladies can sometimes get overwhelmed with all of the talent out there on Pinterest {esp with party planning}. For those ladies who are super talented- that is awesome! But for those of us who have different talents, we shouldn’t be intimidated 🙂 If we have a heart for opening up our homes -that is the most important thing. No one comes to see your home anyways {unless its up for sale!}, they come to see the people

Another thing I don’t get all excited about? Messes. I popped up a table in the garage and we had some good old fashioned kid fun. That garage was covered in glue and fruit loops by the end of the night ….Oh well?! The kids had fun! It can all be cleaned up. Let em be kids. 🙂


Rainbow Birthday Cake
Prep time: 60 mins
Cook time: 30 mins
Total time: 1 hour 30 mins
Serves: 20
Ingredients
  • 2 white boxed cakes {with ingredients on package directions}
  • Food coloring gel
  • 2 jars fluffy white frosting
  • 1 large bag skittles
  • 2 handfuls of marshmallows
  • 2 cake pans
  • waxed paper liner and Pam spray
Instructions
  1. Make cakes in 2 separate bowls according to package instructions.
  2. you will need 6 bowls with 1 cup of cake batter per bowl. Make your desired colors. I made cake #1 with red, orange and yellow. Cake #2 with blue, green and purple.
  3. Trace the outside of your cake pan onto waxed paper liner and cut to fit your cake pan. Place liner in cake pan and spray with Pam or butter. These cakes will not stick!!!
  4. Pour each color of batter on top of one another like picture above.
  5. Bake in a 350 oven for 30 mins or until center is baked through.
  6. Take pans out of the oven and set directly on a wire rack.
  7. When completely cool turn over first cake.
  8. Frost top. Then turn second cake on top of first cake.
  9. Frost the top and sides.
  10. Make a rainbow pattern using Skittles. Place Skittles along the edge and finish with marshmallow clouds.
Signature

Friday’s Feature Recipe


I’ve made many a homemade apple dumplings but NONE have been as simple to make as these! There is a *secret* ingredient in this recipe that will have you floored….come visit me over at my dear friend Courtney’s @ Women Living Well to find out how to make these hot, buttery, gooey bundles of deliciousness!


**This recipe was also featured on my FAVORITE organizing blog “I’m an Organizing Junkie” – you simply MUST go visit Laura- she’s a women of great wisdom, I could browse her blog for hours!**

Signature

Cinnamon Chip Scones

There is nothing that says “welcome” like freshly baked goods- warm out of the oven. These cinnamon chip scones are no exception. They are buttery, dense, simple , and ready in 20 mins to dip in a cup of piping hot coffee .  This recipe was shared on Comfy in the Kitchen and I have kept it a staple for gatherings, bible studies, and meal ministries. You’re going to love it, I just know it…. 

Sift together dry ingredients, then cut in shortening and butter. I simply take two knives and literally do “just that”, I cut it in. {You will get a crumbly texture during this step}.

In a small bowl beat egg with heavy cream {You  may use half and half or milk- your texture will change slightly}.

Stir.

You will have a thicker cookie -dough- batter- like consistency.

You can add whatever you wish at this point….My choice? Cinnamon chips. Other options are blueberries, raisins, chocolate chips, cranberries, or even savory ingredients such as ham and grated cheese. For a sweet scone you may wish to use an egg wash with a coarse sugar topping. This recipe is so versatile!

Mmmmm…

Sprinkle flour on a flat surface and coat your hands. Take scone dough and shape into a ball, then flatten into a disk. 

Cut into 8 slices. Make a cross, then another cross in the other direction…pizza cutters work great doing this.

Place on a baking sheet {I use foil for easy clean-up}.

Bake in a 375 oven for 15 mins until golden in color. Oooo…I wish you could smell these right now!

So rich and buttery…the cinnamon chips melt leaving bursts of flavor throughout the scones.

A wonderful morning or afternoon treat…serve with hot coffee, tea or homemade lemonade.

They are even sweeter, enjoyed with friends…..


Cinnamon Chip Scones
Prep time: 5 mins
Cook time: 15 mins
Total time: 20 mins
Serves: 8
Ingredients
  • 2 cups flour
  • 4 tsp baking powder
  • ¼ tsp salt
  • 1/3 cup sugar
  • 4 T butter
  • 2 T shortening
  • ¾ cup heavy cream
  • 1 egg
  • Handful of cinnamon chips.
Instructions
  1. Sift together dry ingredients.
  2. Cut in the butter and shortening.
  3. In a separate bowl, beat cream and egg.
  4. Add to the dry ingredients.
  5. Stir in cinnamon chips.
  6. With floured hands, shape dough into a ball and lay out onto a floured surface.
  7. Flatten into a disk.
  8. Cut into 8 even wedges using a pizza cutter.
  9. Place individual scones onto a baking sheet covered in foil {for easy cleanup}.
  10. Bake at 375 degrees for 15 minutes or until golden brown.
Signature

MOIST Gluten-Free Double-Layer Chocolate Cake {From a box?! Oh yeah…}

Just look at it.

YES….you CAN make a moist, delicious, double-layer, quick and easy….GLUTEN-FREE chocolate cake! Here are the pictures to prove it! Ladies, I am not kidding here….if there was a blind fold taste test, you still wouldn’t guess this was a “glutenous minimus cake”. I’m grateful for Betty Crocker who recently came out with this boxed cake mix. With a *slight* adjustment to the ingredients this passes the “comfy” taste test for sure. My girls and I made this for a dear friend’s birthday….they had so much fun helping me in the kitchen.  

I love teaching them how to cook from the heart.

For a double layer cake, you want to start with foil-lined parchment paper. Place your cake pans on top and trace them for a perfect fit. The foil liner will go against the pan and the parchment paper side will be at the bottom of your cake.

Mama’s little helper  cutting …

Good job sweetie! {You will also want to butter and flour this…JUST KIDDING, Bahaaa- I crack myself up!!! Just butter it.}

I’m a fan, Betty! You are going to make many GF children very happy on their birthdays {and grown-ups!}. 

My girls baking together.

The secret to making the cake moist: The directions say to use 3 eggs…INSTEAD use 2 eggs, 1 egg yolk and 1/3 cup of vegetable oil. That will do it! We used 2 boxed cake mixes and 2 separate bowls so the cakes would be even.

Pour the batter in parchment- lined and buttered 9 ” cake pans. 

The directions say to bake them waaaaay too long! This was 30 mins a 350 oven- perfecto.

Cool the cakes in the cake pans on a wire rack for approximately 20 mins. Check this out…it didn’t stick at all! 

See? So, stop worrying if it’s going to stick….you can do this. 

I used 2 containers of chocolate frosting and started with the top of the first cake {the middle}.

Plop the second layer on as evenly as possible like so…

Frost all over.

Add some sprinkles….you’ve got to have sprinkles.

Let the kidos put on the candles {you gotta have trick candles- the kind that don’t blow out right away…the kidos love em}.

Turn out the lights and let the singing begin!!!!! 

Happy Birthday sweet friend!!!!! 

Mmmmmm…….Oooey, gooey chocolate cake without the gluten! I’m sold.


MOIST Gluten-Free Double-Layer Chocolate Cake {From a box?! Oh yeah…}
Prep time: 15 mins
Cook time: 30 mins
Total time: 45 mins
Serves: 12
Ingredients
  • 2 Boxes Betty Crocker GF Devils Food Cake
  • 4 eggs
  • 2 egg yolks
  • 2/3 oil
  • 2 sticks butter
  • 2 cups water
  • 2 tubs chocolate frosting
  • sprinkles
  • Parchment paper and butter
  • 2- 9″ round cake pans
Instructions
  1. Pre-heat oven to 350.
  2. Trace cake pans on parchment paper with a pen. Cut out and place foil lining down.
  3. Butter the top of parchment paper side.
  4. In 2 large bowls add all ingredients for each cake. {halve the above ingredients evenly}
  5. Bake 30 mins.
  6. Cool on wire rack for 20 mins.
  7. Flip upside down onto cake stand and frost the top of the first cake.
  8. Place the second cake on top and frost the top and sides.
  9. Garnish with sprinkles and candles!
  10. Happy Birthday!


Signature

Friday’s Featured Recipe

There is nothing….I mean- nothing, that smells as good as Snickerdoodles baking in the oven. Pair these up with a cool autumn evening, some hot apple cider and you will have yourself some very happy campers.

The thing I love most about this recipe is that you’ll likely have all the ingredients on hand. So, when you have no idea what to bake and take – remember this batter! They’ll be a hit….they always are in my home.

Courtney from Women Living Well is trying them out in her kitchen today…come take a peak and grab the recipe! 

The Silpat…girl, I love it! Those cookies look good enough to eat! You did AWESOME!!!!!! 


*Make sure to refrigerate the dough- it matters!

Signature

Sauteed Cabbage with Bacon

Sometimes we are just “at a loss” when it comes to side dishes….mashed potatoes and corn are lovely, but when you are in the mood for something different this sautéed cabbage hits the spot! This is something I remember my mom making for me as a child~ I always loved it and still do. It’s quick, simple, and tasty! Hope you’ll enjoy it too!

Brown 6 slices of bacon {I use center cut} in a large stock pot on med-high heat. Add 2 Tbsp of olive oil and 1/2 of an onion chopped.

Rinse cabbage , tear into small pieces, then place in the stock pot. Use tongs to stir well. Set stove to medium heat and let cook for appx 15-20 mins until tender.

Season with cracked black pepper and salt! Mmmm….


Sauteed Cabbage with Bacon
Prep time: 10 mins
Cook time: 20 mins
Total time: 30 mins
Serves: 6
Ingredients
  • 1 head cabbage
  • 6 slices bacon {I use center cut}
  • 1/2 onion chopped
  • 2 Tbsp olive oil
  • Salt/pepper to taste
Instructions
  1. On medium-high heat, brown bacon in a large stock pot.
  2. Add olive oil and onions- sautee for appx 3-4 mins.
  3. Rinse cabbage and tear apart in small pieces.
  4. Add cabbage into stock pot with bacon, renderings, and onions.
  5. Toss with tongs. Bring heat down to medium and let cook for 20 mins until tender.
  6. Season with salt and pepper.
Signature

Fall Break Week….

fall desktop backgrounds

{photo credit}

Hi Ladies! You were probably wondering where I was today

{If I am lucky, lol}

God has me very busy right now…with my husband out of commission, 3 little ones, school, housework, cooking, ministry, footballs games, practices, birthdays, bible studies, etc. I have finally come to a place this week where I need a little break blogging.

No worries, I will be back next week!

Keep Cookin my friends!

Love to you, Janelle

Signature

Creamy Bacon Crock Pot Chicken

I just love using my Crock Pot …especially on cool fall days like today. When I walked through the door from picking the kidos up from school this meal slow cooking was such a comforting smell. Mmm…the smell of bacon gets me every time. lol.

I typically tend to shy away from slow cooking chicken …but the fat from the bacon prevents the chicken from becoming dry. Serve “gravy” over mashed potatoes or rice and you have yourself one easy, delicious, “comfy food” meal.

Place 6 slices of center cut bacon in a pan and cook 3/4 of the way so its still pliable enough to wrap around chicken. Lay 2 paper towels on a plate and place bacon on top to cool and drain. Leave bacon renderings in pan.

Add 2 cans of cream of chicken soup and 1 cup of sour cream to bacon renderings in pan and stir. If you don’t like cream of chicken soup or are gluten free {hand raised!} use 1 1/4  cup heavy cream and 1 1/4 cup chicken broth.

Wrap chicken breasts in bacon and place in Crock Pot. I recommend buying organic chicken because it’s so much more tender…you can probably see that it’s smaller in size and not beefed up on hormones 😉

Pour gravy mixture over top of chicken. Slow cook for 6 hours.

I had to take a photo of this chicken up close….see how moist it is? And the flavor! WOWSA! Winner, Winner, Chicken Dinner!

Creamy Bacon Crock Pot Chicken
Prep time: 10 mins
Cook time: 6 hours
Total time: 6 hours 10 mins
Serves: 6
Ingredients
  • 6 chicken breasts
  • 6 slices center cut bacon {renders just enough fat}
  • 2 cans cream of chicken soup
  • 1 cup sour cream
  • **** Gluten Free Option**** substitute 1 1/2 cups chicken broth with 1 1/2 cups heavy cream for cream of chicken soup.
Instructions
  1. Fry bacon in a pan 3/4 of the way so that it’s still pliable. Drain on paper towel lined plate.
  2. Add cream of chicken soup and sour cream into bacon pan {in the renderings} and mix.
  3. Wrap chicken with bacon and place in slow cooker.
  4. Add gravy over top, cover and cook for 6 hours.
  5. Serve over rice or mashed potatoes.


Signature

Low-Country Boil {so easy}

I love this recipe because it’s delicious, easy, my entire family gobbles it up, it’s decently healthy, and can be gluten-free! 

*Preparing this dish for a meal ministry? Just place everything in a pot and take it over to your loved one’s home and put it covered on the stove. This is such an easy meal to make and take! Very little prep and clean-up.

Fill stock pot 3/4 of the way with water {about 10 cups for me} , add 1/4 cup of Old Bay seasoning, turn on high heat and bring to a rapid boil.

Yes, Old Bay is Gluten-Free!

4 bi-color corn on the cobs, 1 1/2 lbs baby red potatoes, 1 package Hillshire Farms smoked sausage, and 1 1/2 pounds raw shrimp.

Rinse potatoes and add them whole to the boiling water first…boil for 15 mins.

If your shrimp is frozen- no worries. Just place in a colander and rinse with luke warm water for a couple mins. Shrimp thaws and cooks quickly!

Slice sausage into coin sized slices. Rinse and break corn into halves.

After potatoes boil for 15 mins, throw everything else in the pot and let it boil for another 6-7 mins.

When it’s all done, ladle it out into a large lasagna pan. I put a little butter on the corn and sprinkled it with some sea salt {I get my sea salt at Marcs}.

Mmmmm!!!! This really is such a delicious meal and SO so so so so so easy. If you can boil water, you can make it. My children are huge shrimp fans- they even like “peel and eat” {pictured above}…I cut open their potatoes and put a little ketchup on top- their plates were empty in 5 mins flat.

Winner, Winner Low-Country Boil Dinner!

Low-Country Boil
Prep time: 5 mins
Cook time: 22 mins
Total time: 27 mins
Serves: 6
Ingredients
  • 10 cups water
  • 1/4 cup Old Bay seasoning
  • 1 1/2 lbs redskins
  • 1 pkg Hillshire Farms Smoked Sausage
  • 4 bi-colored corn on the cobs, halved
  • 1 1/2 lbs raw shrimp
  • sea salt, butter, ketchup {optional}
Instructions
  1. Bring water and Old Bay to a boil.
  2. Rinse redskins and place them in whole- let boil for 15 mins.
  3. Cut sausage into coin sized slices, rinse shrimp, rinse corn and break in half- throw it all in the pot and let boil for 6-7 mins longer.
  4. Ladle out into a lasagna pan and sprinkle with sea salt. Butter corn if desired…kidos may want some ketchup on their potatoes.
  5. Enjoy this simple yet wonderful dish!
Signature

Healthy Grab Bags @ The Better Mom

Who says that snacks can’t be fresh, healthy and come in little baggies? 

Come visit me over at The Better Mom where taking just 1 more step while unloading groceries will save you tons of time and calories!


Signature